Notice – Proface GP4600R - 12.1 Standard HMIs with Rear Mounting Options" User Manual
Page 139
GP4000 Series Hardware Manual
139
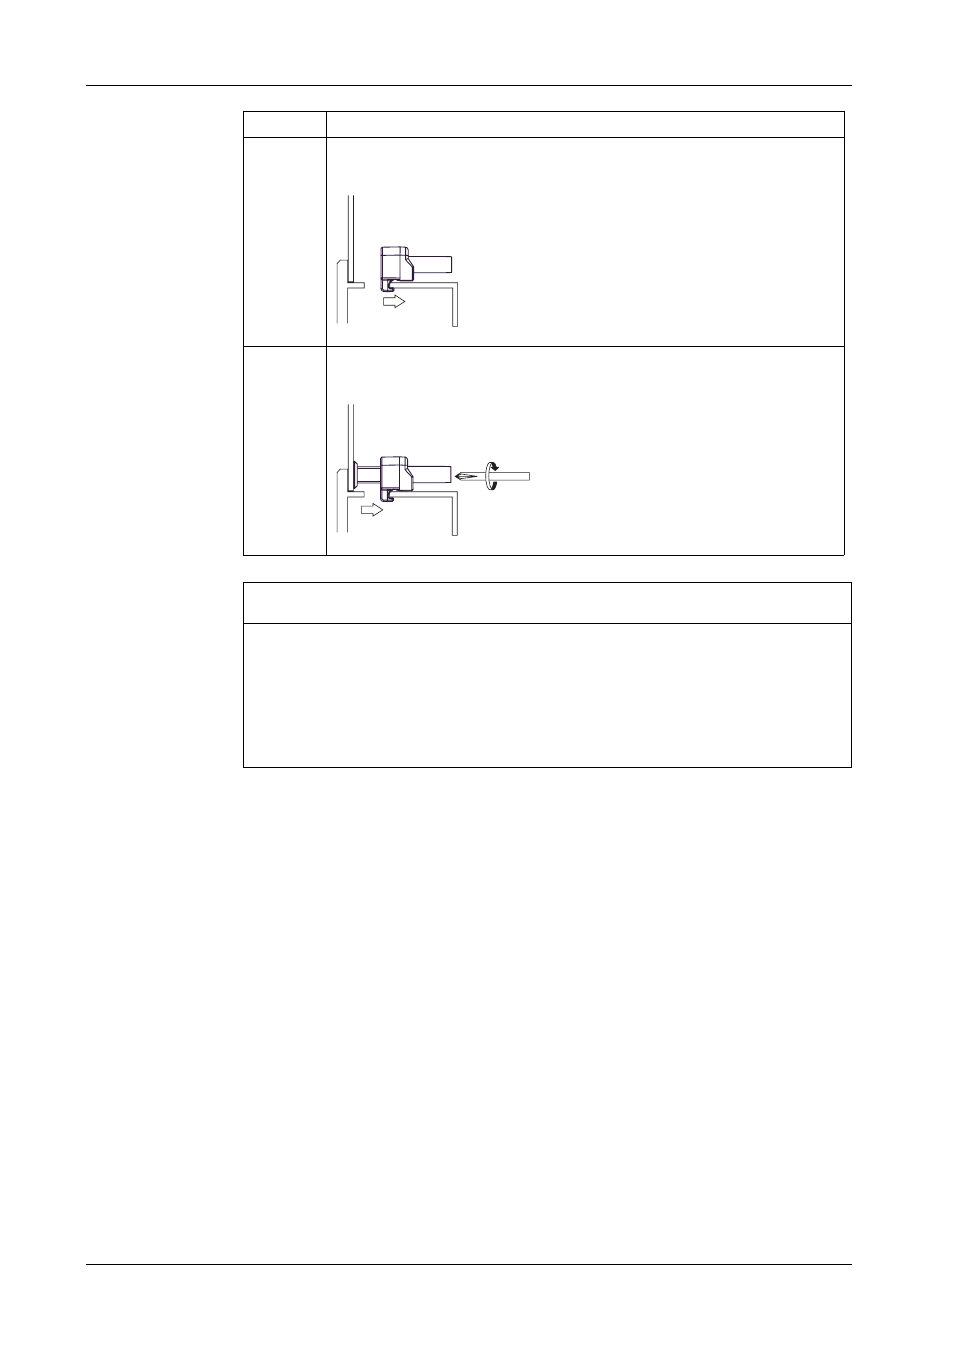
6
Insert each of the fasteners shown below. Make sure you pull the fastener back
until it is flush with the rear of the attachment hole insert.
7
Use a Phillips screwdriver to tighten each fastener screw and secure the GP
unit in place. The necessary torque is 0.5 Nm (4.4 lb•in).
NOTICE
BROKEN ENCLOSURE
z
Do not exert more than 0.5 Nm (4.4 in•lb) of torque when tightening the
fastener’s screws.
z
Use on flat surface of a Type 1, Type 4X (Indoor Use Only) or Type 13
Enclosure.
Failure to follow these instructions can result in equipment damage.
Step
Action
This manual is related to the following products:
- GP4500R - 10.4 Standard HMIs with Rear Mounting Options" GP4400R - 7.5 Standard HMI with Rear Mounting Options" GP4300R - 5.7 Standard HMI with Rear Mount" GP4300M - 5.7 Modular HMI" GP4200M - 3.5 Modular HMI" GP4500 - 10.4 W Model HMI" GP4400 - 7.0 W Model HMI" GP4300 - 5.7 W Model HMI" GP4200 - 3.5 W Model HMI" GP4600 - 12.1 Standard HMIs" GP4500 - 10.4 Standard HMIs" GP4400 - 7.5 Standard HMI" GP4300 - 5.7 Standard HMI" GP4200 - 3.5 Standard HMIs"