Proface GP4600R - 12.1 Standard HMIs with Rear Mounting Options" User Manual
Page 231
GP4000 Series Hardware Manual
231
8
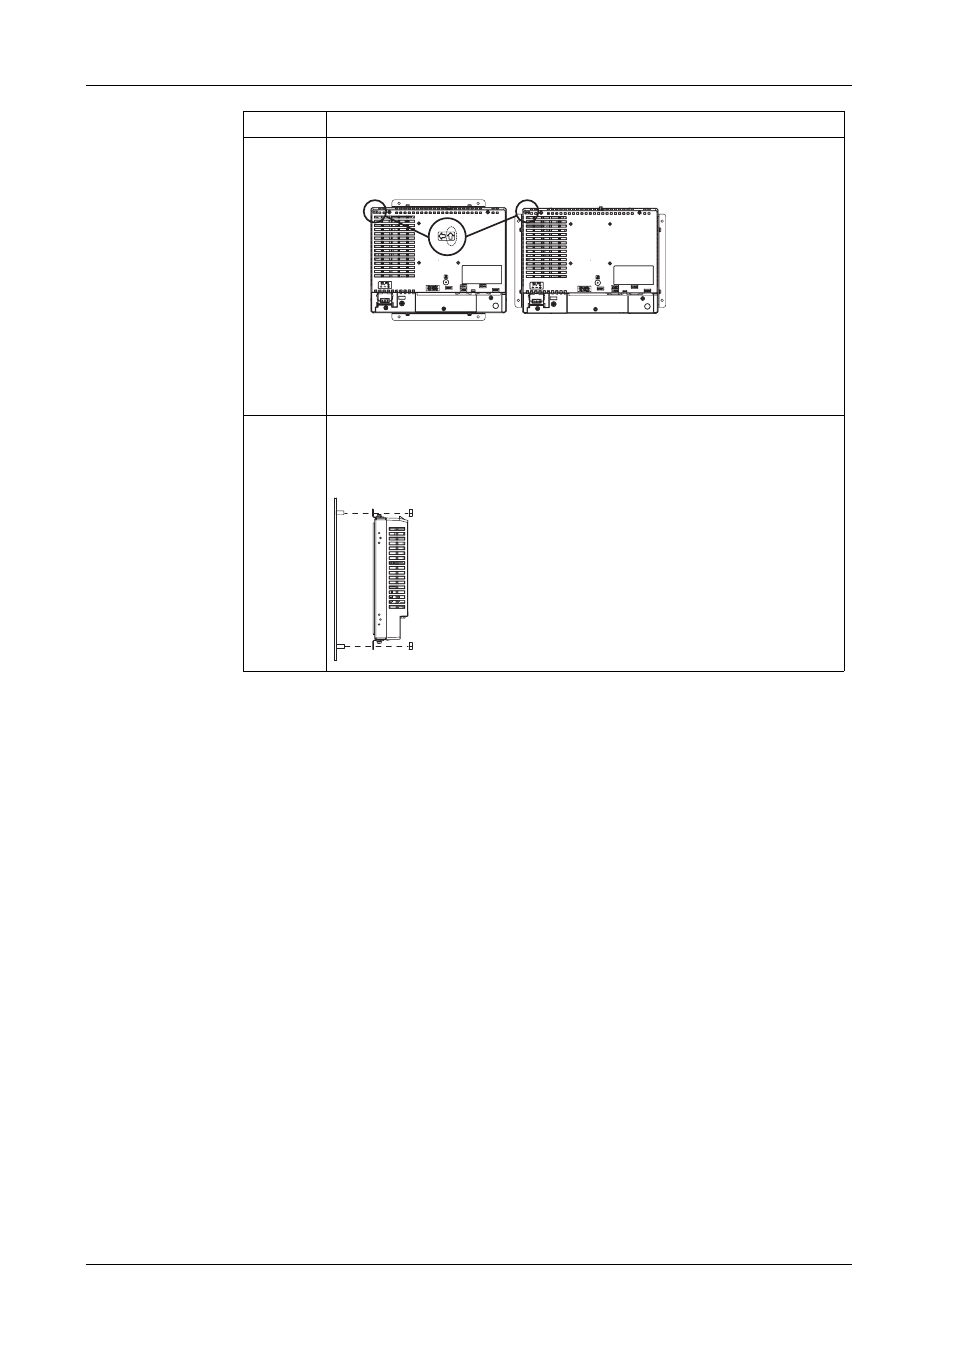
When you are installing the GP unit horizontally, hold the GP unit so that the
arrow pointing in the horizontal direction on the rear surface of the GP unit
points up as shown in the figure.
1) Figure of the GP unit's rear surface when attaching installation brackets at
the top and bottom surfaces of the GP unit
2) Figure of the GP unit's rear surface when attaching installation brackets on
either side of the GP unit
9
Insert the GP unit through the rear surface of the panel, pass the stud bolts
through the four installation bracket holes, and then tighten nuts on the stud
bolts to fix the GP unit in place. The tightening torque is 0.8 N•m to 1.0 N•m
(7.1 lb-in to 8.9 lb-in).
Step
Procedure Details
Installation diagram (profile)
- GP4500R - 10.4 Standard HMIs with Rear Mounting Options" GP4400R - 7.5 Standard HMI with Rear Mounting Options" GP4300R - 5.7 Standard HMI with Rear Mount" GP4300M - 5.7 Modular HMI" GP4200M - 3.5 Modular HMI" GP4500 - 10.4 W Model HMI" GP4400 - 7.0 W Model HMI" GP4300 - 5.7 W Model HMI" GP4200 - 3.5 W Model HMI" GP4600 - 12.1 Standard HMIs" GP4500 - 10.4 Standard HMIs" GP4400 - 7.5 Standard HMI" GP4300 - 5.7 Standard HMI" GP4200 - 3.5 Standard HMIs"