Setting rgb delay (vga and rgbhv boards only), Setting rgb delay (vga and rgbhv, Boards only) – Extron Electronics SMX System User Guide User Manual
Page 30
SMX System MultiMatrix Switcher • Operation
24
4.
Press and release the desired input button (1-10) to select a plane preset address.
Saving a plane preset — The Address, Preset, and Enter buttons flash crimson.
Recalling a plane preset — The Address and Enter buttons flash crimson.
NOTE: A preset can be saved to any lit or unlit input button (1 through 10). Only
presets with lit buttons can be recalled. When a preset is saved to a lit button
(already containing a preset), the stored data is overwritten with the new data. Only
one plane preset can be saved to an address at a time.
5.
Press and release the Enter button. The plane preset is saved or recalled.
Step 4.
Press and release the desired (unlit or lit) input button 1-10
(here preset 3). The selected button flashes
red.
Enter button also blinks (
red).
ENTER
Step 5.
Press the Enter button to
save or recall the preset.
All buttons extinguish
.
C O N T R O L
PRESET
ESC
VIEW
INPUTS
1 2 3 4 5 6 7 8 9 10 11 12 13 14 15 16
OUTPUTS
1 2 3 4 5 6 7 8 9 10 11 12 13 14 15 16
I/O PLANE SELECT
1 2 3 4 5 6 7 8 9 10 11 12 13 14 15
0
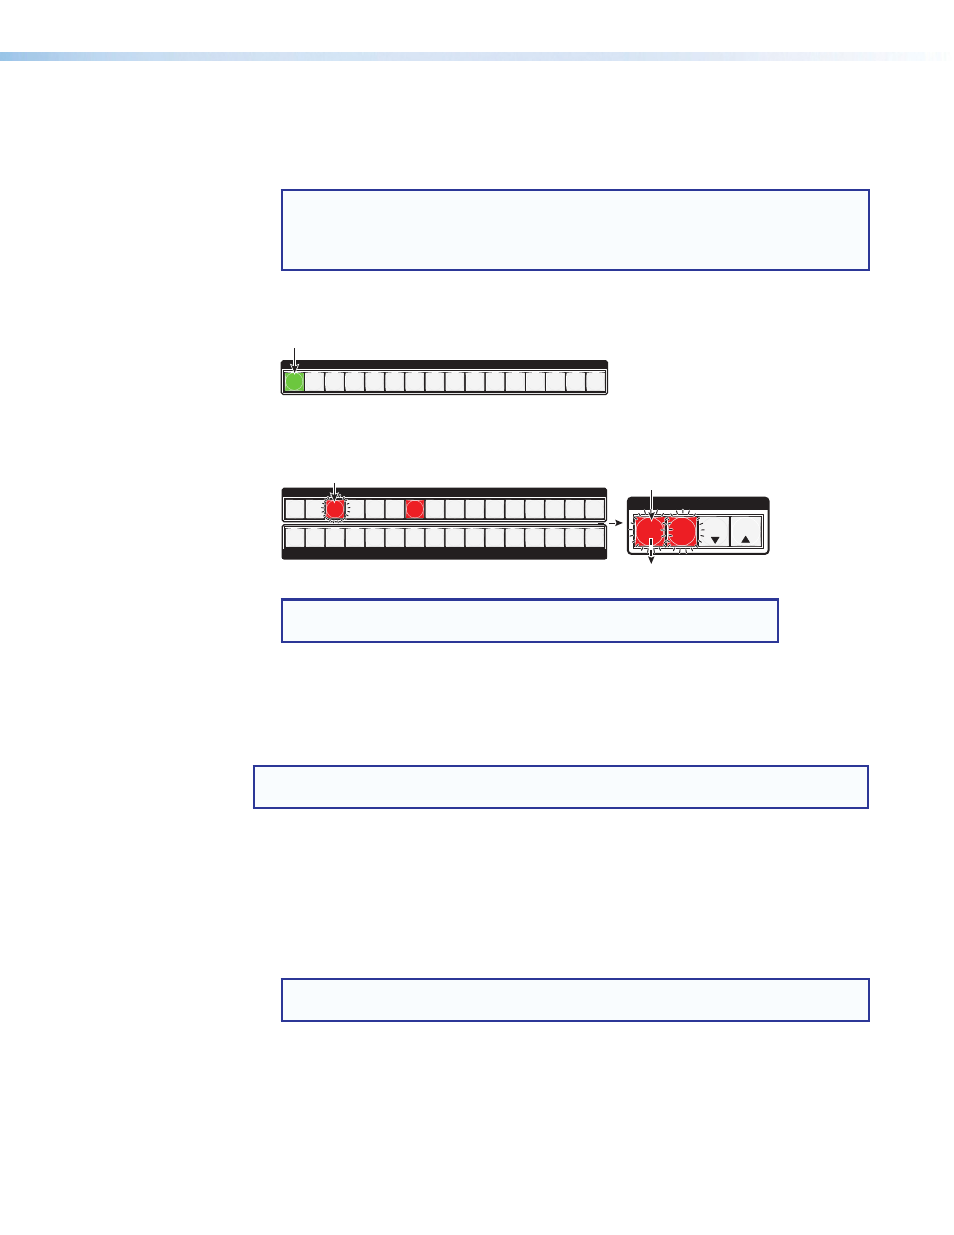
Step 3.
Press desired plane button (here plane 0).
Plane button lights
green.
Buttons for any previously saved plane presets light
red (here preset 7).
NOTE: To recall a plane preset, press and release the Preset button.
Select a plane, then press and release a lit preset button.
Figure 21.
Saving or Recalling a Plane Preset — an Example
(Steps 3 through 5)
Setting RGB Delay (VGA and RGBHV Boards Only)
NOTE: This feature is applicable only for VGA and RGBHV boards and can not be set
via the front panel when the SMX is in lock modes 1 or 2.
1.
Press the Esc button to clear all pending changes. The button flashes green once.
2.
Select a
VGA or RGBHV plane.
3.
Press and hold View for 3 seconds. The selected plane button flashes green.
4.
Select the output to delay. The button lights.
5.
Using View and Esc, adjust the time duration for the delay (up to 5 seconds maximum).
Each lit input button corresponds to a half-second delay.
NOTE: No input buttons lit signifies zero delay, 10 buttons lit signifies 5 seconds
delay.