Setting up stormscope on the navigation page – Garmin G1000 Mooney M20TN User Manual
Page 264
Garmin G1000 Pilot’s Guide for the Mooney M20M/M20R/M20TN
190-00647-00 Rev. A
6-28
HAZARD AVOIDANCE
6.2 STORMSCOPE WX-500 SERIES II WEATHER MAPPING SENSOR
NOTE:
The Stormscope system is not intended for hazardous thunderstorm penetration. Weather information
on the G1000 MFD is approved for weather avoidance only. Refer to the WX-500 User’s Guide for a detailed
description of Stormscope operation.
The following pages can display Stormscope data:
• Stormscope Page
• AUX - Trip Planning Page
• Navigation Map
• Nearest Pages
To display Stormscope data on the Navigation Map, AUX - Trip Planning Page, or any of the Nearest Pages,
press the
MAP
Softkey, then press the
STRMSCP
Softkey. These pages can also display cell or strike data using the
yellow lightning strike symbology shown in Table 6-4.
Table 6-4 Lightning Age and Symbols
SETTING UP STORMSCOPE ON THE NAVIGATION PAGE
1)
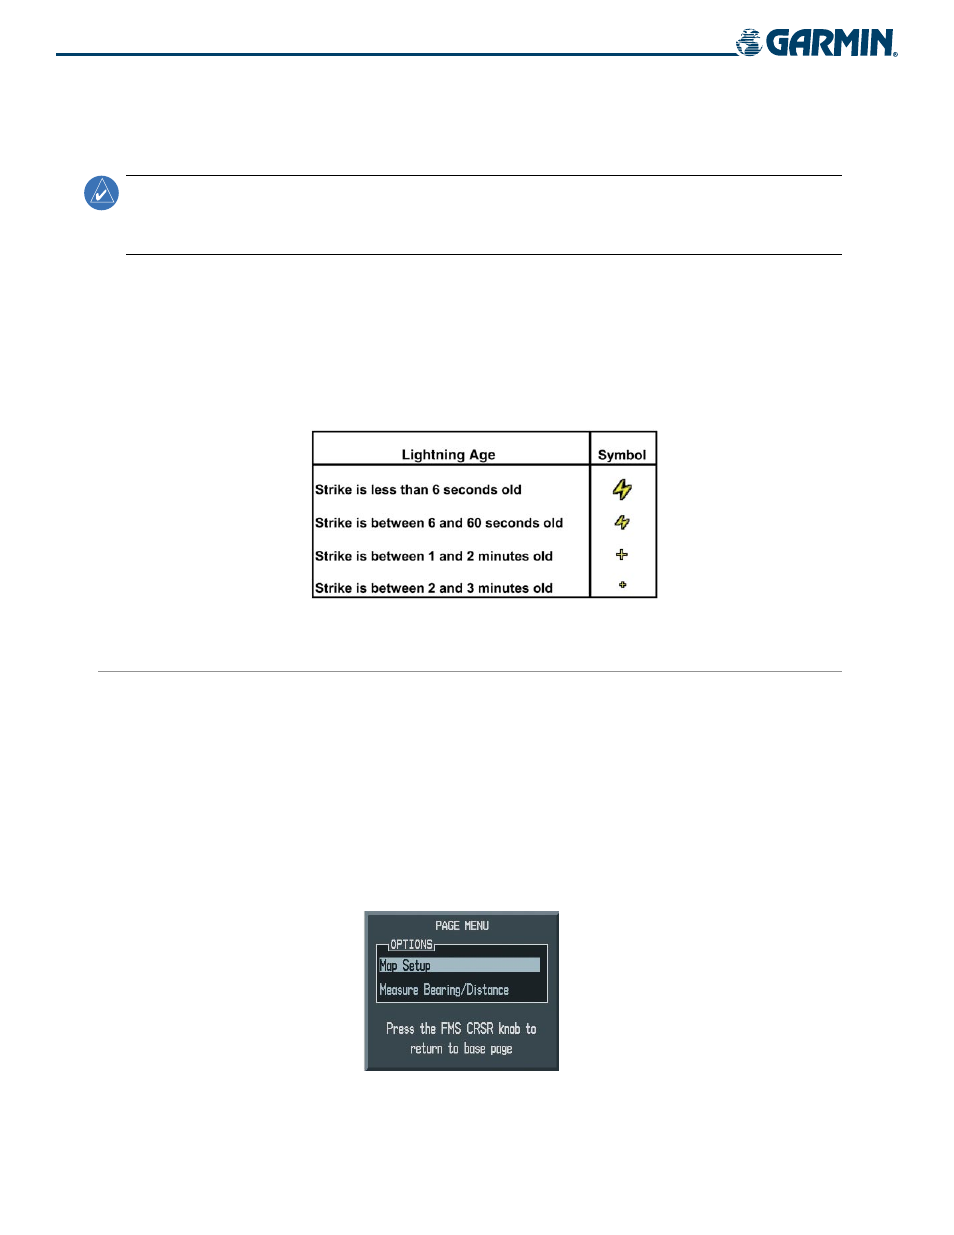
On the Navigation Map page, press the MENU Key.
2)
With ‘Map Setup’ selected (Figure 6-37), press the ENT Key.
3)
Select the ‘Weather’ group (Figure 6-38).
4)
Press the ENT Key.
5)
Turn the large FMS Knob to select ‘STRMSCP LTNG’.
6)
Turn the small FMS Knob to select ‘ON’.
7)
Press the
FMS
Knob to return to the Navigation Map Page (Figure 6-39).
Figure 6-37 Navigation Map Options Menu