Root root e -- e, Root root a -- a – Zoom MRS-1266 User Manual
Page 94
Reference [Rhythm]
ZOOM MRS-1266
94
H
INT
• Formulas entered with the FAST method are saved for
each project. If necessary, you can repeat steps 1 - 3 to
call up the formulas, edit numbers or formulas, and write
the song again.
• When you edit a song, the entire rhythm song is written
again. Writing only a partial song or editing the contents is
not possible.
• There is no difference in the completed rhythm song due
to input method that was used, i.e. a song will be the
same, regardless of whether it was created using step
input or the FAST method. A song written with the FAST
method can therefore be edited using step input.
6.
To return to the main screen, press the [EXIT] key
while the rhythm section is stopped.
Inputting root/chord data
This section explains how to add chord data to the rhythm
song that you created by inputting rhythm pattern data.
Chord data consists of a “ROOT” that specifies the root (C,
C#, D ...B) of the chord, and “CHORD” that specifies the
type of chord (major or minor, etc.).
The bass phrase of the rhythm pattern will be transposed
according to the root that you input. Also, the bass phrase
will be converted according to the type of chord you specify.
1.
In rhythm song mode, make sure that the
[RHYTHM] key is lit.
If the key is not lit, press it repeatedly until it lights up. Use
the cursor left/right keys to move the current position to the
start of the rhythm song.
2.
Press the REC [
O
] key.
The REC [
O
] key lights up and input of rhythm pattern
number, chord, and other information for the rhythm song
becomes possible.
3.
Use the cursor up/down keys to call up the
indication “ROOT”.
When inputting chord data into the rhythm song, you will
specify the chord root (C - B) and chord type (major or
minor, etc.) separately. When “ROOT” is displayed, you can
specify the root of the chord.
H
INT
• At a point where rhythm pattern information is input, chord
information is also input.
• In the default condition, the root is as programmed for that
rhythm pattern, and the chord type is set to “--” (no
conversion).
4.
Turn the dial to specify the note name (C - B) that
will be the root of the chord.
The following screen shows an example of when the chord
root has been changed to A.
5.
To specify the chord type, press the cursor down
key once to bring up the indication “CHORD”.
6.
Turn the dial to select the chord type.
You can choose from the following chord types.
The following screen shows an example of when the chord
type has been changed to minor (m). With these settings, the
“A minor” chord data have been input at the beginning of the
rhythm song.
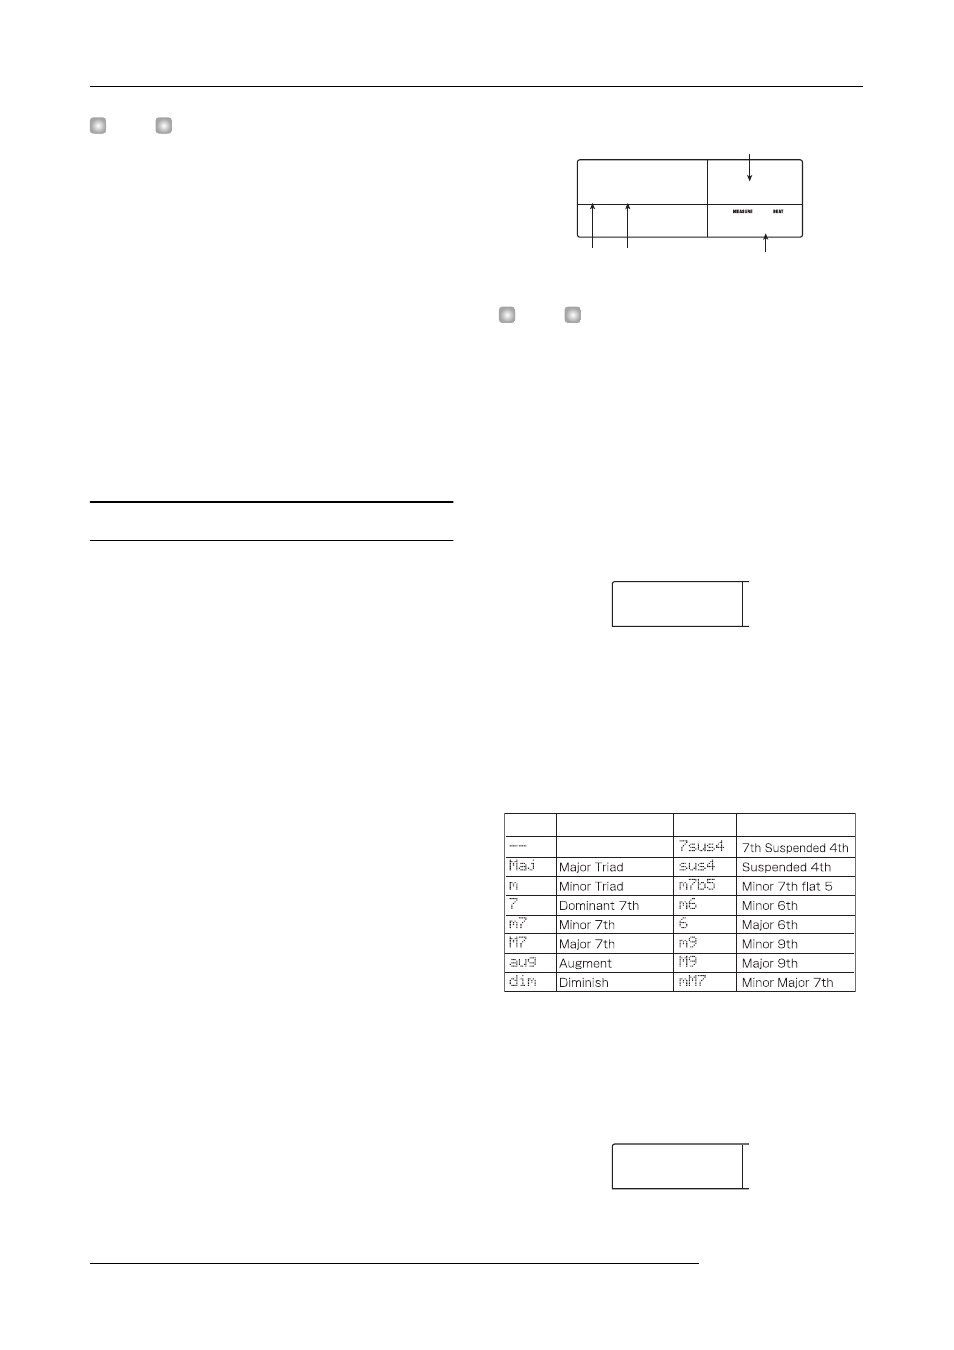
Chord root Chord type Measure/beat
Ticks
ROOT
ROOT
E --
E --
001- 1
001- 1
0
0
ROOT
ROOT
A --
A --
Display
Content
Display
Content
No conversion
CHORD
CHORD
A m
A m