ZyXEL Communications P-335WT User Manual
Page 395
P-335 Series User’s Guide
Chapter 38 Call Scheduling
395
Once your schedule sets are configured, you must then apply them to the desired remote
node(s). Enter 11 from the Main Menu and then enter the target remote node index. Using
[SPACE BAR], select PPPoE or PPPoA in the Encapsulation field and then press
[ENTER] to make the schedule sets field available as shown next.
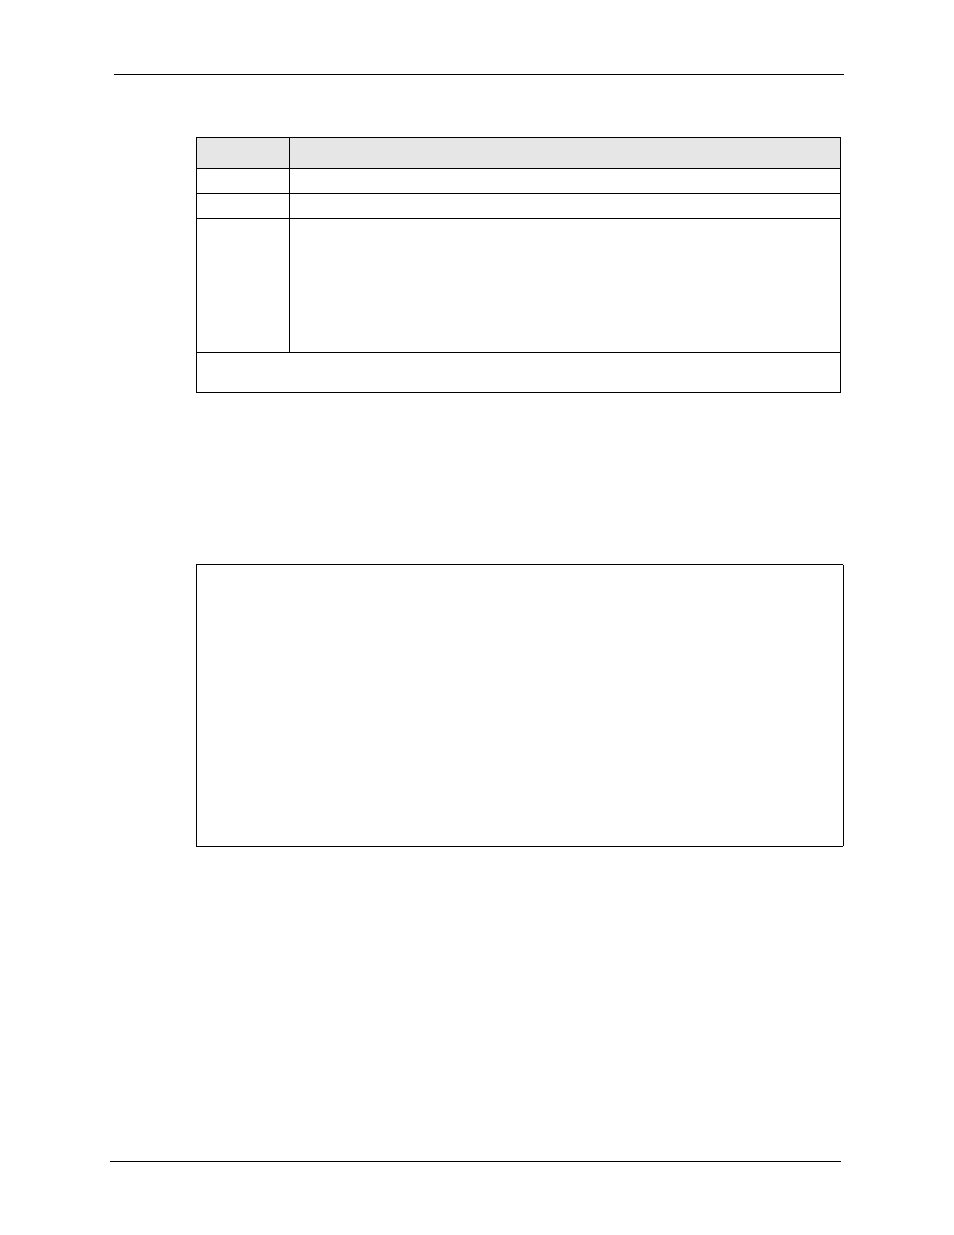
Figure 235 Applying Schedule Set(s) to a Remote Node (PPPoE)
Menu 11.1 - Remote Node Profile
Rem Node Name= MyISP Route= IP
Active= Yes
Encapsulation= PPPoE Edit IP= No
Service Type= Standard Telco Option:
Service Name= Allocated Budget(min)= 0
Outgoing: Period(hr)= 0
My Login= Schedules= 1,2,3,4
My Password= ******** Nailed-Up Connection= No
Retype to Confirm= ********
Authen= CHAP/PAP
Session Options:
Edit Filter Sets= No
Idle Timeout(sec)= 100
Edit Traffic Redirect= No
Press ENTER to Confirm or ESC to Cancel:
You can apply up to four schedule sets, separated by commas, for one remote node. Change
the schedule set numbers to your preference(s).
Start Time
Enter the start time when you wish the schedule set to take effect in hour-minute format.
Duration
Enter the maximum length of time this connection is allowed in hour-minute format.
Action
Forced On means that the connection is maintained whether or not there is a demand
call on the line and will persist for the time period specified in the Duration field.
Forced Down means that the connection is blocked whether or not there is a demand
call on the line.
Enable Dial-On-Demand means that this schedule permits a demand call on the line.
Disable Dial-On-Demand means that this schedule prevents a demand call on the line.
When you have completed this menu, press [ENTER] at the prompt “Press ENTER to confirm or ESC
to cancel” to save your configuration or press [ESC] to cancel and go back to the previous screen.
Table 139 Menu 26.1 Schedule Set Setup
FIELD
DESCRIPTION