Stapling bed assembly – EXP Computer C4077-90960 User Manual
Page 235
Stapling Bed Assembly
1
Remove the Stapling Unit Assembly (see Figure 6-91).
2
Remove the Back Plate (see Figure 6-92).
3
Remove the Stapler Unit Controller PCA (see Figure 6-94).
4
Remove the Top Cover Assembly (see Figure 6-97).
5
Remove the wire frame by pushing both arms of the wire frame toward the
center to clear the retaining notches and lift.
6
Release the brushes bar from the retaining notches and lift upwards.
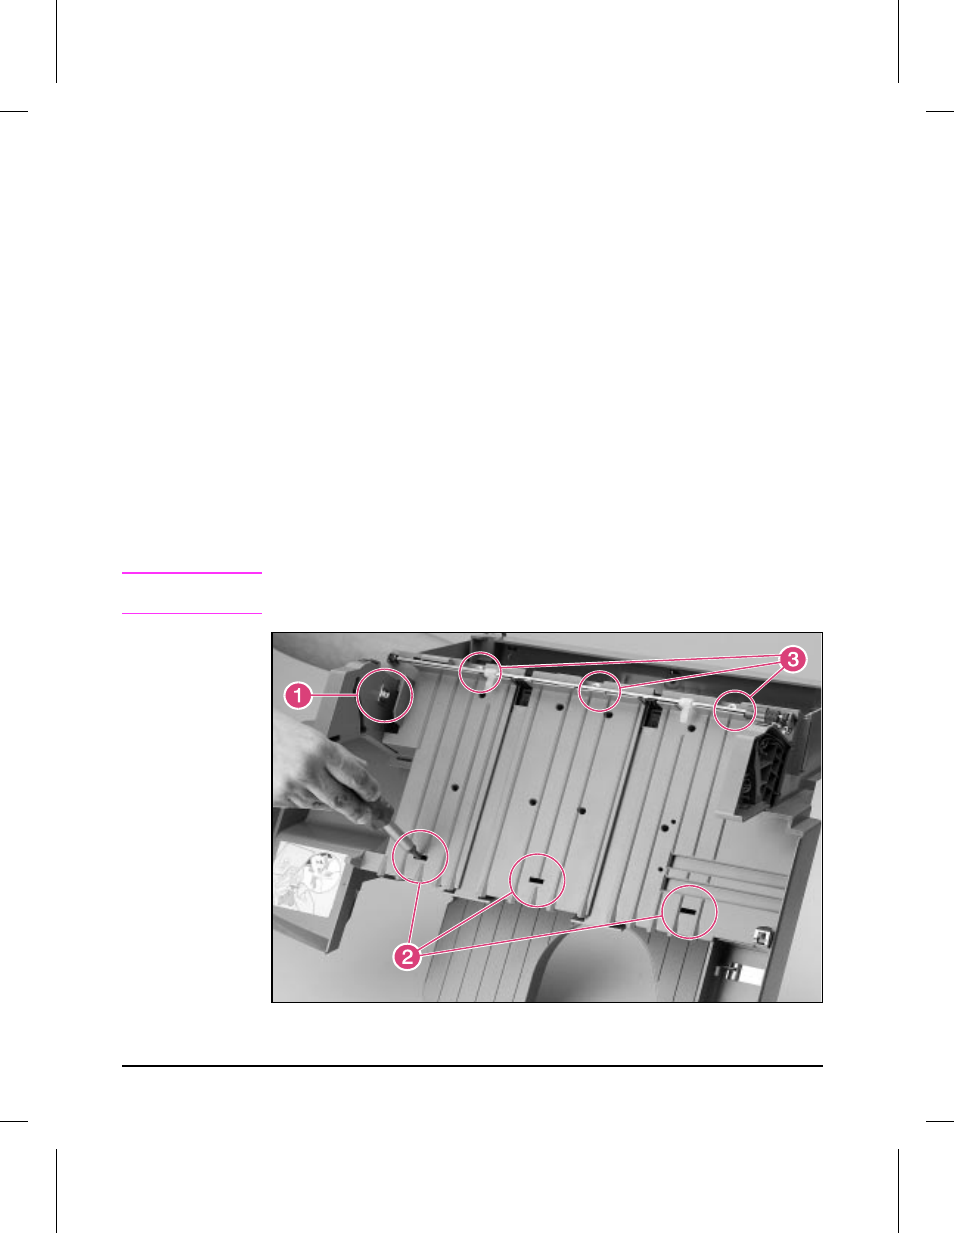
7
Insert a flat-blade screwdriver into top of the Stapling Bed Assembly and
push gently to release the latches in the front of the stapling bed (see Figure
6-98. callout 2).
8
Remove (3) torx screws that join the stapling bed with the rest of the unit
(see Figure 6-98, callout 3).
9
To remove the Stapling Bed Assembly, lift the edge of the assembly where
the stapler unit resides, then gently lift the entire Stapling Unit Assembly.
To Reinstall:
Replace the Stapling Bed. Replace the Stapling Unit Controller. Replace
the actuator for the paper bin empty sensor.
C a u t i o n
Make sure that the actuator is in its proper place before replacing the
Stapling Bed Assembly (see Figure 6-99, callout 3).
Figure 6-98
6-108 Removal and Replacement