Paper tray – EXP Computer C4077-90960 User Manual
Page 198
Paper Tray
1
Remove all unused paper from the tray.
2
Remove the Transfer Assembly (see Figure 6-64).
3
Remove the left cover (see Figure 6-54) and the right cover (see Figure 6-55).
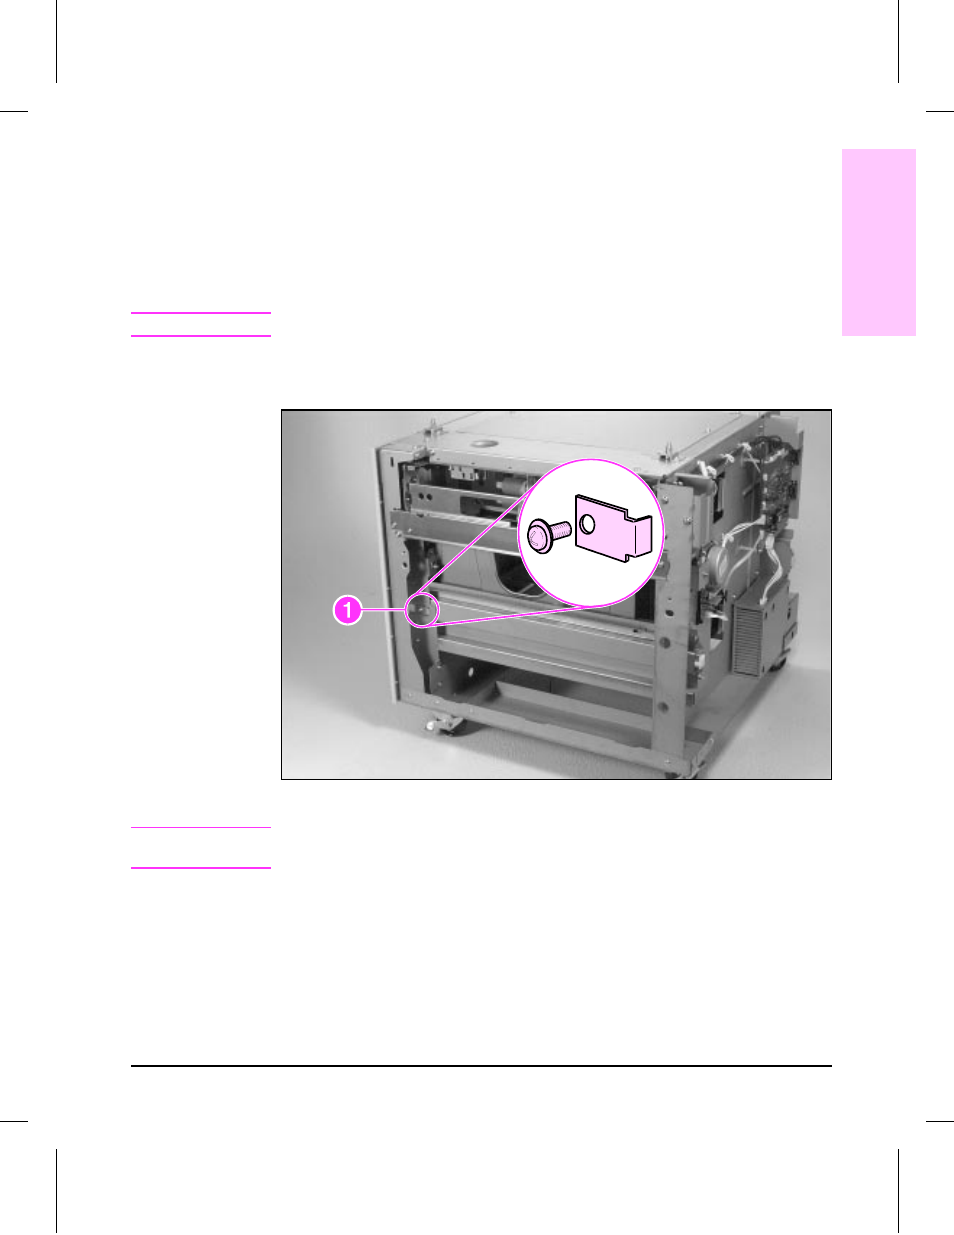
4
Remove (1) screw, CH108 (Figure 6-57, callout 1) and the metal retaining
tab from each side of the chassis.
C a u t i o n
Support the rear of the tray when removing it.
5
Slide the tray straight out of the chassis.
Tray 4, Paper Tray
N o t e
If the print starts too close to the edge of the paper, see "Tray 4 Adjustment
Procedure" in Chapter 4 to adjust the paper.
Figure 6-57
6
Removal and
Replacement
Removal and Replacement 6-71