Pickup assembly – EXP Computer C4077-90960 User Manual
Page 200
Pickup Assembly
1
Open the paper tray to the stops.
2
Remove the Transfer Assembly (see Figure 6-64).
3
Remove the right cover (see Figure 6-55) and the Back Cover (see
Figure 6-53).
4
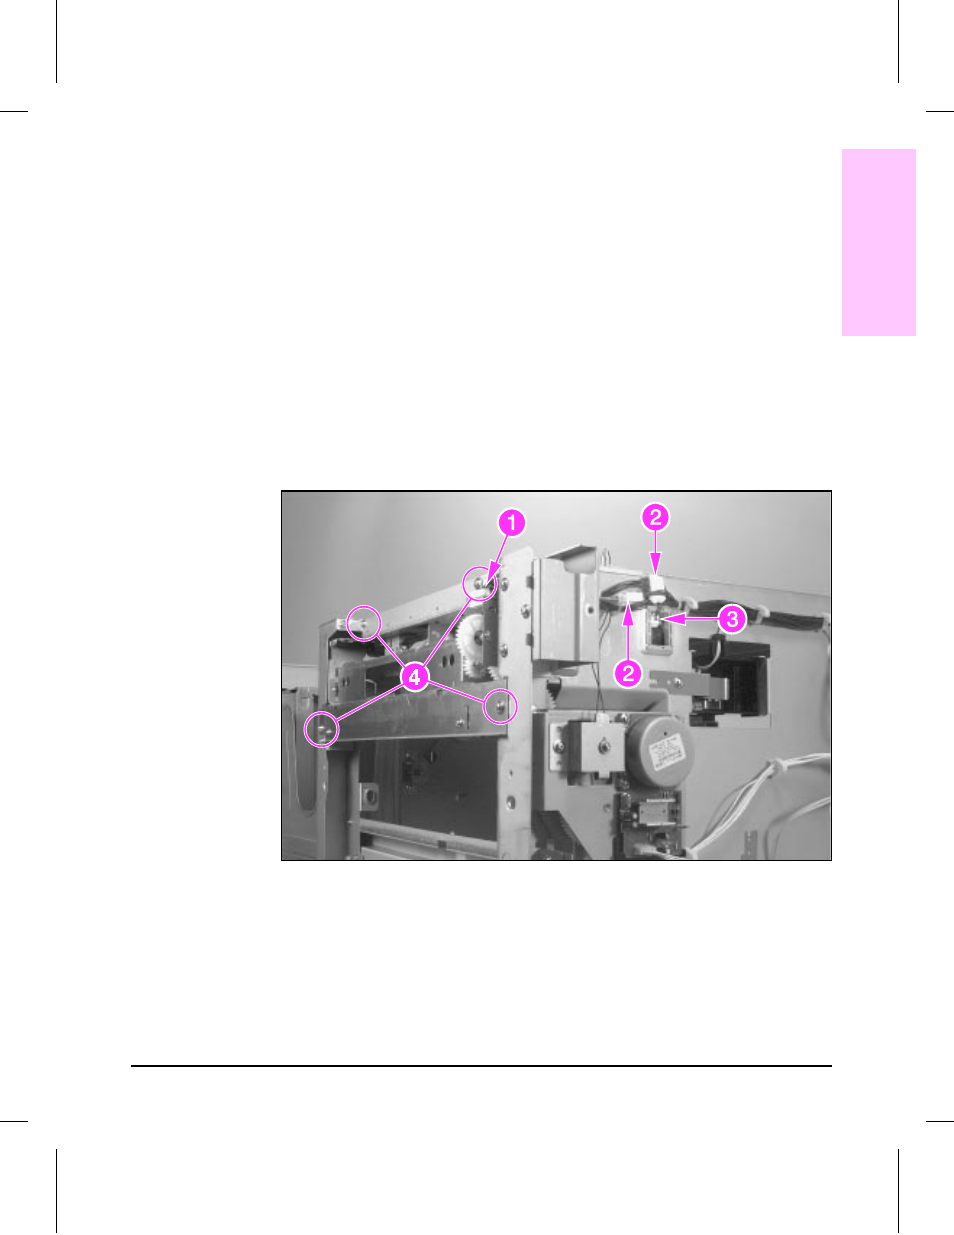
Unplug (1) connector (Figure 6-59, callout 1) from the front of the Pickup
Assembly.
5
Unplug (2) in-line connectors (Figure 6-59, callout 2).
6
Unplug (1) connector (Figure 6-59, callout 3) from the side of the assembly.
7
Free the cables from their retaining clips.
8
Remove (4) screws, CH108 (Figure 6-59, callout 4).
9
Slide the assembly straight out of the chassis.
To Reinstall:
Make sure that the side connector (Figure 6-59, callout 3) is replaced.
Tray 4, Pickup Assembly
Figure 6-59
6
Removal and
Replacement
Removal and Replacement 6-73