2 map reference points, Map reference points – RLE LD5200 V.2.3 User Manual
Page 64
64
LD5200 User Guide
800.518.1519
4
Web Interface
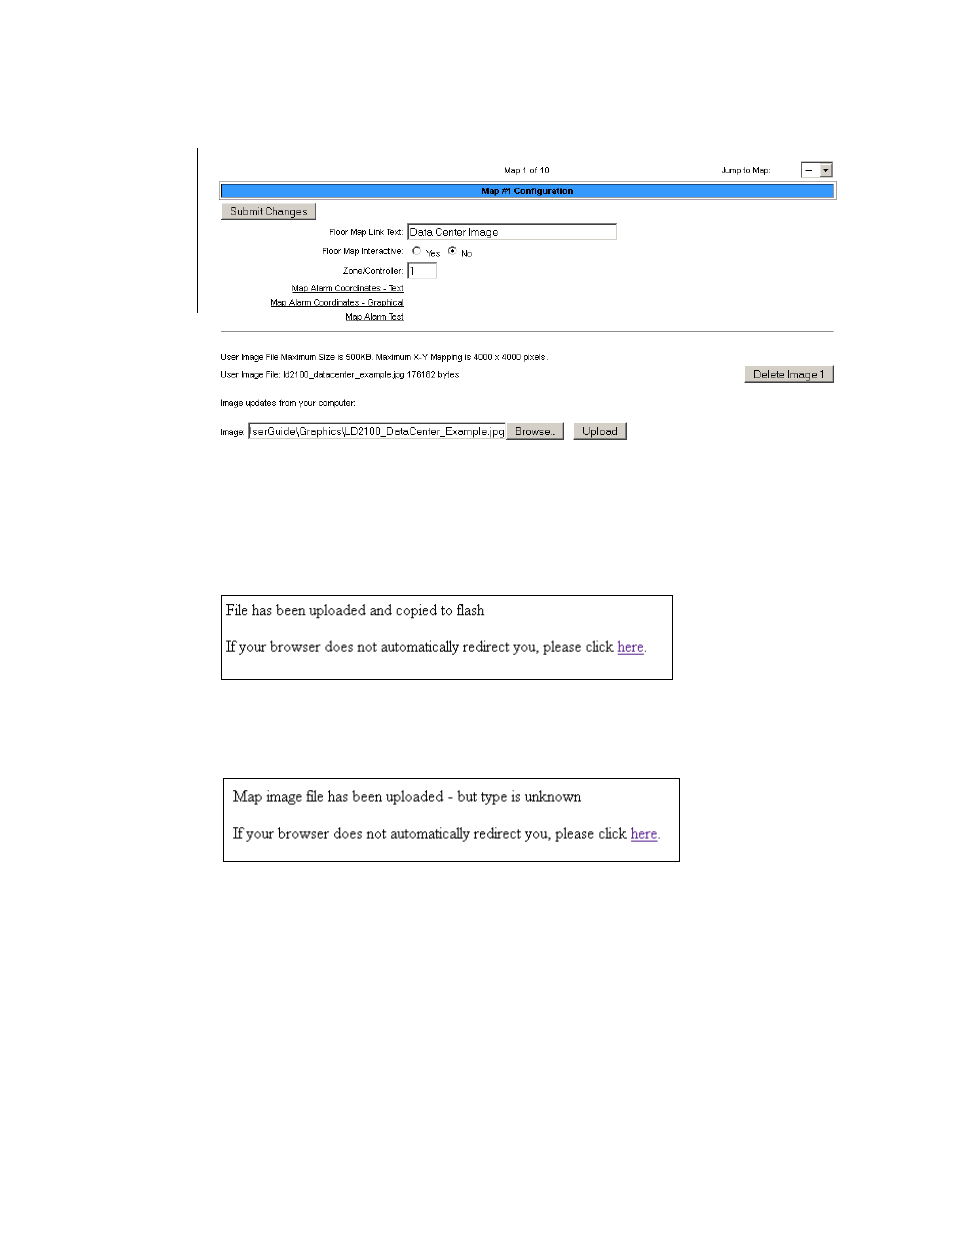
2
Locate and select the map file you have previously created and saved. Click the Open
button. The path and name of the map file displays in the field next to the Browse button.
Figure 4.15
Map Configuration Page
3
Click the Upload button.
The upload should take about seven seconds. Once the image of the map has uploaded, the
LD5200 displays a message confirming that it has uploaded the new file.
Figure 4.16
Map Image Upload Message
If you receive the following error message, the file did not upload:
Figure 4.17
Map Image Upload Error Message
If the upload fails, return to the Map Configuration page, verify your file’s size and type,
and repeat the upload process.
4.3.8.2 Map Reference Points
Once the map image has been uploaded, make sure you’ve designated it as interactive (clicked
the Yes radio button next to the Floor Map Interactive option), entered the text that you’d like
to see on the link for the map (the Floor Map Link Text field) and clicked the Submit
Changes button to save these edits. Now you’re ready to designate reference points on the
map.