Lingenfelter L250280197 Lingenfelter C5 Corvette E-Force Supercharger Install Kit v2.9 User Manual
Page 36
Page 35
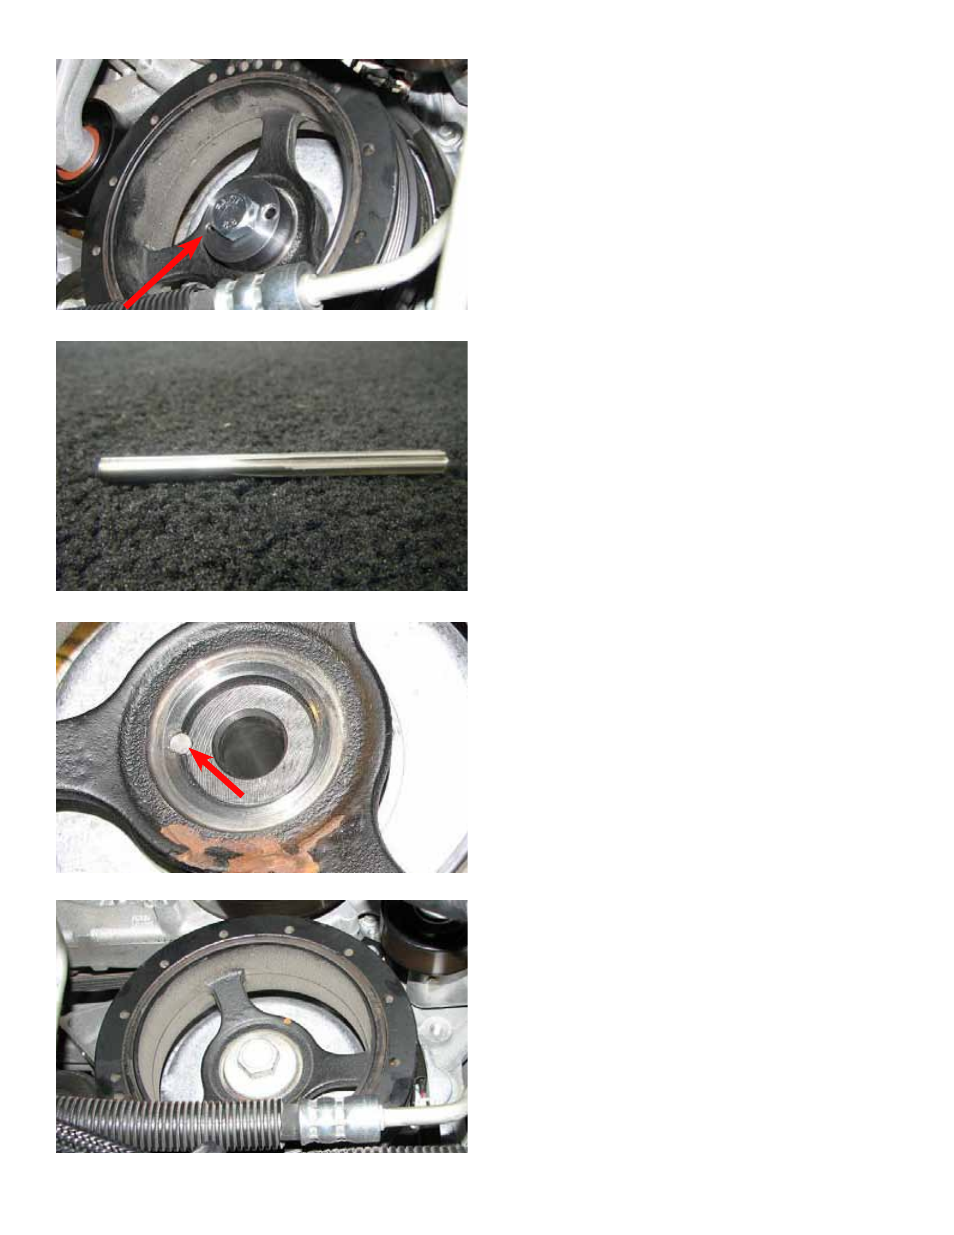
103. Lubricate the 15/64” supplied drill bit.
Using the bit and a drill, drill out the hole located
by the reamer guide (as illustrated in the picture
by the red arrow) until the bit is drilled into the
shaft up to the mark on the bit. Loosen the bolt
and blow the chips out using an air gun.
CAUTION: Be sure to wear safety glasses.
105. Remove the bolt, then use compressed air
to clear out any metal shards. Apply Loctite® 609
to the supplied crank pin, then press or tap it in
the drilled hole with a hammer until it is flush.
CAUTION: Be sure to wear safety glasses.
104. Turn the drill guide to line up the ream
hole with the hole in the crankshaft and tighten
the bolt. Using the 0.2500” reamer attached to a
handle or drill, ream the hole.
CAUTION: Be sure to wear safety glasses.
106. Using a long handled ratchet, extension
and 24mm socket, install the supplied crank bolt
and torque it down to 37 ft-lbs. Then using an
angle ratchet (a ratchet that measures angle of
rotation), extension and 24mm socket, rotate it
an additional 140 degrees.
NOTE: Do not reuse the stock crank bolt. The
crank bolt is a one-time use torque-to-yield
fastener.