RKI Instruments EAGLE 2 Manual User Manual
Page 211
EAGLE 2 Operator’s Manual
Maintenance • 201
in the sensor body by a threaded collar on the connector end of the sensor.
Unscrew the collar from the sensor body.
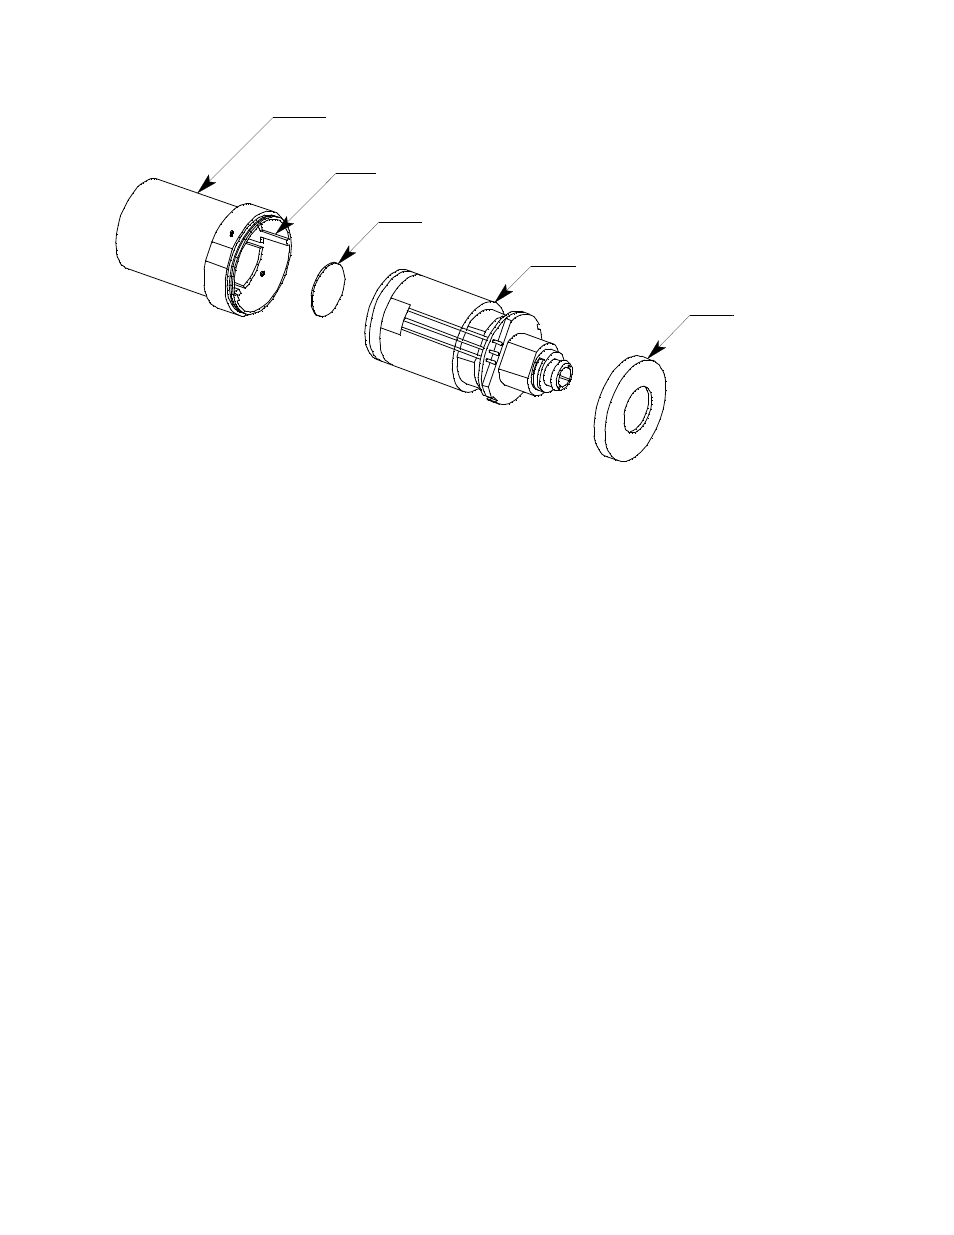
Figure 36: ESM-01 Sensor Component Location
12. Grasp the connector and lift the electrolyte reservoir assembly out of the
sensor body.
13. Turn the body upside down to remove the H
2
S scrubber. If it does not
come out, push on it from the top of the upside down body.
14. Discard the old H
2
S scrubber.
15. Carefully place the new H
2
S scrubber in the end of the sensor body. If the
O-ring came out, place it back in making sure it is seated in its groove.
16. Place the electrolyte reservoir assembly back in the sensor body making
sure that the ridges on the electrolyte reservoir assembly line up with the
grooves inside the sensor body.
CAUTION:
Verify that the electrolyte reservoir assembly is properly aligned
before inserting it into the sensor body. Forcing an electrolyte
reservoir assembly into its sensor body may damage the
electrolyte reservoir assembly or the sensor body.
17. Screw the collar of the ESM-01 sensor back on.
18. Plug the ESM-01 sensor back into the cable.
19. Insert the sensor into the ESM-01 flow chamber and push it in until it
bottoms out.
20. Line up the holes in the ESM-01 sensor bracket with the two standoffs on
Groove
Sensor Body
Collar
Electrolyte Reservoir
Assembly
H2S Scrubber