1 milling and dr illing – ACU-RITE MILLPWRG2 User Manual
Page 148
130
8 Milling and Drilling
8.1 Milling and Dr
illing
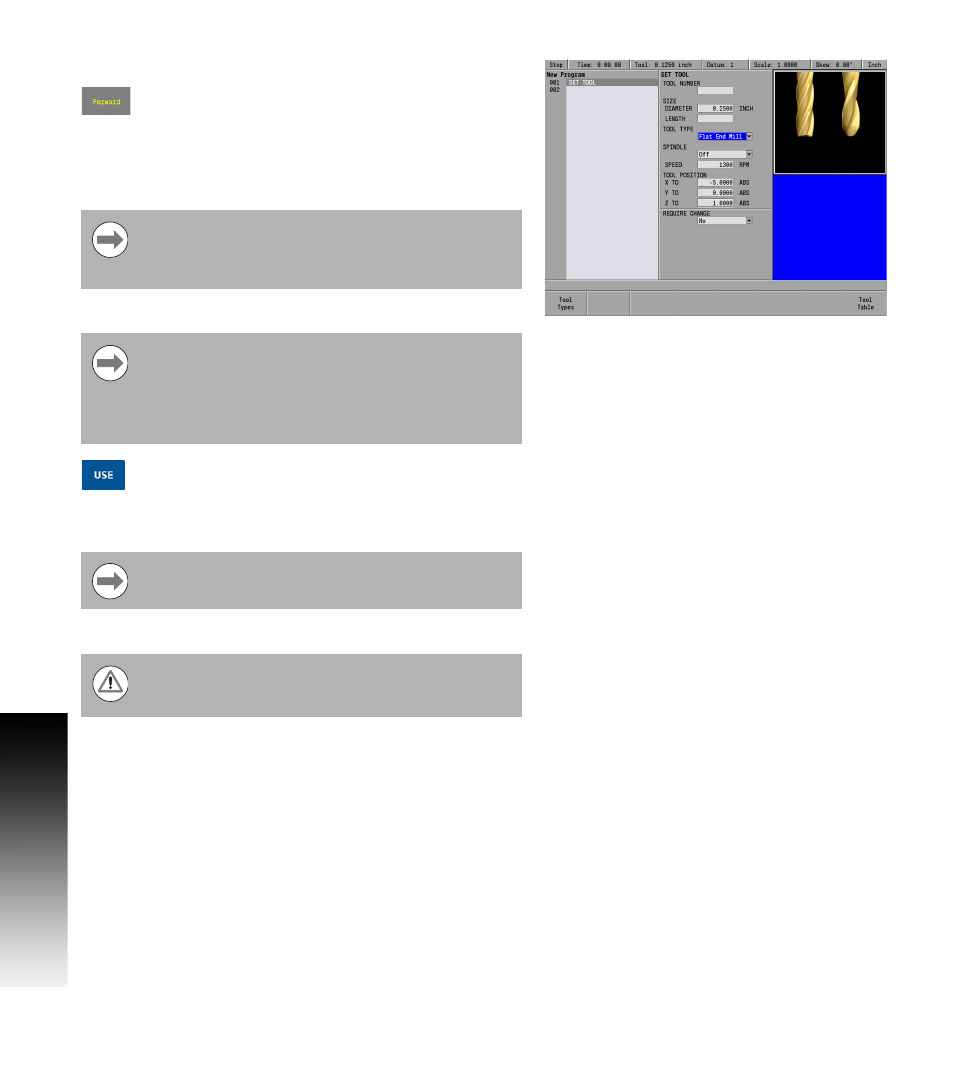
ARROW
DOWN to highlight the SPINDLE: field.
Press the Forward soft key
ARROW
DOWN to the SPEED: field (RPM) and enter the speed required
(e.g. 1300) using the numeric keypad.
ARROW
DOWN to tool position and enter the location where it is best to
make a tool change away from the part and fixtures.
ARROW
DOWN to the REQUIRED CHANGE field and select YES, or NO.
Press the USE key.
The programming of a part can now begin.
MILLPWR
G2
moves to the TOOL POSITION before
prompting the user for a tool change, making it
unnecessary to program a POSITION/DRILL step before a
tool change.
MILLPWR
G2
prompts the user to change the tool if the
SET TOOL step has a different tool than the one currently
mounted (as indicated in the status bar). If the REQUIRE
CHANGE field is set to YES, then MILLPWR
G2
will always
pause and prompt the user for a tool change (even if the
SET TOOL matches the currently mounted tool).
Tool length offsets are discussed on the following pages.
If the TOOL TABLE is used to enter a tool, MILLPWR
G2
will fill in the DIAMETER, and LENGTH fields in PGM mode
only.