Programming the connecting line, 1 demonstr ation pr ogr am – ACU-RITE MILLPWRG2 User Manual
Page 132
114
7 Demonstration Program
7.
1 Demonstr
ation Pr
ogr
am
Programming the connecting Line
Step 001 is now highlighted. ARROW Down to the last blank step
number (004) to highlight that step.
The next step to program is the line that starts at the bottom of the arc.
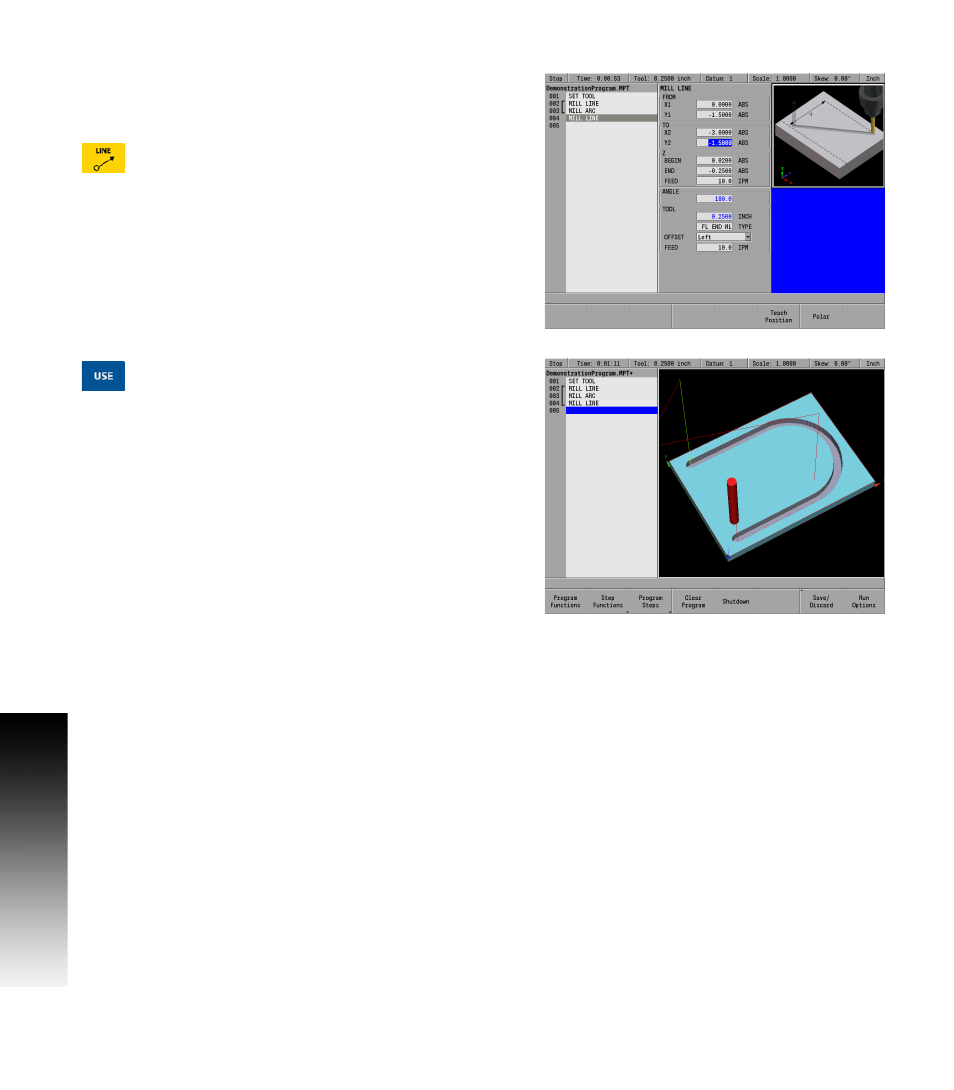
Press the LINE key.
Again, MILLPWR
G2
assumes that the program is continuing from the
last step. So it has automatically filled in the FROM: X1, and Y1 fields,
the Z: fields, TOOL: fields, FEED: fields, and the OFFSET field.
Using the numerical keypad, enter the following information:
In the TO: X2 field enter -3.0, and ARROW Down.
In the TO: Y2 field enter -1.5, and ARROW Down.
Press the USE key.
Now that the upper edge, arc, and lower line have been created, the
following steps will close the contour.
First the lower vertical line will be added.