Programming a line, 1 demonstr ation pr ogr am – ACU-RITE MILLPWRG2 User Manual
Page 130
112
7 Demonstration Program
7.
1 Demonstr
ation Pr
ogr
am
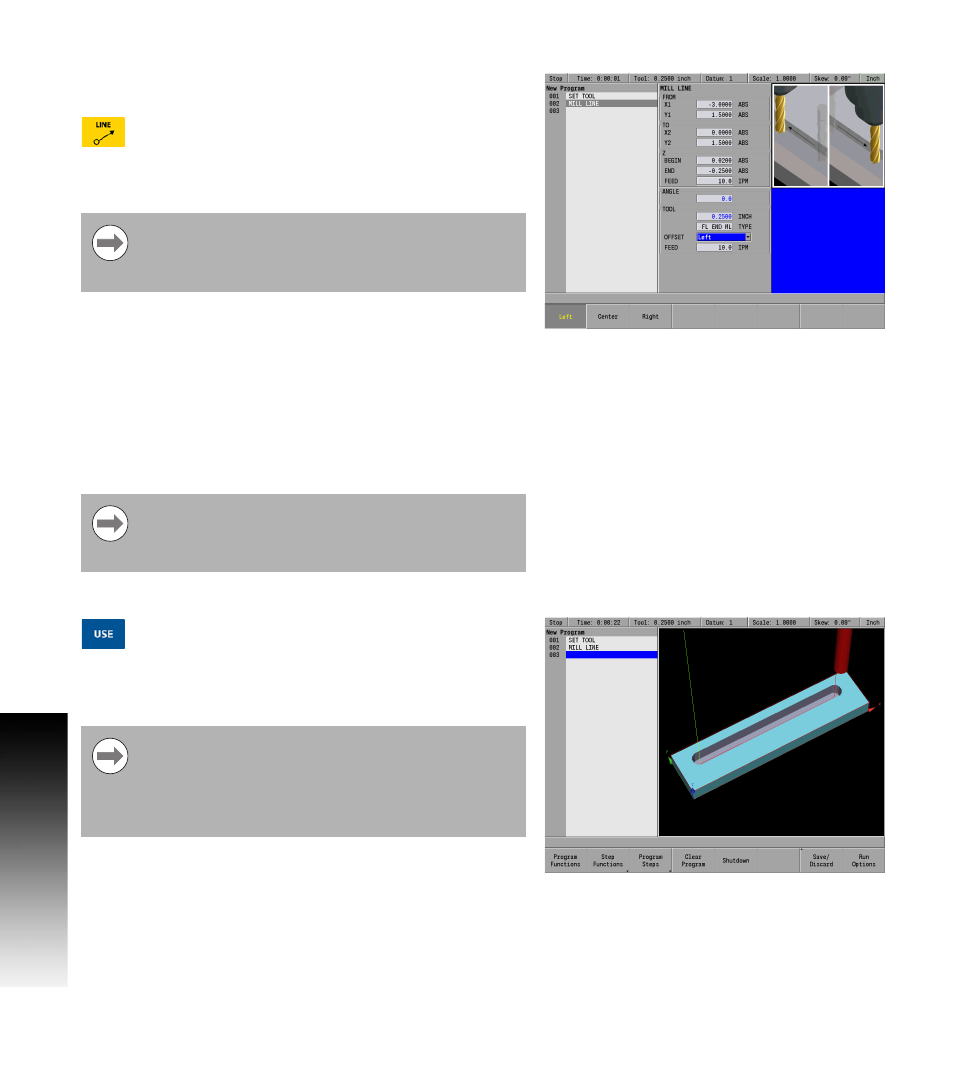
Programming a line
For this example, the part will begin at the upper left hand corner, and
cut in a clockwise (CW) direction.
Press the LINE key. The cursor will default to the
FROM: X1 field in the MILL LINE dialogue.
Using the numerical keypad, enter the following information:
In the FROM: X1 field enter -3, and press the ARROW Down key.
In the FROM: Y1 field enter 1.5, and press the ARROW Down key.
In the TO: X2 field enter 0, and ARROW Down.
In the TO: Y2 field enter 1.5, and ARROW Down.
In the Z: BEGIN field enter .02, and ARROW Down.
In the Z: END field enter -.25, and ARROW Down.
ARROW
Down to the OFFSET: field and press the Left soft key.
Notice that the ANGLE and TOOL specifications were filled in
automatically. The tool specifications were taken from the information
entered in Step 001.
Press the USE key.
The line is now displayed on the Program (PGM) screen and in the
graphics area.
Next, the arc will be added to the program.
In this case, pressing the ENTER key twice is required to
move the cursor down to the next field because a negative
number was entered. The arrow key accomplishes the
same result with one press of the key.
To cut around the outside of the contour in a clockwise
direction, a left offset is used. MILLPWR
G2
has been
factory set with a feed rate of 10 inches per minute, and is
used for this operation.
If it is preferred to see the complete material work piece
size for program verification, press the VIEW key, then
press the Block Form soft key. In the BLOCK FORM
dialogue enter the overall blank size for the part, or cutting
piece. MILLPWR
G2
will calculate the block form as the
program is entered.