P.103 – Toshiba Gigashot A Series User Manual
Page 125
Owner’s Manual
103
Hard Disk Camera GSC-A100FE/GSC-A40FE
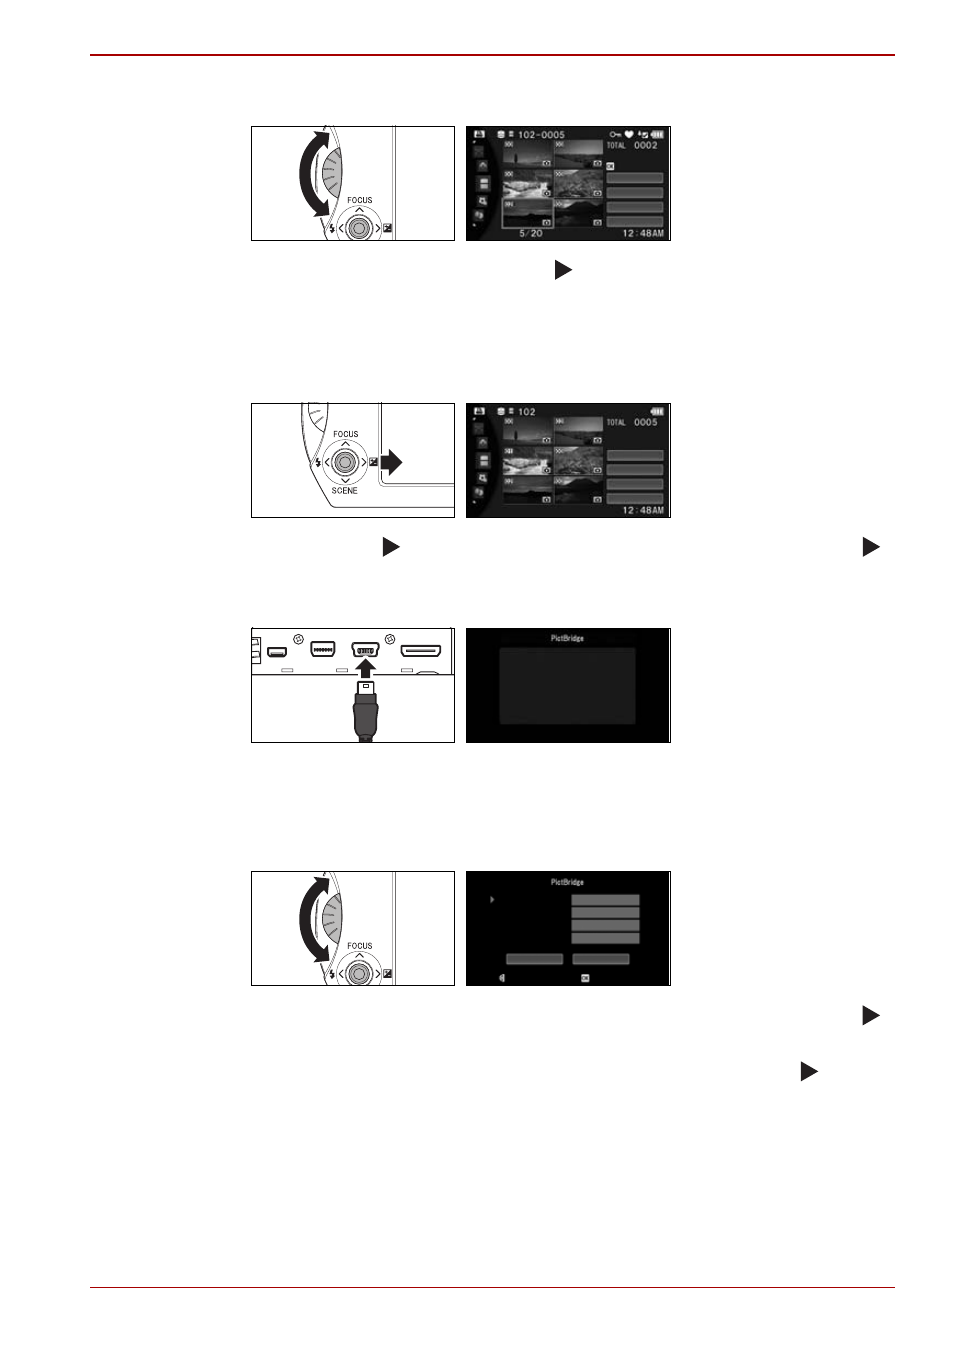
4. Set the number of prints.
Use the jog dial or move the OK ( ) button up or down to set the
number of prints for the selected image.
Repeat steps 3 and 4 to set the number of prints for all the images you
want to print. You can set up to 99 prints in total.
5. Select [OK].
Move the OK ( ) button right to select [OK] and then press the OK ( )
button.
6. Connect the camera to the printer with the USB cable.
Connect the camera to the printer with the USB cable while the
“CONNECT A PRINTER APPLICABLE FOR PictBridge.” message is
displayed on the camera.
7. Specify the print settings.
Use the jog dial to select the desired setting and then press the OK ( )
button.
Use the jog dial to change the setting and then press the OK ( ) button.
The print settings are as follows:
PAPER SIZE:
Sets the paper size used for printing.
LAYOUT:
Sets details such as the number of images printed on
each sheet of paper.
PAPER TYPE: Sets the type of paper used for printing.
PRINT DATE:
Specifies whether the date is printed in images.
28/10/2007
OK
OK
SELECT ALL
SPECIFY RANGE
CANCEL
28/10/2007
OK
SELECT ALL
SPECIFY RANGE
CANCEL
CONNECT A PRINTER
APPLICABLE FOR
PictBridge.
CANCEL
SELECT
PAPER SIZE
LAYOUT
PAPER TYPE
PRINT DATE
PRINTER SETTINGS
PRINTER SETTINGS
PRINTER SETTINGS
PRINTER SETTINGS
CHANGE