Qs1.6 setting up ip communications – Campbell Scientific CR9000X Measurement and Control System User Manual
Page 17
Quick Start
QS1.6 Setting Up IP Communications
Once serial communications has been established, the CR9000X's IP can be
set. First you have to be connected to the CR9000X through the RS232
port. Next go into RTDAQ's Terminal Mode window
(Datalogger/Terminal Emulator). Click on "Open Terminal" in the "I/O
Port" section and then press
prompt appears. Press C and
need to press
IP port settings will be shown. To change any of the settings, type in the
associated number, enter the new setting and press
complete, type in 6 (Save and Exit). Press
CR9000X prompt and type in C and
For communications across a LAN, or through the Internet, a straight CAT
5 Ethernet cable should be used. For hooking up directly to your PC's
Ethernet port, a CAT 5 Ethernet crossover cable is required.
After the CR9000X's IP settings have been set, you will need to add another
logger communication station, this time setting it up for IP communications
instead of serial communications. Before RTDAQ will allow you to set up
another station, it will be necessary to "Disconnect" from the Serial
Connected Logger (station that we just created). To start, press the Icon
with a data logger + sign to start the Station set-up wizard again. This time
select "IP Port" for the Communication Mode. Once you have setup the IP
station, if communication is still not established, read the section QS1.6.1,
"IP Port Set-up Tips".
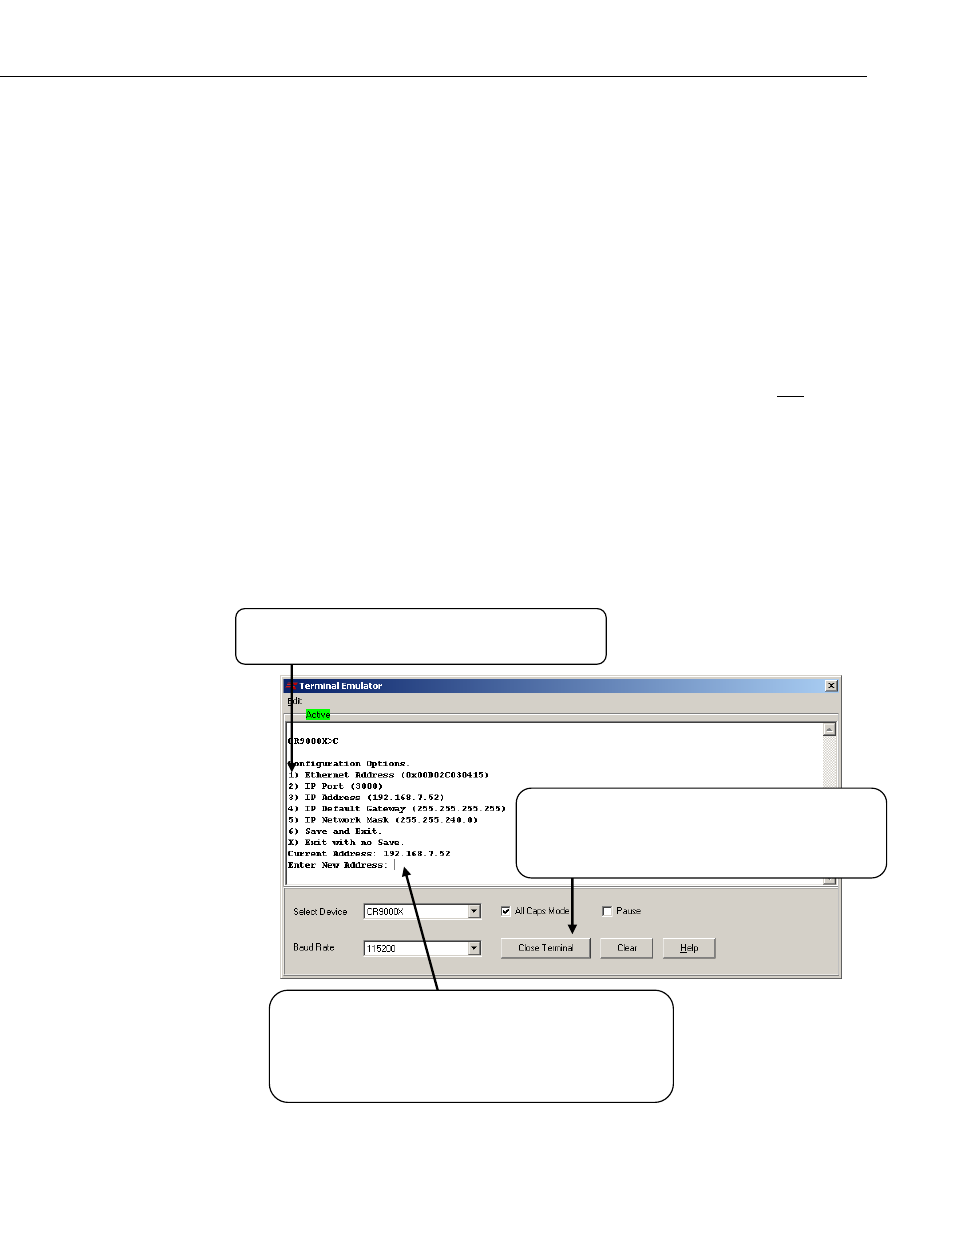
To change a setting, type in the associated number and
press
First, click on "Open Terminal". Next press
until the CR9000X prompt is returned. Type in "C"
and
be returned.
In this example, a 3 (IP Address) was typed in. The
CR9000X responded with the its current IP address and the
software is waiting for a new IP address to be entered.
After changes are made and entered, enter 6 and hit
QS-9