Installation method, 1 installing the gripper, Warning caution – IAI America RCP2W-GRLS User Manual
Page 33: Rcp2-grss, rcp2w-grss
23
4. Installation Method
4. Installation
Method
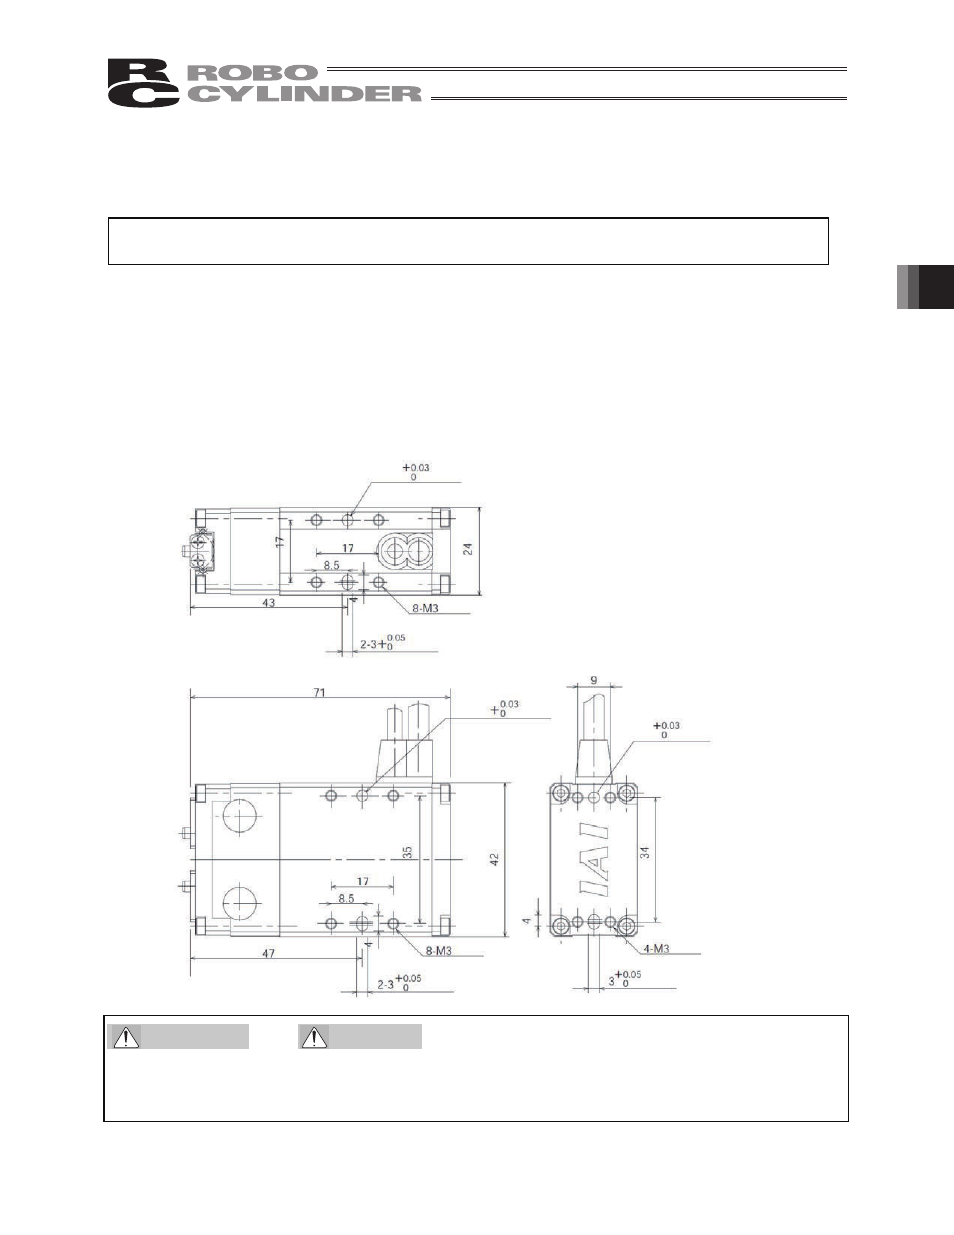
4.1 Installing the Gripper
The surface on which the gripper is installed must be machined or otherwise have a flat surface of
equivalent precision.
x The effective thread depths of holes will vary depending on the gripper model and installation surface.
Determine the lengths of screws to be used by referring to the figure below.
(
Never use long screws exceeding the effective thread depth. They may damage the mechanical or
electrical parts inside the gripper.)
x Round and elongated holes are provided in each mounting surface for receiving positioning pins. Use
these holes as necessary.
[RCP2-GRSS, RCP2W-GRSS]
The actuator can be mounted and affixed on five surfaces.
Warning
Caution
x
Some of the tapped holes used for installing the gripper are through holes. Therefore, never use long
screws exceeding the effective thread length. They may damage the mechanical or electrical parts
inside the gripper.
depth 3
(Same on opposite side)
depth 3
(Same on opposite side)
depth 3
(Same on opposite side)
depth 5
(Same on opposite side)
depth 3
(Same on opposite side)
depth 5
(Same on opposite side)
depth 3
(Same on opposite side)
depth 5
depth 3
2-
3
2-
3
3