Joystick / electrical mounting – Alamo TS-100A User Manual
Page 66
© 2005 Alamo Group Inc.
Section 8 - 2
Maverick (NH TS-100A,115A , 125A, 135A Asy. Man) 01/05
Installing Wiring Harness and Joystick:
1.
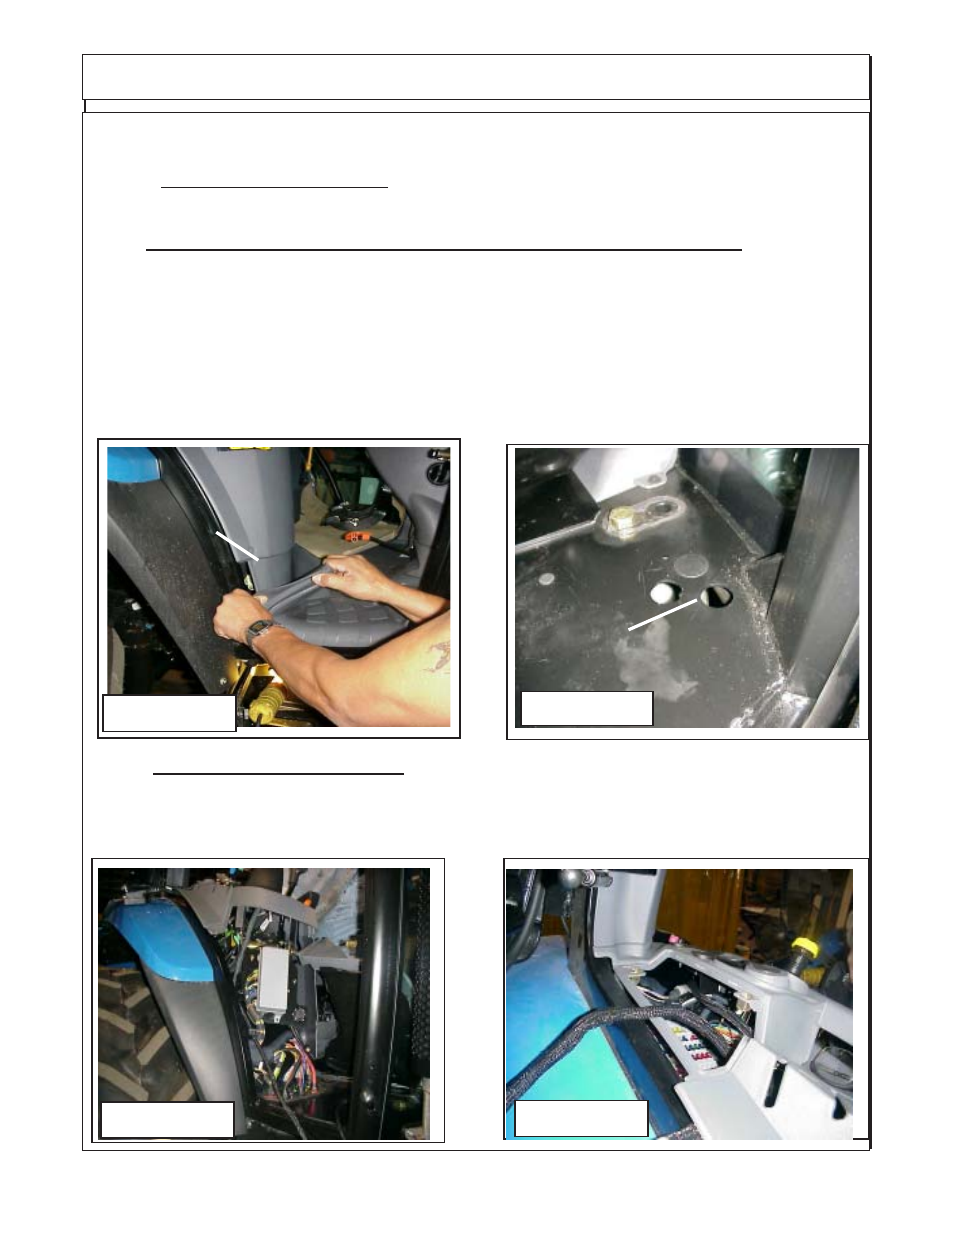
Preparing Tractor Floor Mat. First thing to do is remove the Battery Cables from Battery, Do
Not perform any work on Tractor or Boom Electronics unless this has been done. Raise the Floor Mat
up on the RH Side by the RH Door, You will need to fold it back approx. 12 to 14 inches (See Figure 1
& 2). DO NOT Tear or Cut any Holes in Rubber Floor Mat, as it will NOT be required.
You may find a rubber plug or you may have to cut a hole with a hole saw, this will have to be decided
during installation. If you need to cut a hole, check the under side of cab for any obstruction or any
component that might be damaged before you cut the hole. The hole is going to have to be oblong in
order for the plug to go through it. Measure Wire Harness plug Coded G1 to determine the size hole.
In Figure 2 below the tractor had two holes from the tractor manufacturer, technician removed the
rubber plugs and cut the space between the two holes to open it into one oblong hole. Check to make
certain the installation will not interfere with the operators normal functions. (See Figure 1 & 2). Floor
mat can be reinstalled by over wire harness with out cutting any holes in floor mat..
FIGURE 1
Pull Floor Mat
loose here
Joystick / Electrical Mounting
FIGURE 2
Cut Hole in flor of
cab if not one
already in it.
2.
Remove Tractor RH Side Panel. Remove the side panel on the RH side of the cab so the wire
harness can be run down through and under top panel and will be covered when the panel is put back
on (See Figure 3). Isert the end of the interior wire harness with the pug coded G1 down into the panel
from top and out bottom of panel (See Figure 3 & 4).
FIGURE 3
FIGURE 4