Konica Minolta Polygon Editing Tool User Manual
Page 94
92
Chapter
2
File
Menu
900
910
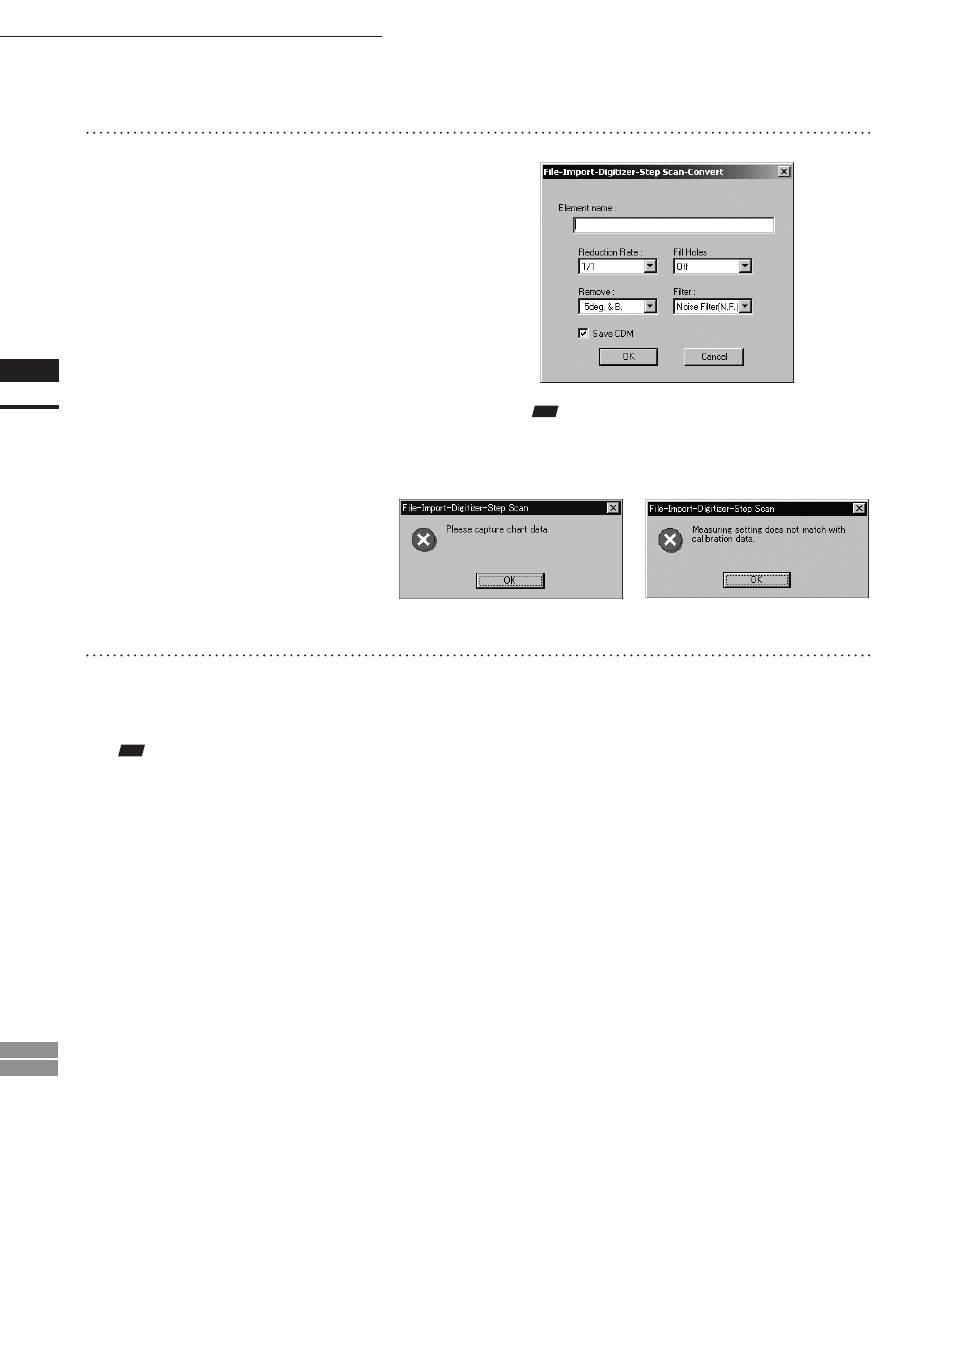
File – Import – Digitizer – Step Scan (When VIVID 900/910 is Selected)
9
Enter the desired element name, and
set parameters.
• Select the desired rate from “1/1”, “1/4”, “1/9”,
“1/16” and “No polygon” by selecting from the
[Reduction Rate] pull-down menu.
• If you want to generate points to fill in holes
caused by missing data, set the [File Holes] set-
ting to “On”.
• The [Remove] pull-down menu lets you select
which points to remove from the imported data.
You can set this to any of the following: “None”,
“Boundary(B.)”, “5deg. & B.”, “10deg. & B.”,
“15deg. & B.”, or “20deg. & B.”
• If you want to filter the imported data, select the
appropriate parameter from the [Filter] pull-down
menu.
• If you want to save the raw scan data (.cdm) when
importing, check the [Save CDM] checkbox.
Note
The element name must consist of up to 31 alphanu-
meric characters.
8
In the [General] tab, click the [Go] but-
ton.
The [File-Import-Digitizer-Step Scan-Convert]
dialog box will appear.
Note
If no chart data exists or the existing chart data does not
match the measurement conditions, the following error
messages will appear.