4) installing polygon editing tool on the computer – Konica Minolta Polygon Editing Tool User Manual
Page 13
4) Installing Polygon Editing Tool on the computer
When installing the software, make sure to install it correctly according to the following procedure.
Operating Procedure
1
Start Windows and insert the software
CD-ROM into the CD-ROM drive.
2
From Explorer, execute the “setup.exe”
file stored in the CD-ROM.
The setup program will start.
3
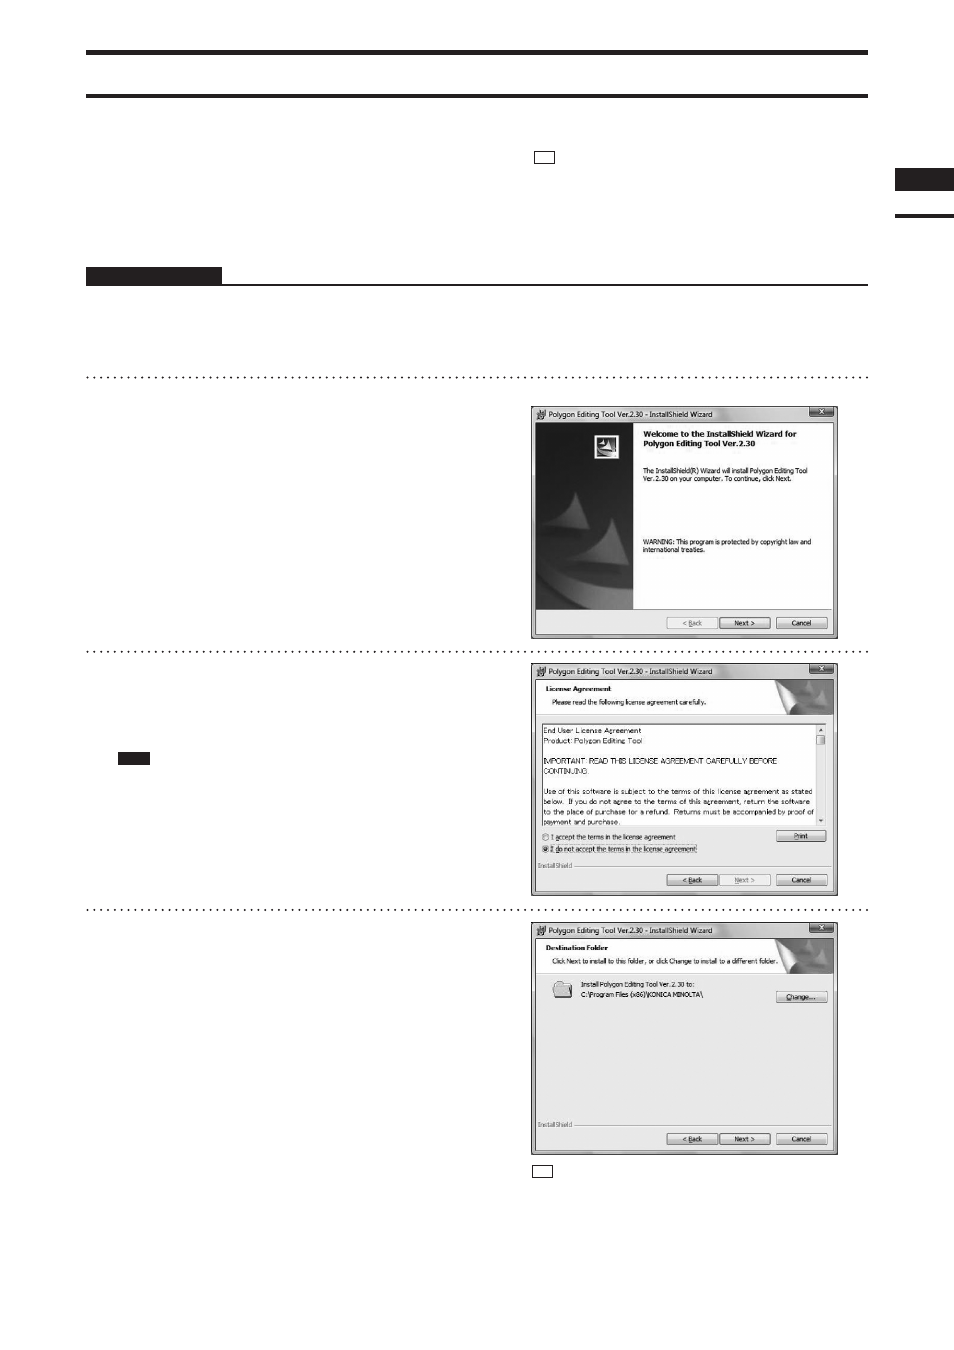
Click the [NEXT] button.
A dialog asking whether you agree with the
program agreement will appear.
Note
Read it thoroughly and select whether you agree or not.
If you agree, proceed to step 4.
If you do not agree, the software cannot be installed.
Click the [Cancel] button to cancel installation.
4
Select [ I accept the terms in the license
agreement. ] and click the [NEXT] but-
ton.
Memo
It is necessary to connect the protect key to the computer
correctly before installing the software.
If the protect key has not yet been connected, connect the
protect key to the computer according to the procedure on
page 9.
Chapter
1
Preparations
Below are display examples when Windows Vista is used.
Memo
If you want to install the software in another directory,
click the [Change...] button and select the desired direc-
tory. If you do not specify another directory, the software
will be installed in “C:\Program Files (x86)\KONICA
MINOLTA” in case of a 64-bit OS or “C:\Program Files\
KONICA MINOLTA” in case of a 32-bit OS.
11