Changing the ribbon – Gasboy 1000 Series FMS Diagnostic Manual User Manual
Page 71
GASBOY Series 1000
4-12
03/07/03
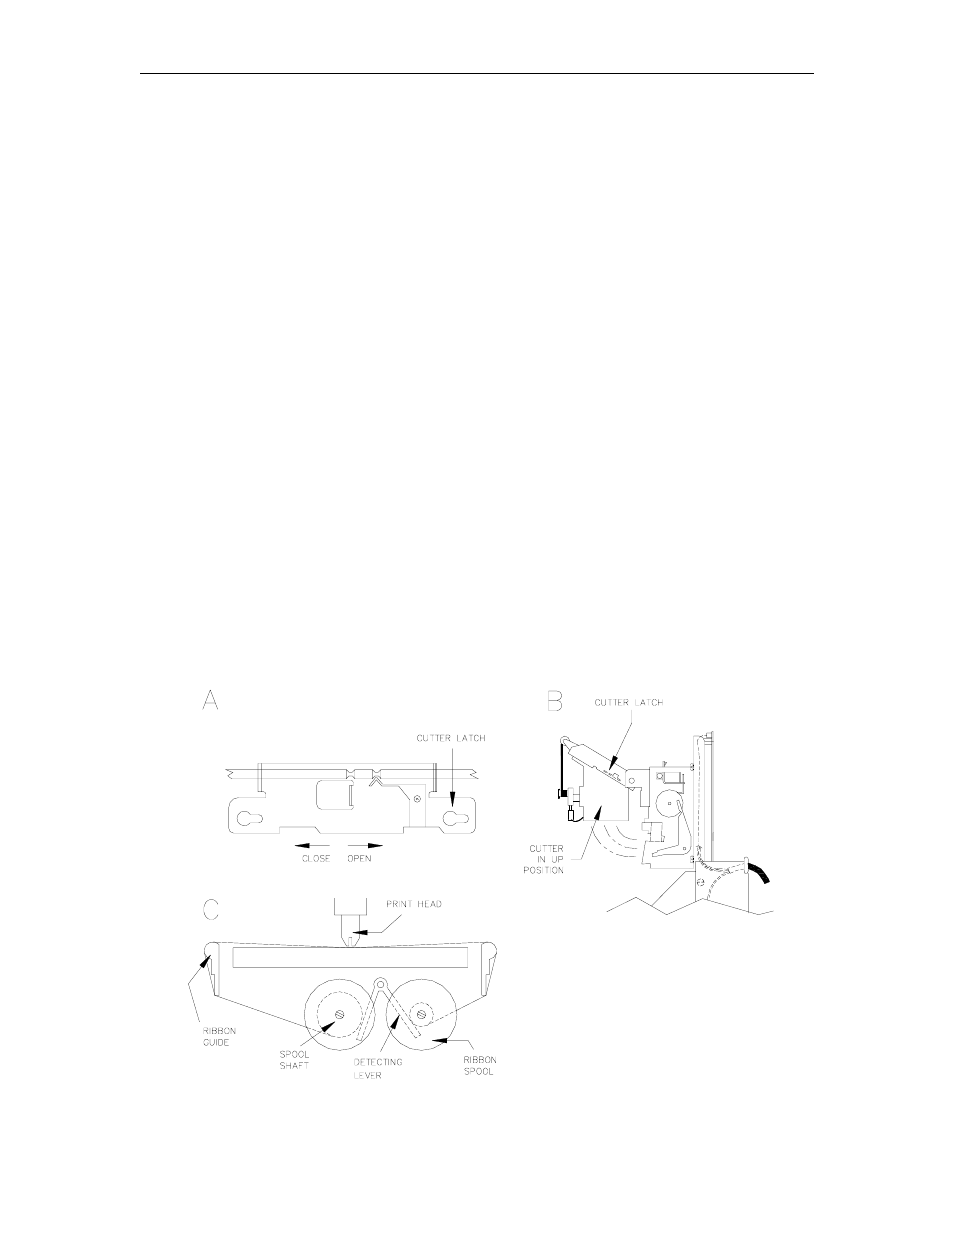
Changing the Ribbon
Removing Old Ribbon Spools
1.
Follow the procedure for accessing the printer.
2.
Slide the cutter latch on the paper cutter unit to the right and swing the paper cutter up
(Figure A and B).
3.
Rotate both spools to create some slack in the ribbon.
4.
Pull one spool off of the shaft while pushing the ribbon detecting lever out of the way (Figure
C). Repeat for the other spool.
Installing New Ribbon Spools
1.
Place the ribbon spool onto the left shaft with the spool-driving pins pointing toward the
printer (Figure C).
2.
Feed the ribbon over the left ribbon guide, under the print head, and over the right ribbon
guide.
3.
Repeat Step 1 for the right spool.
4.
Rotate both spools to remove the slack from the ribbon.
5.
Return the paper cutter unit to the normal position and slide the cutter latch to the left to lock
(Figure A).
6.
Perform a short self-test
7.
Return the printer slide assembly to its normal position and lock it in place with the hex head
screw.
8.
Close and lock the printer access door.
NOTE:
Make sure the printer door lock is drawn tight in order to insure a watertight seal.