Point rotation – Baby Lock ProStitcher Version 14.04.0051 (BLPS3) Instruction and Reference Guide User Manual
Page 47
5.12 | Design Menu
Pro-Stitcher User Manual
In addition to using the rotation buttons, press the number box and enter a rotation value on the number
pad. Enter a positive number to rotate the design clockwise or a negative number to rate the design
counterclockwise.
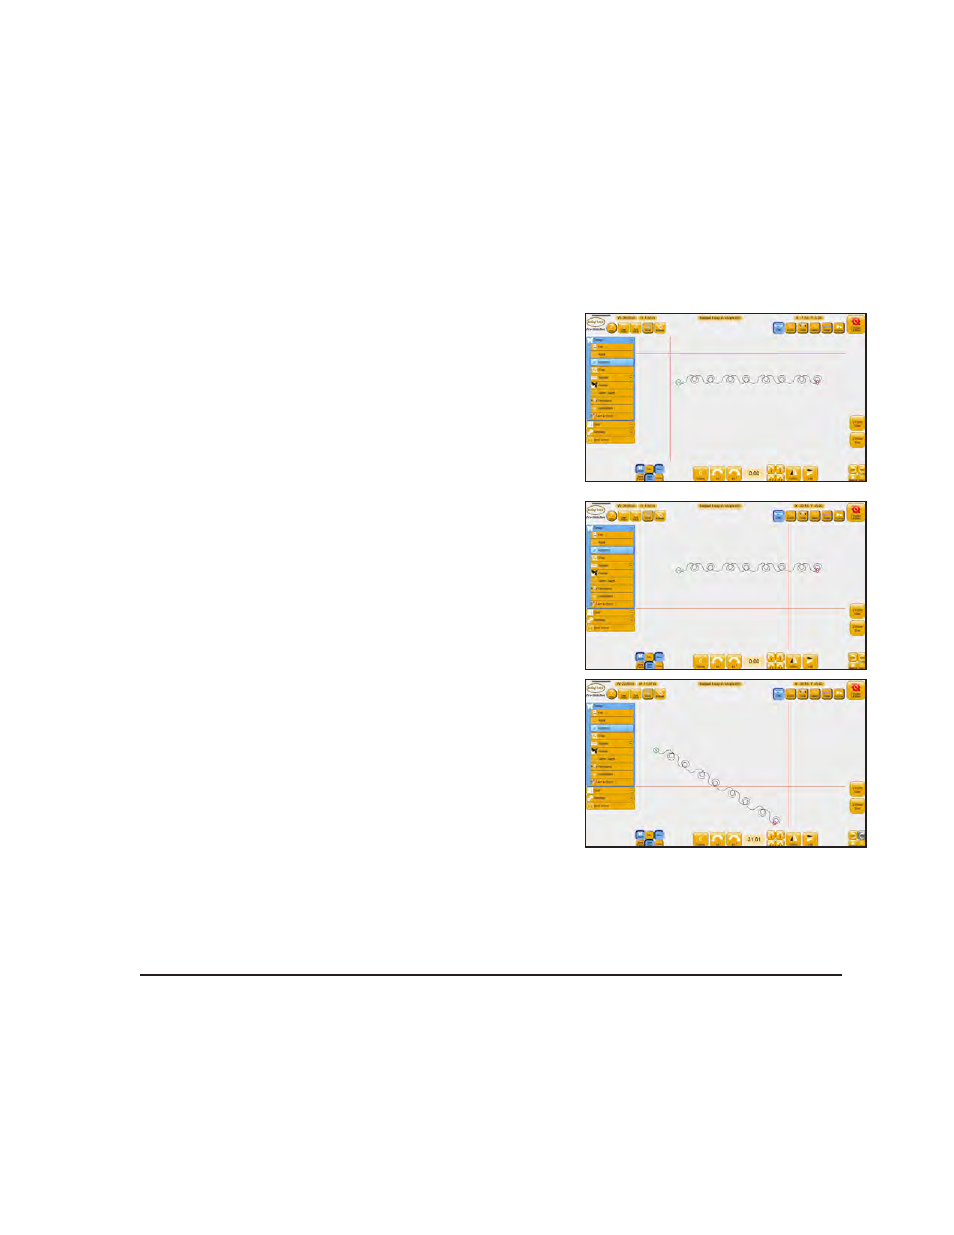
2-Point Rotation
2-Point Rotation uses the quilting machine to identify a line that represents the rotation angle. You’ll set a
start point and an end point to create a line that represents the angle to which the design will align.
To rotate a design according to an angle on the quilt
1. Move the quilting machine to a point on the quilt left of the
line to follow and press 2 Point Start. Note the position of
the crosshairs in the image at the right.
2. Move the machine to a point further to the right along the
angled line. Note the position of the crosshairs in the image
at the right.
3. Select 2 Point End. The design rotated to match the angle
created by the two points selected in steps 1 and 2
The rotation angle appears in the number box and the design rotates to match the angle, 44.17 degrees in
this example.
Machine Quilting Tip: Use 2-Point rotation to quilt sashing in an on-point quilt
Create an area that represents the sashing to be quilted. Load the design and make design
changes, such as resize and create repeats. The design will be horizontal on the screen. Then
use 2-Point rotation to rotate the design to match the quilt. Position the machine’s needle
along the angled sashing seam line and select 2-Point Start. Move the machine’s needle to a
spot along the same seam line and select 2-Point End. The design rotates to match the angle
you defined.