Multi-point – Baby Lock ProStitcher Version 14.04.0051 (BLPS3) Instruction and Reference Guide User Manual
Page 45
5.10 | Design Menu
Pro-Stitcher User Manual
Multi-Point
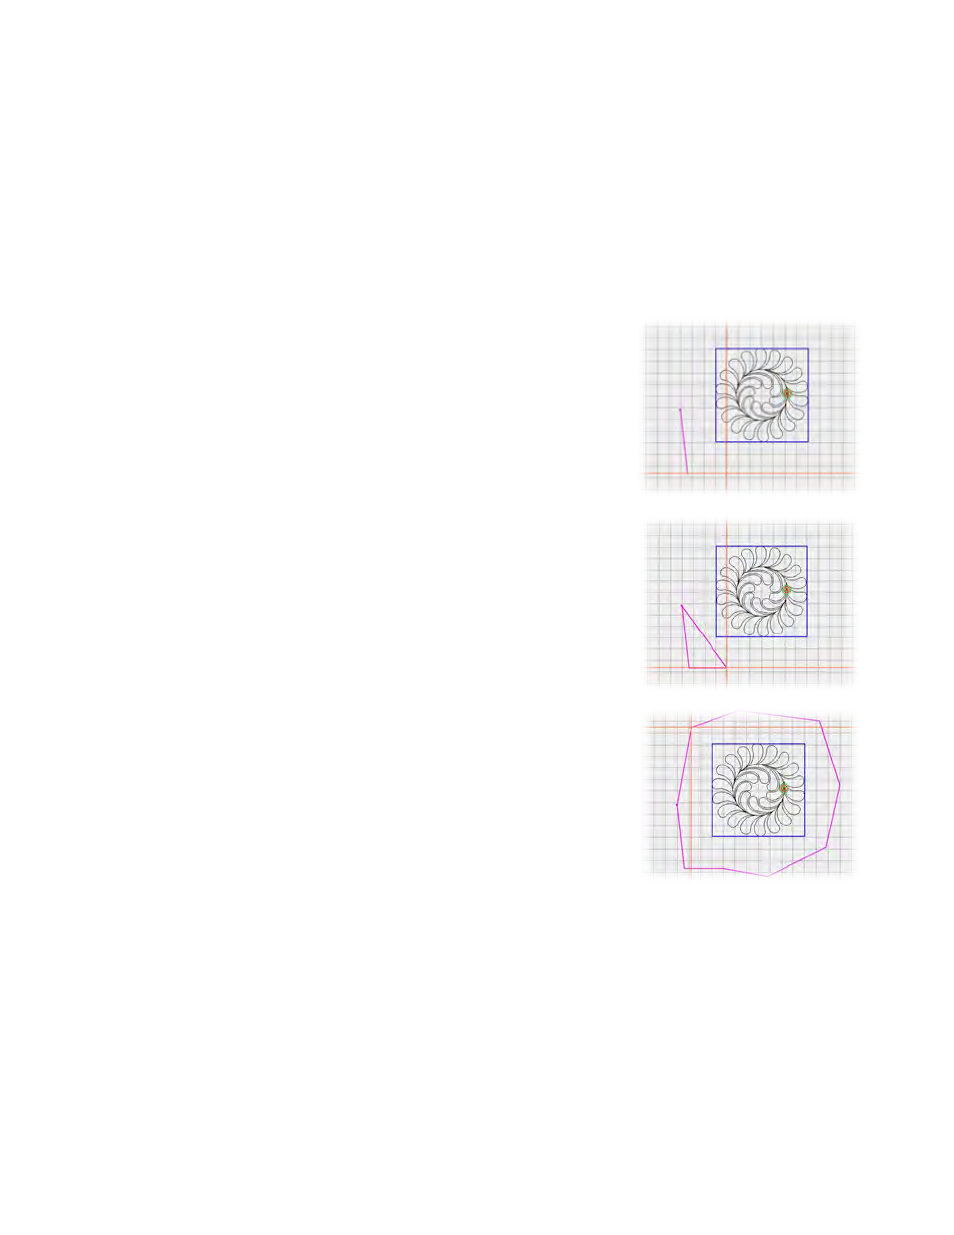
For more complex areas, use Multi-Point to mark multiple points to create triangles, hexagons, octagons,
or any shape with three or more points.
To create an area with multiple points
1. Move the quilting machine so the needle lines up with one corner of the desired area on the quilt.
It may be necessary to press the Disable Motors button at the top-right corner of the screen. Press
Multi-Point.
2. Move the machine to a second point along the perimeter of
the quilting area and press Multi-Point again. A purple line
joins the two marked points.
3. Move the machine to a third point along the perimeter
of the quilting area and press Multi-Point. Pro-Stitcher
automatically closes the shape back to the first point when
the third point is marked, creating a purple triangle to
indicate the multi-point area.
4. Mark other points as desired to create a detailed quilting
area.
To keep track of how many points you have marked
• The Point Count box displays how many points you have marked. When you clear the area, the point
count goes back to zero.