Baby Lock ProStitcher Version 14.04.0051 (BLPS3) Instruction and Reference Guide User Manual
Page 18
3.10 | Installation
Pro-Stitcher User Manual
To set up the Pro-Stitcher carriage
1. Place the Pro-Stitcher carriage on the frame system
and untie the black twist ties that are binding the
black cables in a loop. Drape the black cables over the
back of the carriage.
2. Plug one branch of the Y-power cord (see Parts List,
item I) into the power supply located toward the rear
of the carriage. The other end of the power cord will
be plugged into the quilting machine in step 6.
3. Attach one end of the harness cable (see Parts List, item P) into the connector on the right side of the
power supply. Tighten the side screws. You will plug the other ends to the bracket as part of step 5
when you attach the tablet computer.
4. Carefully lift the quilting machine and place it on the carriage so the wheels engage the white carriage
tracks, making sure not to set the wheels on top of the stitch regulator cable. This is easier to do with
two people – one at each end of the quilting machine.
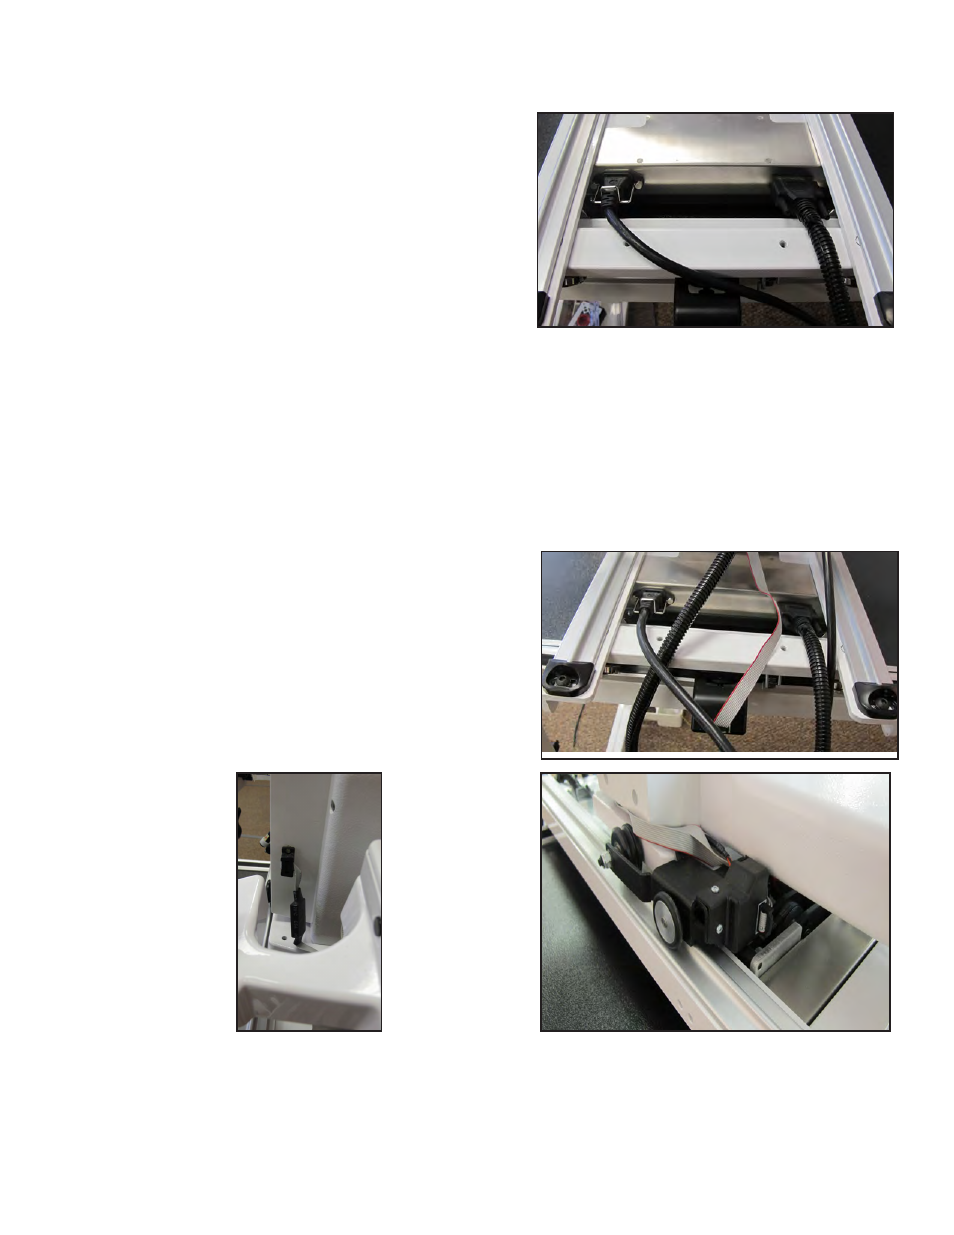
5. With one end of the stitch-regulator cable plugged
into the machine’s C-Pod (A below) and the middle
connector plugged into the quilting machine’s
Y-encoder (B below), plug the other end of the cable
into the carriage X-encoder (C at right).
B
C
A