1 stacker position, 2 stacker angle – Avery Dennison SNAP 500 User Manual
Page 41
User’s Manual—SNAP™ 500 Gen 1 and Gen 2
41
You may need different settings depending on the label size and material. Feel
free to make adjustments until you are satisfied with the stacking. That way you
will soon learn the settings that work best for your labels.
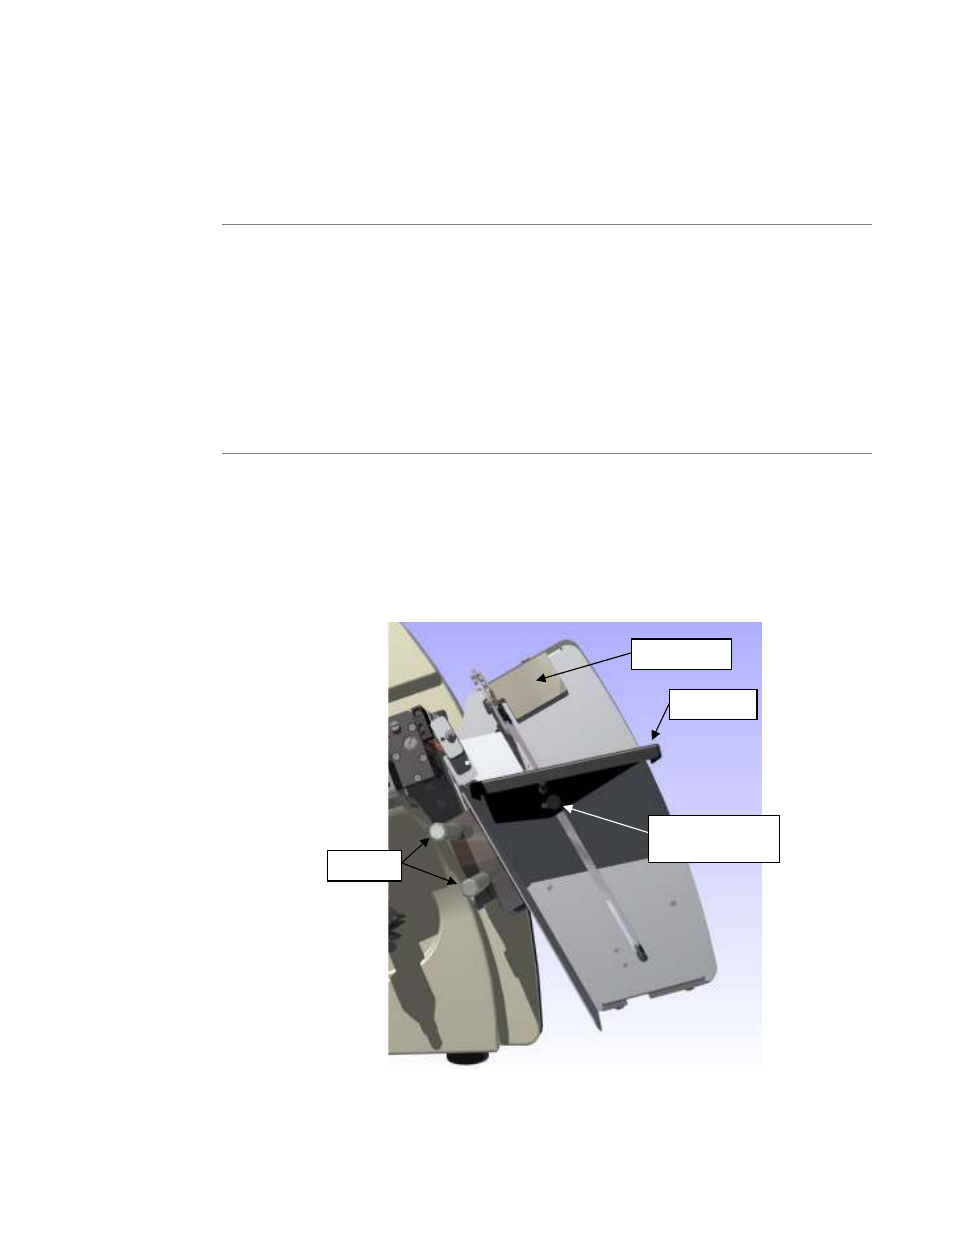
4.2.1 Stacker Position
The stacker slides front and back on the mounting pins allowing its proper
positioning for the width of the label. Set the back wall of the stacker just behind
the back corner of the label where it comes out of the nip rollers.
The stacker mount bracket has a thumbscrew that locks the stacker in position
and stiffens the mounting.
Adjusting the stacker angle (see section 4.2.3) will move the position of the back
wall. If you adjust the stacker angle, be sure to readjust the stacker position.
4.2.2 Stacker Angle
The angle of the stacker can be tipped out a maximum of 20 degrees at the
bottom from the vertical position shown in Figure 5. Adjust the stacker angle to
best accommodate each run.
1. When the label is 2 inches (51 mm) or longer, or when using coated tapes,
the stacker works well with the bottom tipped out.
2. When using woven tapes, the stacker should be vertical or almost vertical.
Figure 14: Stacker Angle – Almost Vertical
Label Stop
Platform
Shafts
Adjustment
Thumb Screw