Defining the clear zone, Defining the clear zone -30, 8 • scanning – Pitney Bowes DI950 FastPac Inserter User Manual
Page 174
8-30
SV61311 Rev. E
8 • Scanning
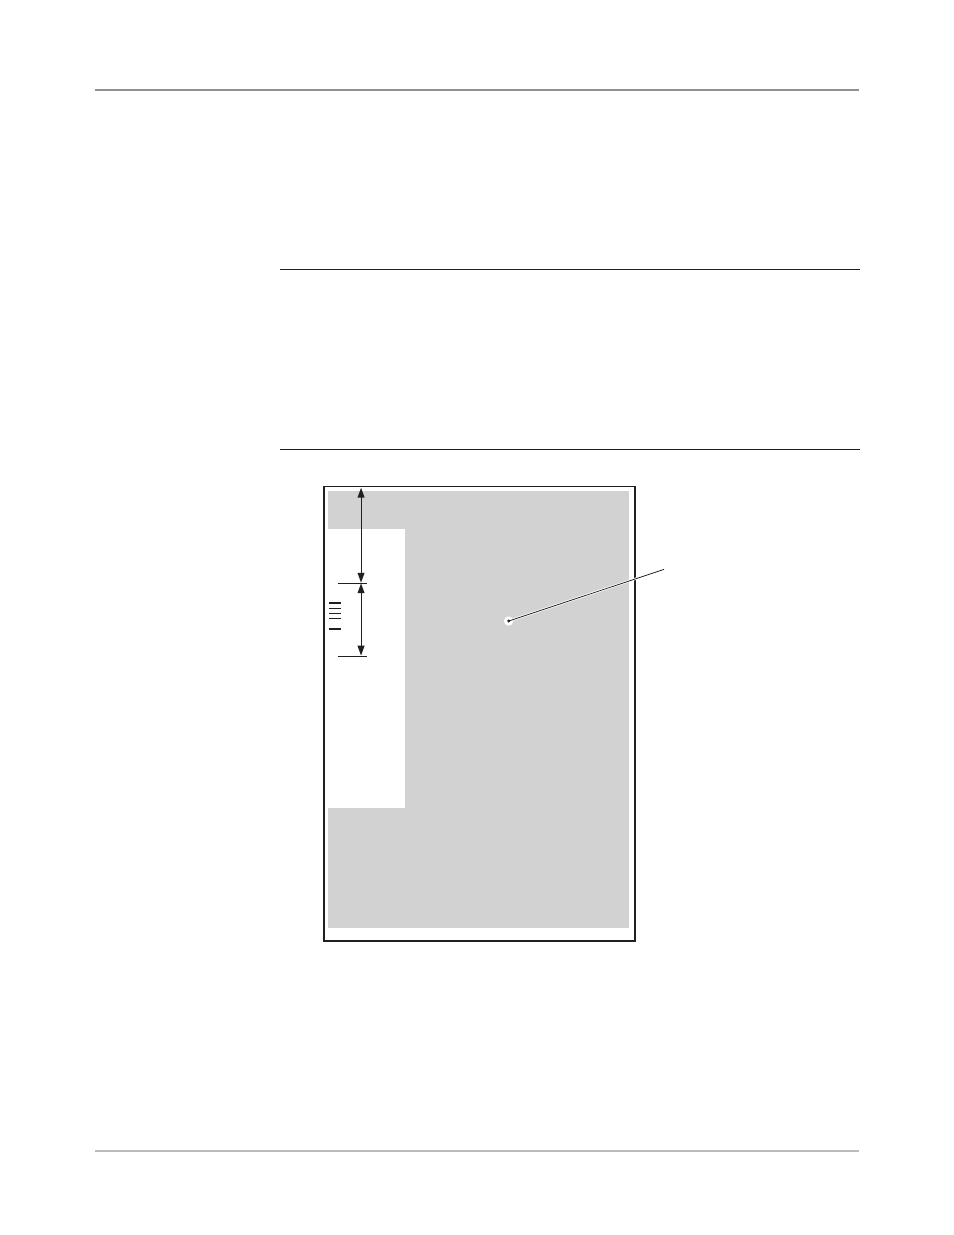
1. When requested by the machine, measure and enter the distance (A)
from the top edge of the sheet to the point after the printed matter where
you wish the machine to START scanning.
2. When requested by the machine, measure and enter the distance (B)
from the start point just set, to the point you wish the machine to STOP
scanning. This is called the Clear Zone.
NOTES:
• Setting the Clear Zone closer to the beginning and end of the OMR marks de-
creases the possibility of any poor print or imperfections on the material being
interpreted as marks.
• Conversely, setting the Clear Zone too close to the beginning and end of the
marks could cause problems if the position (registration) of the printing on the
material varies.
• A good guide is to limit the Clear Zone, but always allow at least 3/8" (9 mm)
before and after the marks.
A
B
Grey area indicates
printed matter on
material
TOP OF SHEET
Defining the
Clear Zone