Assigning a scan configuration to an existing job, Assgnng a scan confguraton to an, Exstng job – Pitney Bowes DI950 FastPac Inserter User Manual
Page 161: Scanning • 8
SV61311 Rev. E
8-17
Scanning • 8
Assigning
a Scan
Configuration
to an Existing
Job
Follow the steps in this section to assign a Scan Configuration to an existing
job (either the current job, or another job) that has been created previously.
1. From the Home screen, select "Menu", "Jobs", then select:
• "Edit Current Job", or
• "Select Job", then the appropriate job from the list that appears.
2. If the Scan Configuration uses dynamic envelope selection, the existing
job must have a second outer envelope. To add an outer envelope:
a. Select “Add Outer Envelope”.
b. Select the appropriate options.
c. Select “Accept” when done.
3. Use the UP/DOWN arrow keys to select the appropriate item (sheet or
insert) in the Mail Piece Icon Tree.
4. Select "Edit Highlighted Item".
5. Select "Additional Settings".
6. Select "Scan Item" and toggle "Yes".
7. Select "Scan Settings".
8. The Select Scan Type screen displays. Select the appropriate scan type
(OMR, Code 3 of 9, or Interleaved 2 of 5).
9. Select the appropriate scan configuration name from the list that ap-
pears. If necessary, select "Next" or "Previous" to move forward or back-
ward through the list.
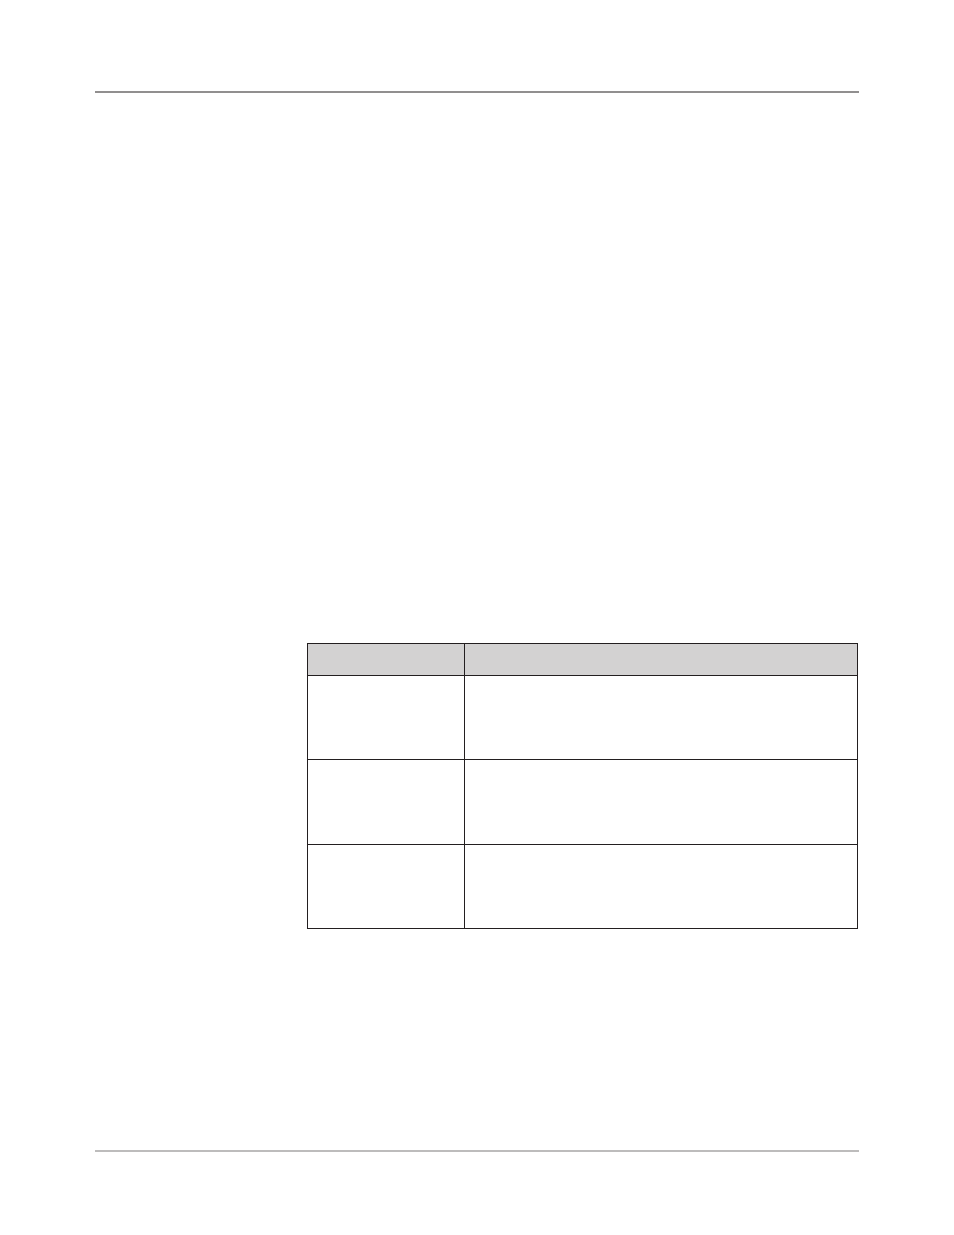
10. The Scan Settings screen displays.
Menu Option
Associated Options/Actions
Content in Line with
Marks
Allows you to toggle whether or not the content is in line with
the scan marks in the feed direction:
•
Yes, or
•
No.
Marks on
Allows you to toggle which side of the page the marks appear
on:
•
Front (address side), or
•
Back.
Marks on First Page
Only
Allows you to toggle whether or not the marks appear only on
the first of multiple sheets:
•
Yes, or
•
No.