FaxBack NET SatisFAXtion 9.0 - Fax Server Manual User Manual
Page 48
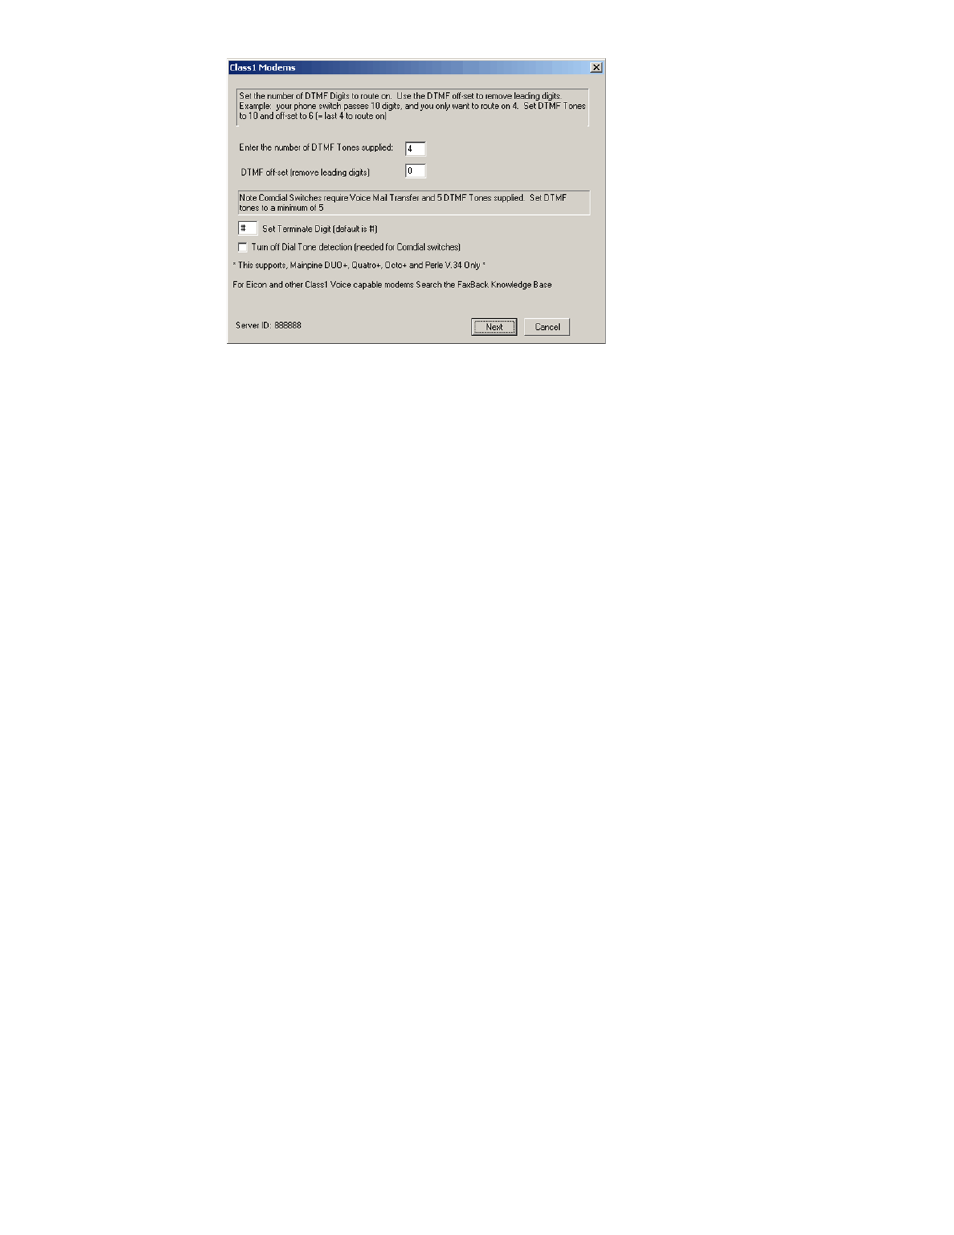
Set the number of DTMF Tones your phone switch is passing. Commonly this is the last 4 digits
of the DID numbers assigned to your inbound fax users. Also included is a setting for no dial
tone for outbound calls, should your PBX not provide dial tone on the line.
2.5.1.9 Refusing Unrouted Faxes
If you only route to individual users and not to groups, it is possible to have the fax server reject calls to
unassigned DIDs. When a call comes in, the DID is examined to see if it is assigned to any user (not
group) on the system. If so it is answered, if not it is rejected as busy.
[HKEY_LOCAL_MACHINE\SOFTWARE\FaxBack\CASDrive]
"RefuseUnroutedCalls"="1"
2.5.2 Routing to Users and Groups
There are two fundamental routing methods: routing to a single user, or routing to a group of
users.
2.5.2.1 Routing to Users
User routing is simply the association of a single DID or line to a user account. When the fax is received,
the fax is sent to the specified user.
To assign a DID to a user, run the Administration program and log in. Go to the User Administration
section using the View
⇨ User Administration menu. Select the user you wish to route to, rightclick on
it and select Modify User. Change to the Routing tab. In the Identifier box, enter the DID string you
wish to route to this user.
To assign a line to a user (note that you cannot use line routing with VoIP or T1/PRI equipment), run
the Administration program and log in. Go to the User Administration section using the View
⇨ User
Administration menu. Select the user you wish to route to, rightclick on it and select Modify User.
Change to the Routing tab. Click the Line dropdown box and select the line you wish to route to this
user.
2.5.2.2 Routing to Groups
Group routing is the association of a single DID or line to a group. This enables a single fax to be sent to
multiple users. When the fax is received, the fax is sent to each member of the group.
To assign a DID to a group, run the Administration program and log in. Go to the User Administration
section using the View
⇨ User Administration menu. Select the group you wish to route to, rightclick
on it and select Modify Group. Change to the Routing tab. In the Identifier box, enter the DID string you
wish to route to this user.
To assign a line to a user (note that you cannot use line routing with VoIP or T1/PRI equipment), run
the Administration program and log in. Go to the User Administration section using the View
⇨ User
Administration menu. Select the user or group you wish to route to, rightclick on it and select Modify
User or Modify Group. Change to the Routing tab. Click the Line dropdown box and select the line you
wish to route to this user.
Proprietary FaxBack, Inc. 2014
48