Setting the install options, Setting up the voice mail server – CTL Lx-Lite VoiceSupport User Manual
Page 19
Setting Up the Voice Mail Server
Setting the Install Options
VoiceSupport LX System Guide
2-5
Chapter 2 Installation and Setup
Setting the
Install
Options
In order to complete the Voice Mail installation, certain options must be selected
and a numbering plan must be established for the extensions.
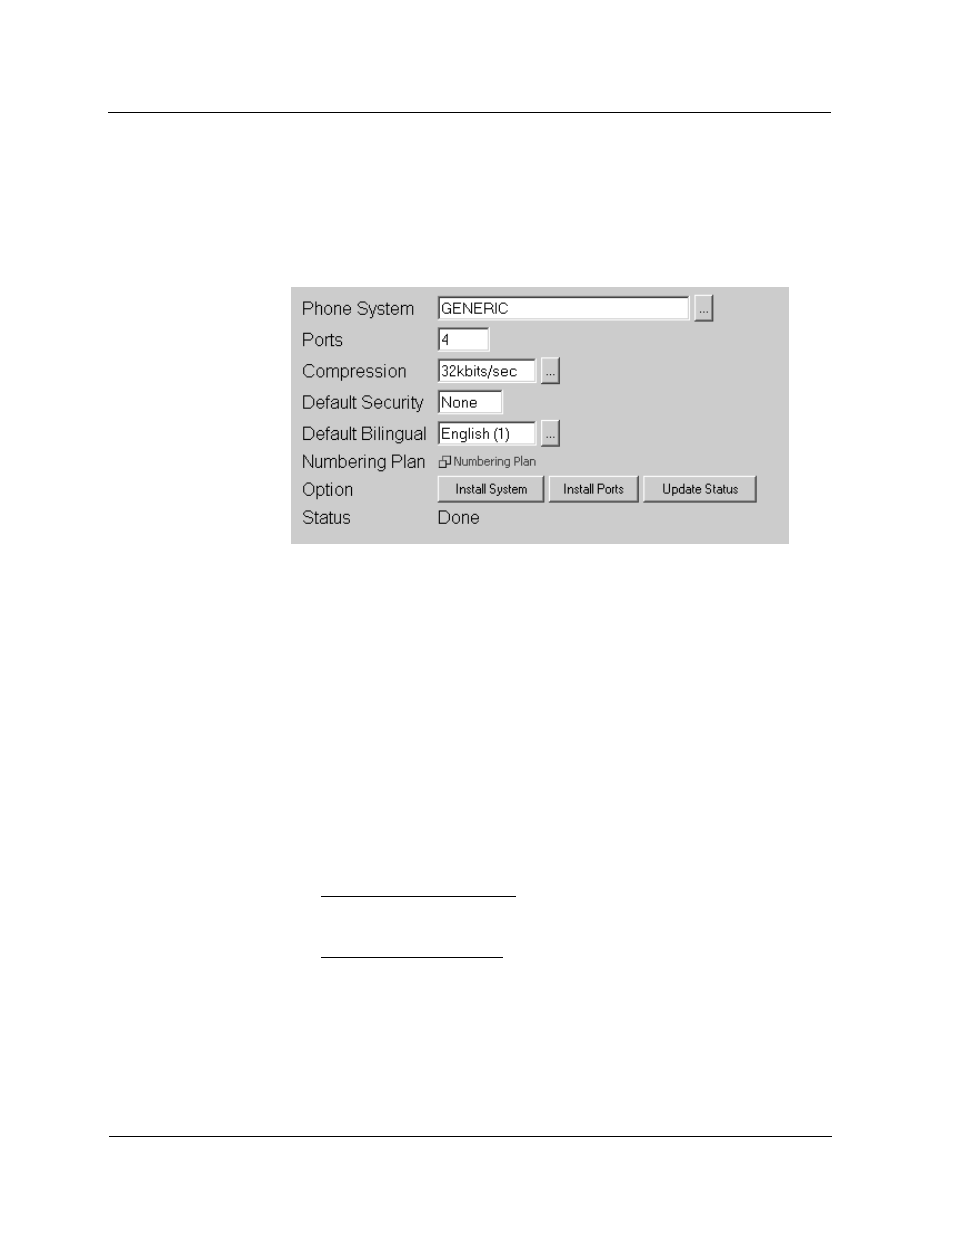
To customize the Install Options:
1) Select Install Options from the Installation section of the main menu. The
following screen is displayed:
2) Select or type in the desired options in the following fields:
■
Phone System - Scroll through the drop-down list and select the phone
system. If a Generic phone system is selected, integration strings must be
entered manually. See In-band Integration for a Generic Phone System.
■
Ports - Enter the number of ports that are active in the VoiceSupport LX.
■
Compression - Select one of the available compression rates - 32kbits/sec
or 24kbits/sec
■
Default Security - The first time you start up Voice Mail, a default security
code is automatically set up for each Subscriber mailbox. All subscribers
must use this code to log on to their mailbox for the first time. After initially
logging on, a subscriber can change the security code for his mailbox.
■
Default Bilingual - This identifies the language that Voice Mail uses for
system voice prompts played to an Auto Attendant caller or a caller
accessing the Voice Mail by dialing the Voice Mail extension. Two languages
are installed in your Voice Mail by default:
American English Mnemonic prompts the caller to use letters, such as:
To listen to a message, press L. This is the primary language and is
referred to as English 1.
American English Numeric prompts the caller to use numbers, such as:
To listen to a message, press 5. This is the secondary language and is
referred to as English 2.
■
Numbering Plan - All Subscriber extensions must be registered. See
Establishing a Numbering Plan for the Phone Extensions on page 2-6.