3 connecting the module to the network – Rockwell Automation DeviceNet Communications Module User Manual
Page 22
3-4
DeviceNet Communications Module
3.3
Connecting the Module to the
Network
Step 1. Remove power from the drive.
Step 2. Use static control precautions.
Step 3. Remove the drive cover.
Step 4. Connect a DeviceNet cable to the network and route it
through the bottom of the MD65 drive. DeviceNet thin
cable with an outside diameter of 6.9 mm (0.27 in.) is
recommended. (See figure 3.5.)
Important: Maximum cable length depends on data rate. Refer to
data rate
in the Glossary.
Step 5. Connect a 5-pin linear plug to the DeviceNet cable. Refer
to figure 3.2.
Note that a 10-pin linear plug is not supported. Use the
5-pin linear plug shipped with the module.
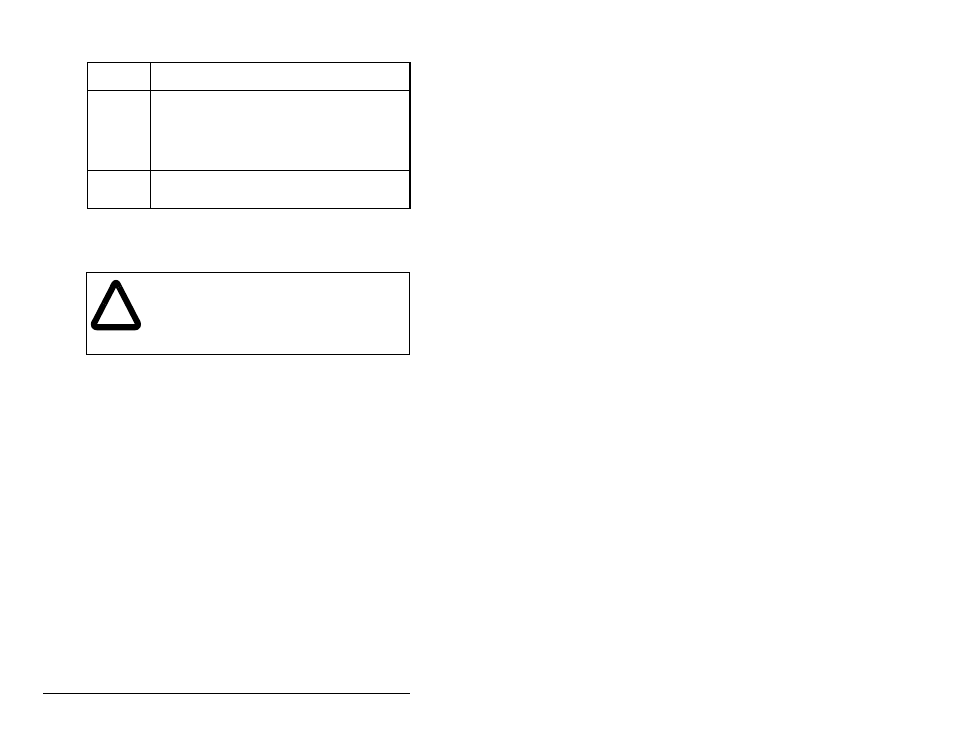
Table 3.3 – Jumper Settings for Single- or Multi-Drive Operation
Jumper
Setting
Description
Right
position or
jumper
missing
Sets the module for Single-Drive mode (default
setting) using a single drive connection.
Important: In this mode, connections to multiple
drives must be removed since all powered and
connected hosts will respond to any message sent by
the module.
Left position Sets the module for Multi-Drive operation mode using
up to 5 different drives. MDI peripherals do not
operate with the module in this mode.
!
ATTENTION: The drive may contain high voltages
that can cause injury or death. Remove all power
from the drive, and then verify power has been
removed before installing or removing a DeviceNet
module. Failure to observe these precautions could
result in severe bodily injury or loss of life.