Installing a remote i/o link – Rockwell Automation 1785-Lx0C15 ControlNet PLC-5 Programmable Controllers User Manual User Manual
Page 25
1785-UM022C-EN-P - February 2008
Installing Your ControlNet PLC-5 Processor
1-13
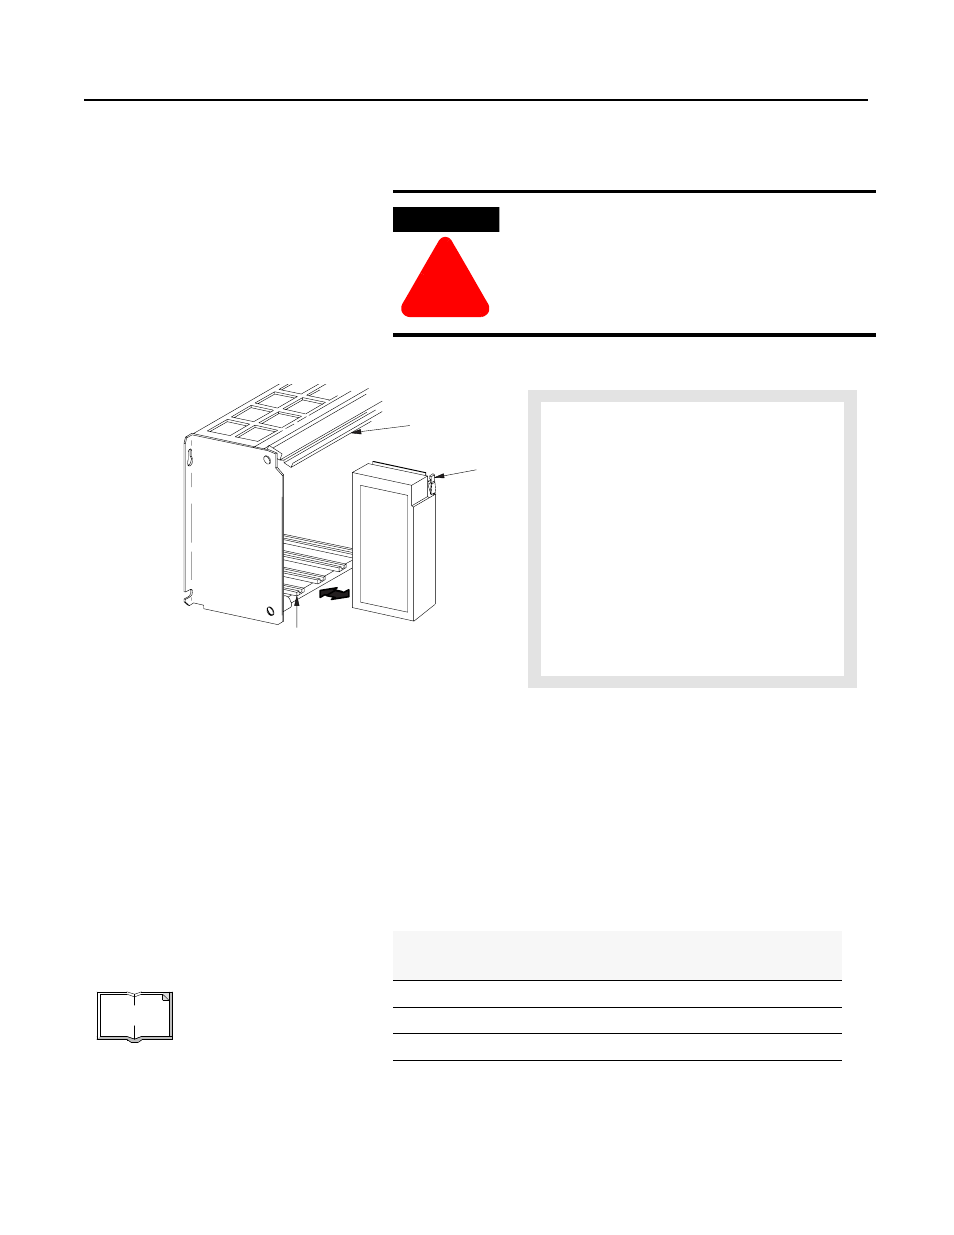
Inserting/Removing the Processor
into/from the I/O Chassis
To insert/remove the processor into/from the chassis, do the
following:
Installing a Remote
I/O Link
Install a remote I/O link using 1770-CD cable and either a
daisy-chain or trunk-cable/drop-cable configuration.
Verify that your system’s design plans specify cable lengths within
allowable measurements.
Important: The maximum cable length for remote I/O depends on
the transmission rate. Configure all devices on a remote
I/O link to communicate at the same rate.
Table 1.A Correct Cable Length Based on Communication Rate
For proper operation, terminate both ends of a remote I/O link by
using the external resistors shipped with the programmable controller.
Use either a 150
Ω or 82Ω terminator.
If you insert or remove the processor while
backplane power is on, an electrical arc can occur.
This could cause an explosion in hazardous location
installations. Be sure that power is removed or the
area is nonhazardous before proceeding.
WARNING
!
To insert a processor into the chassis:
1. Lift the locking bar and the ejector tab.
2. Slide the processor into the left-most slot of the
I/O chassis.
3. Press down on the ejector tab, and then close the
locking bar over the processor.
To remove a processor from the chassis:
1. Save processor memory.
2. Remove power to the processor-resident chassis.
3. Disconnect all cables from the processor's ports.
4. Lift the locking bar and the ejector tab, and then
slide the processor from the chassis.
Ejector
Tab
Locking
Bar
Card Guides
Trunk-cable/drop-cable considerations:
When using a trunk-cable/drop-cable
configuration, use 1770-SC station connectors
and follow these cable-length guidelines:
• trunk-cable length—depends on the
communication rate of the link; see Table
Table 1.A
• drop-cable length—30.4 m
(100 cable-ft) maximum
Important: When using a trunk-cable/
drop-cable configuration, set your
communication rate to 57.6K bit/s.
For more information about designing
trunk-cable/drop-cable configurations, see the
Data Highway/Data Highway Plus/Data Highway
II/Data Highway 485 Cable Installation Manual,
publication 1770-6.2.2.
MOR
E
A remote I/O link using this
communication rate:
Cannot exceed this cable length:
57.6K bit/s
3,048 m (approximately 10,000 ft)
115.2K bit/s
1,524 m (approximately 5,000 ft)
230.4K bit/s
762 m (approximately 2,500 ft)