Apple Compressor (4.1.2) User Manual
Page 14
Chapter 3
Simple transcoding
14
6
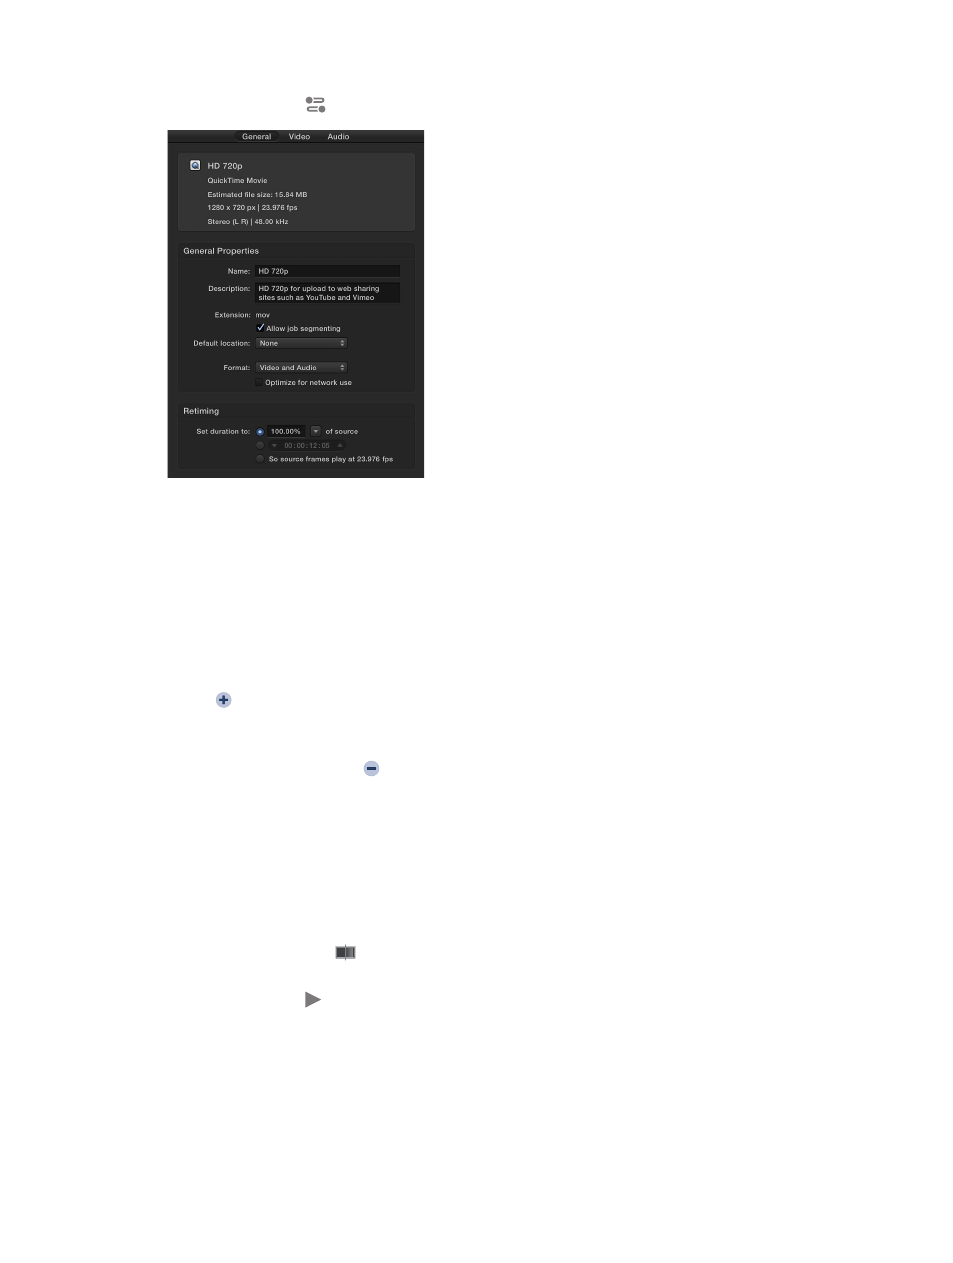
To view the properties of a setting, select an output row, and then open the inspector by clicking
the Inspector button
in the upper-right corner of the Compressor window.
Depending on the setting you’re viewing, general, video, and audio properties are displayed in
the inspector. For information about modifying these properties, see
on page 19.
Add and remove job outputs
You can add additional transcoding instructions to a job by adding one or more output rows.
You can also remove output rows.
Do one of the following:
m
To add an output row: Position your cursor over an output row in the job, and then click the Add
button that appears at the end of the row. Then, in the window that appears, select one or
more settings, choose a location, and click OK.
m
To remove an output row: Position your cursor over the output row that you want to remove, and
then click the Remove button that appears at the end of the row.
Preview how a transcoded file will look and sound
After you’ve set up a job, you can preview how your source file will look and sound after it has
been transcoded.
Note: Retiming and interlacing property adjustments (that you make in the Video tab of the
inspector) are not displayed in the transcoding preview.
1
In a job, select the output row that includes the setting you want to preview.
2
If the Comparison button
in the preview area isn’t already selected (highlighted blue), click it
to turn on comparison previewing.
3
Click the Play button .
The source file video plays on the left side of the preview area, and a preview of the transcoded
file plays on the right side. The transcoded audio plays through your computer speakers (or
through connected speakers).
In the preview area, you can also add markers, set a poster frame, or identify a portion of the
source file to transcode.
67% resize factor