Setting preferences, Figure 4 preferences dialog, 4 preferences dialog – HP M-series HA-Fabric Manager Software User Manual
Page 16
16
Using McDATA Web Server/McDATA Element Manager
Exiting McDATA Web Server or McDATA Element Manager
Select
File > Exit to exit the application session. Enter the password and click OK, if the fabric view file was
saved with a password.
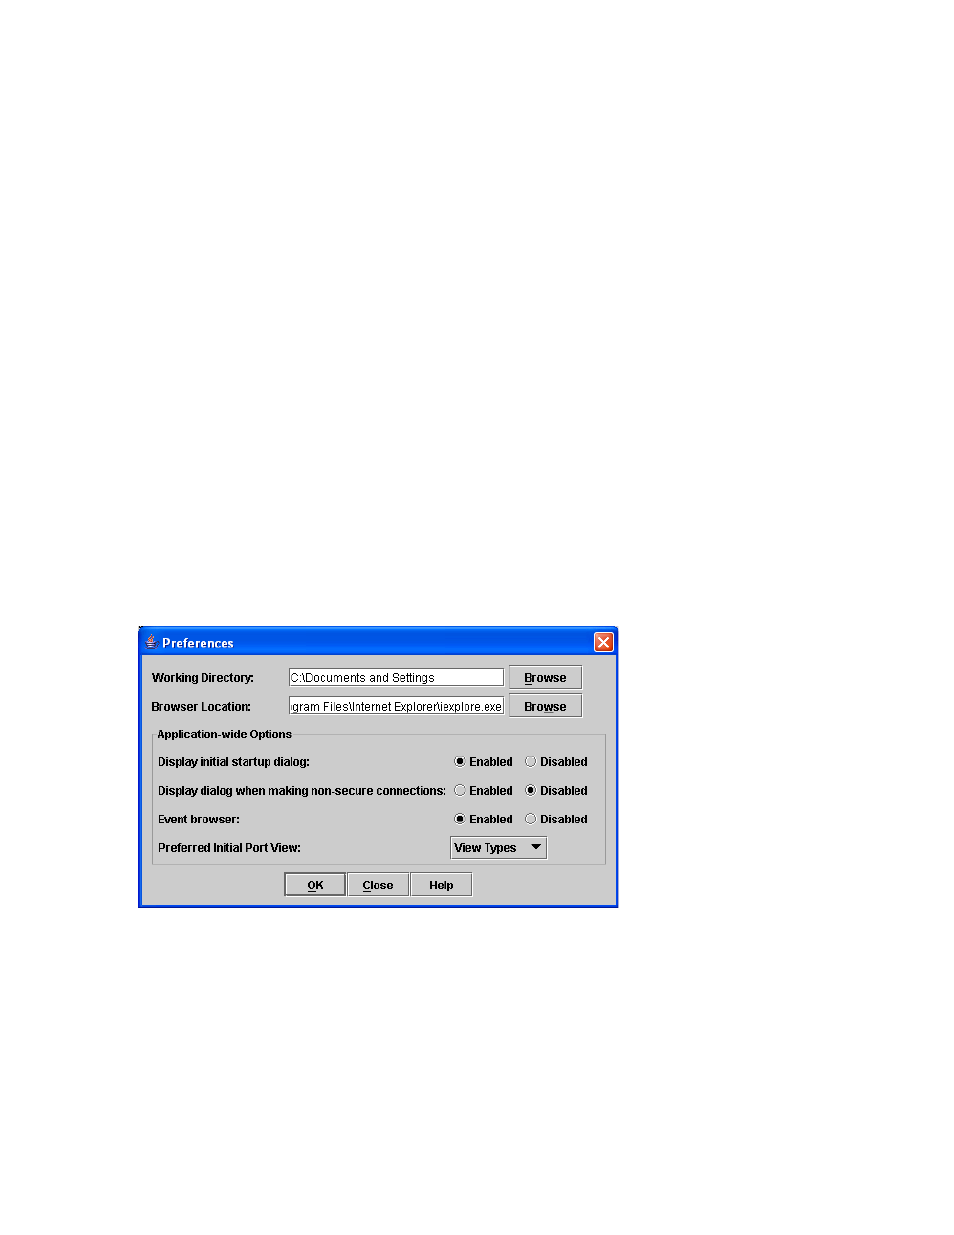
Setting preferences
You can customize the following preference settings for McDATA Web Server and McDATA Element
Manager:
•
Change the location of the working directory in which to save files.
•
Change the location of the browser used to view the online help.
•
Enable (default) or disable the use of the Initial Start Dialog at the beginning of a session. See ”
for information about the Initial Start Dialog. After a default fabric
view file is created, this setting has no effect.
•
Enable (default) or disable the Event Browser. See ”
Event Browser is enabled using the Preferences dialog as shown in
, the next time McDATA
Web Server or McDATA Element Manager is started, all events will be displayed. If the Event Browser
is disabled when McDATA Web Server or McDATA Element Manager is started and later enabled,
only those events from the time the Event Browser was enabled and forward will be displayed.
•
Choose the default port view when opening the faceplate display. You can set the faceplate to reflect
the current port type (default), port speed, port operational state, or port transceiver media. Regardless
of the default port view you choose, you can change the port view in the faceplate display by opening
the View menu and selecting a different port view option. See the corresponding subsection for more
information:
•
•
Displaying port operational states
•
•
Displaying transceiver media status
Figure 4
Preferences dialog
To set preferences, perform the following procedure:
1.
Select
File > Preferences to open the Preferences dialog.
2.
Enter or browse for paths to the working directory and browser.
3.
Choose the preferences you want in the Application-wide Options area.
4.
Click
OK to save the changes.