Creating and editing embroidery patterns – Brother PE-DESIGN Ver.6 User Manual
Page 55
Basic Operation
47
Creating and Editing Embroidery Patterns
3.
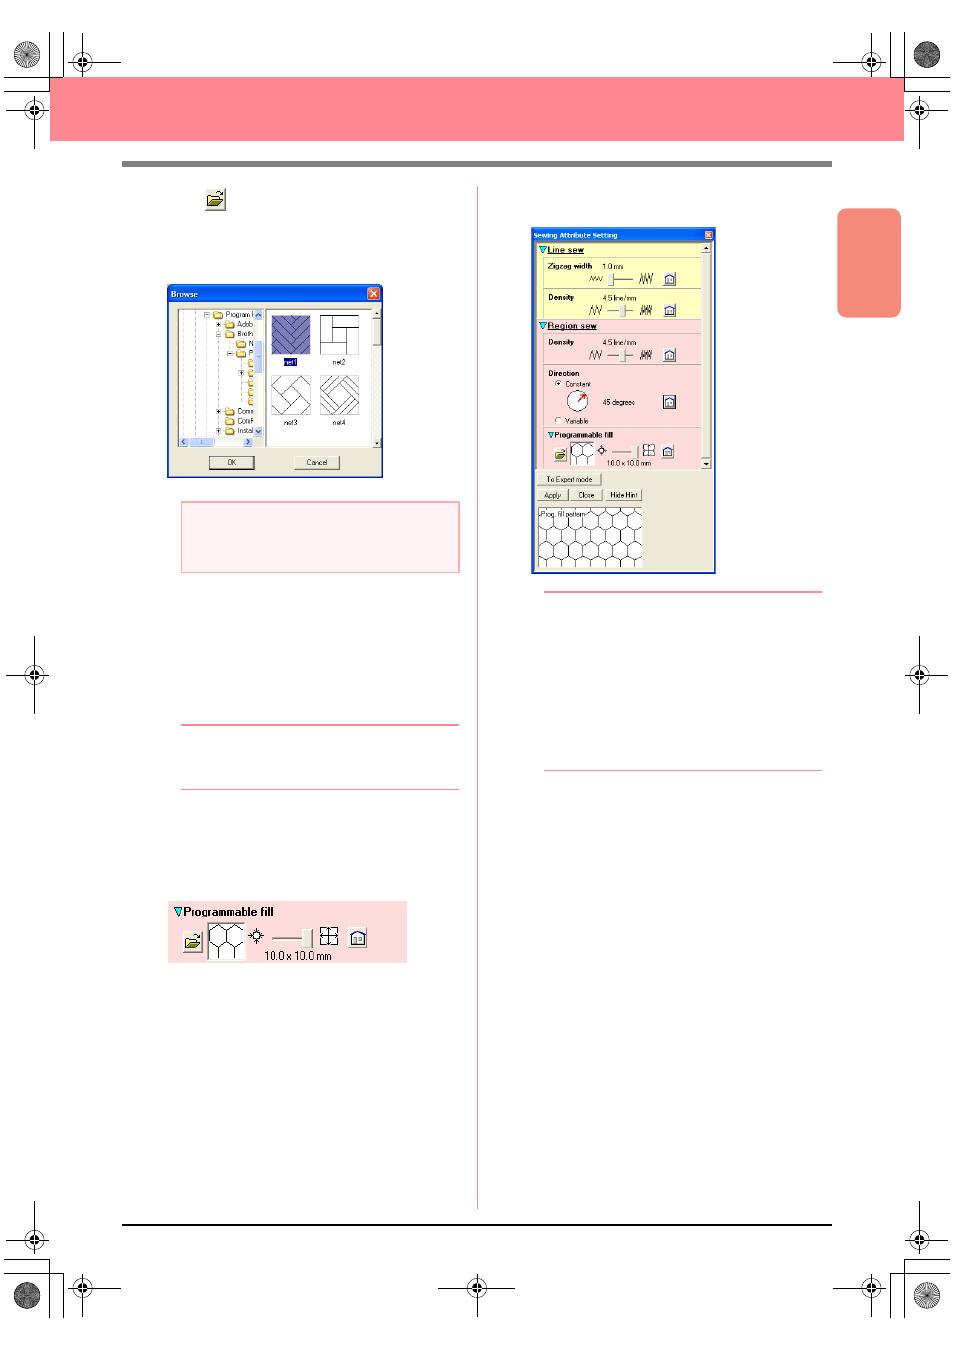
Click under
Programmable fill.
→ The Browse dialog box appears, allowing
you to preview and browse through the
existing programmable fill stitch patterns.
4.
From the stitch samples, click pat 07 to select
it, and then click OK.
→ The dialog box closes and a preview of
the selected stitch appears at the bottom
of the Sewing Attribute Setting dialog
box.
b
Memo:
Double-clicking the stitch pattern also selects
it and closes the dialog box.
5.
To change the size of the programmable stitch
pattern in Beginner Mode, set the size to 10
×
10 mm (0.30
× 0.30 inch) by moving the slide
to the right.
→ The Sewing Attribute Setting dialog box
appears as shown below.
b
Memo:
• The preview of the stitch pattern at the
bottom of the dialog box changes each
time a setting is changed. This allows you
to see how each setting affects the pattern.
• To separately change the width and height
of the stitch pattern, click To Expert
mode, and then type or select the desired
values in the appropriate boxes under
Programmable fill.
6.
To change the direction of the fill stitching,
click Constant under Direction, move the
pointer over the red arrow inside of the circle
under Constant, and then drag the red arrow
until 340 degrees is selected.
a
Note:
Only programmable fill stitch files, which
have the .pas extension, are listed.
PeDesignV6Eng.book Page 47 Thursday, July 8, 2004 11:59 AM