Automatically creating embroidery patterns, Step 2 opening an image file – Brother PE-DESIGN Ver.6 User Manual
Page 28
20
Automatically Creating Embroidery Patterns
Step 2
Opening an image file
First, we need to open the image that will be
converted into the embroidery pattern.
1.
Click Image on the menu bar, point to Input,
and then click from File on the submenu.
→ An Open an image file dialog box similar
to the one shown below appears.
2.
Double-click the ClipArt folder to open it.
3.
Select the sample file tulip.bmp in the ClipArt
folder.
b
Memo:
If the Preview check box is selected, the
contents of the selected file will appear in the
Preview box.
4.
Click Open to open the image file and to close
the dialog box.
b
Memo:
Double-clicking the file name also adds the
image to the work area and closes the dialog
box.
→ The image appears in the work area.
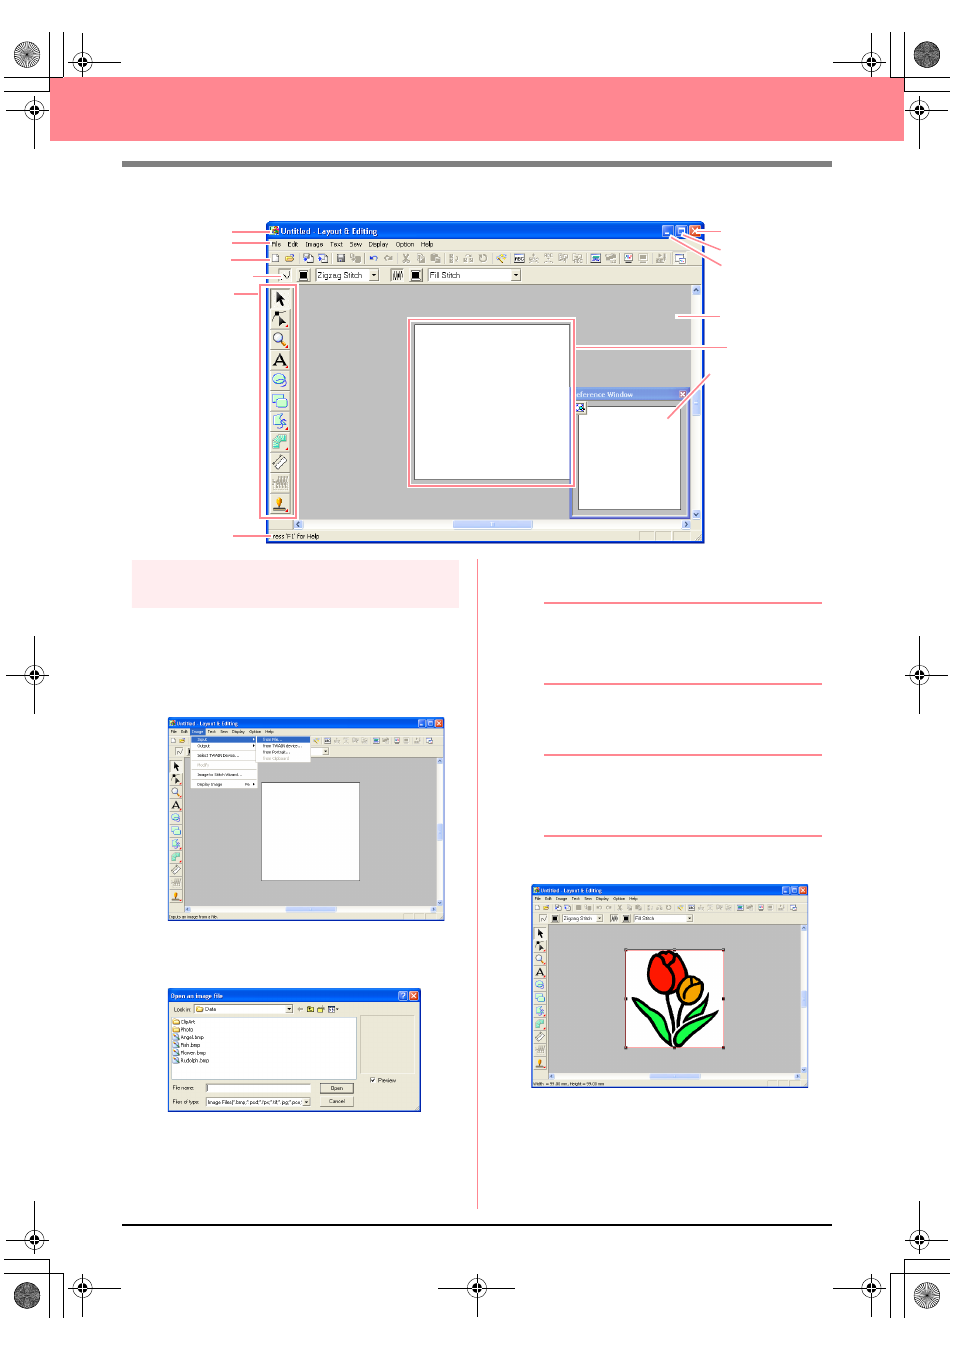
Menu bar
Toolbar
Sewing Attributes bar
Tool Box
Work area
Design Page
Status bar
Maximize button
Close button
Title bar
Minimize button
Reference Window
PeDesignV6Eng.book Page 20 Thursday, July 8, 2004 11:59 AM