Creating and editing embroidery patterns – Brother PE-DESIGN Ver.6 User Manual
Page 48
40
Creating and Editing Embroidery Patterns
1.
In Design Center, click File on the menu bar,
and then click Open.
→ An Open dialog box similar to the one
shown below appears.
2.
Select Design Center PEM File (*.PEM) in
the Files of type box, the sample file
Flower.pem in the Data folder, and then click
Open.
b
Memo:
If the Preview check box is selected, the
contents of the selected file will appear in the
Preview box.
→ The embroidery pattern is displayed in the
Design Page of Design Center.
3.
Click Option on the menu bar, and then click
Layout & Editing to display the Layout &
Editing window.
4.
In Layout & Editing, click File on the menu bar,
point to Import, and then click from Design
Center on the submenu.
An alternate method is to click the Toolbar
button indicated below.
→ The Import size dialog box appears.
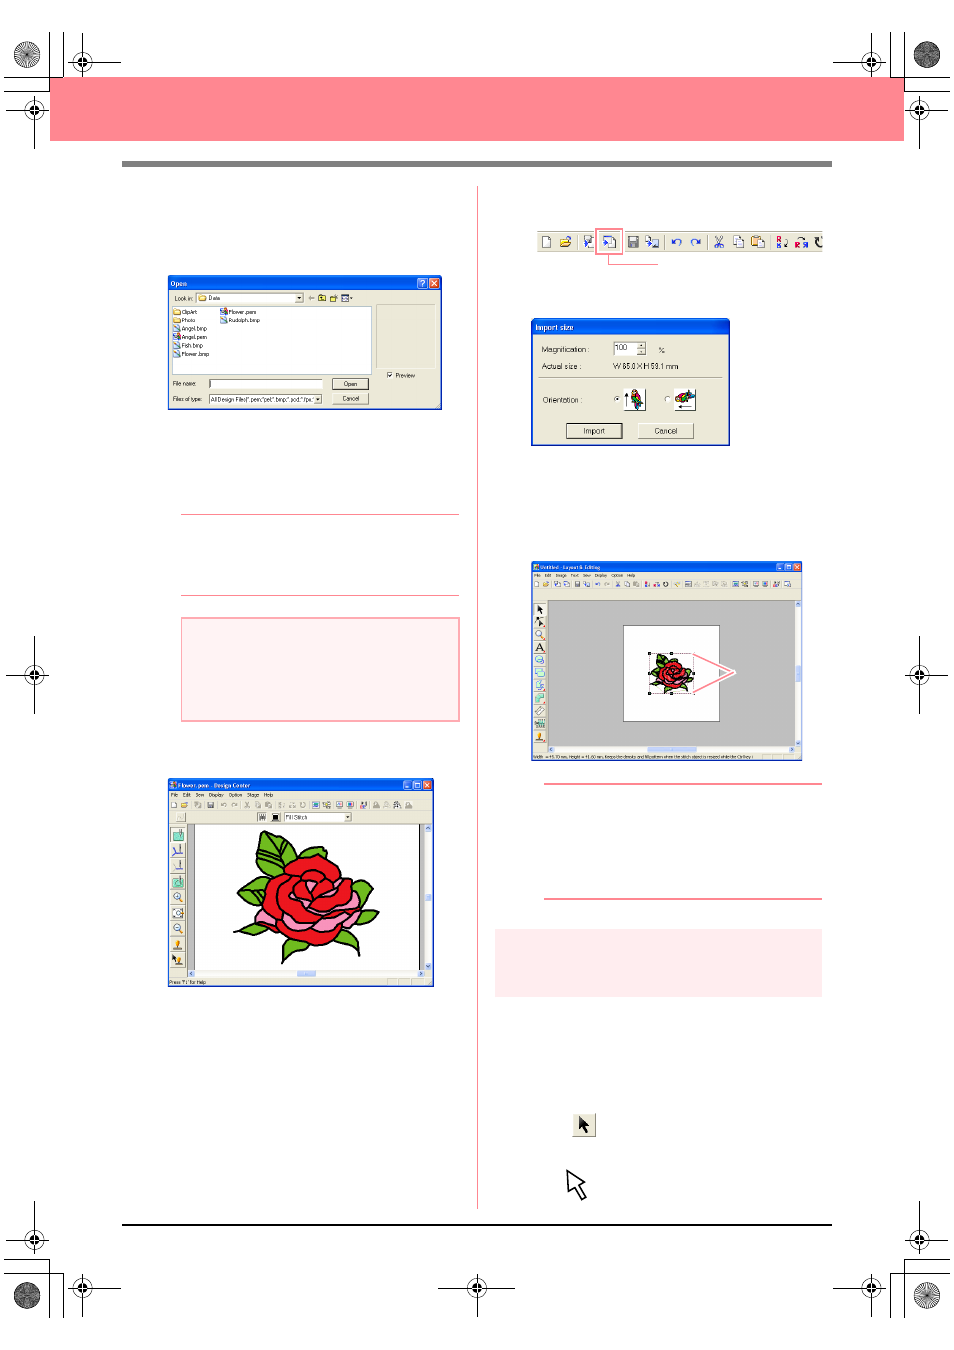
5.
In the Magnification box, type or select 70%,
and then c
lick
Import
.
→ The embroidery pattern is imported into
the Design Page of Layout & Editing.
b
Memo:
• The dotted line and the handles that
appear around the embroidery pattern
show that the pattern is selected.
• The status bar shows the dimensions
(width and height) of the selected pattern.
Step 2
Adjusting the size and position
of the embroidery pattern
When you import a pattern from Design Center,
Layout & Editing puts the pattern at the center of
the Design Page. We are now going to change the
size of the imported pattern and move it to a
different location.
1.
Click
on the Tool Box.
→ The shape of the pointer changes to
.
a
Note:
Be sure to select a .pem file saved in stage
4 (Sew Setting stage).
You cannot import another file type from
Design Center.
from Design Center
Handles
PeDesignV6Eng.book Page 40 Thursday, July 8, 2004 11:59 AM