Scr146.bmp, Layout & editing, If design center is selected – Brother PE-DESIGN Ver.6 User Manual
Page 134
126
Layout & Editing
Inputting Images and Embroidery Patterns
2.
Click Next.
→ A Cross Stitch Setting dialog box similar
to the one shown below appears.
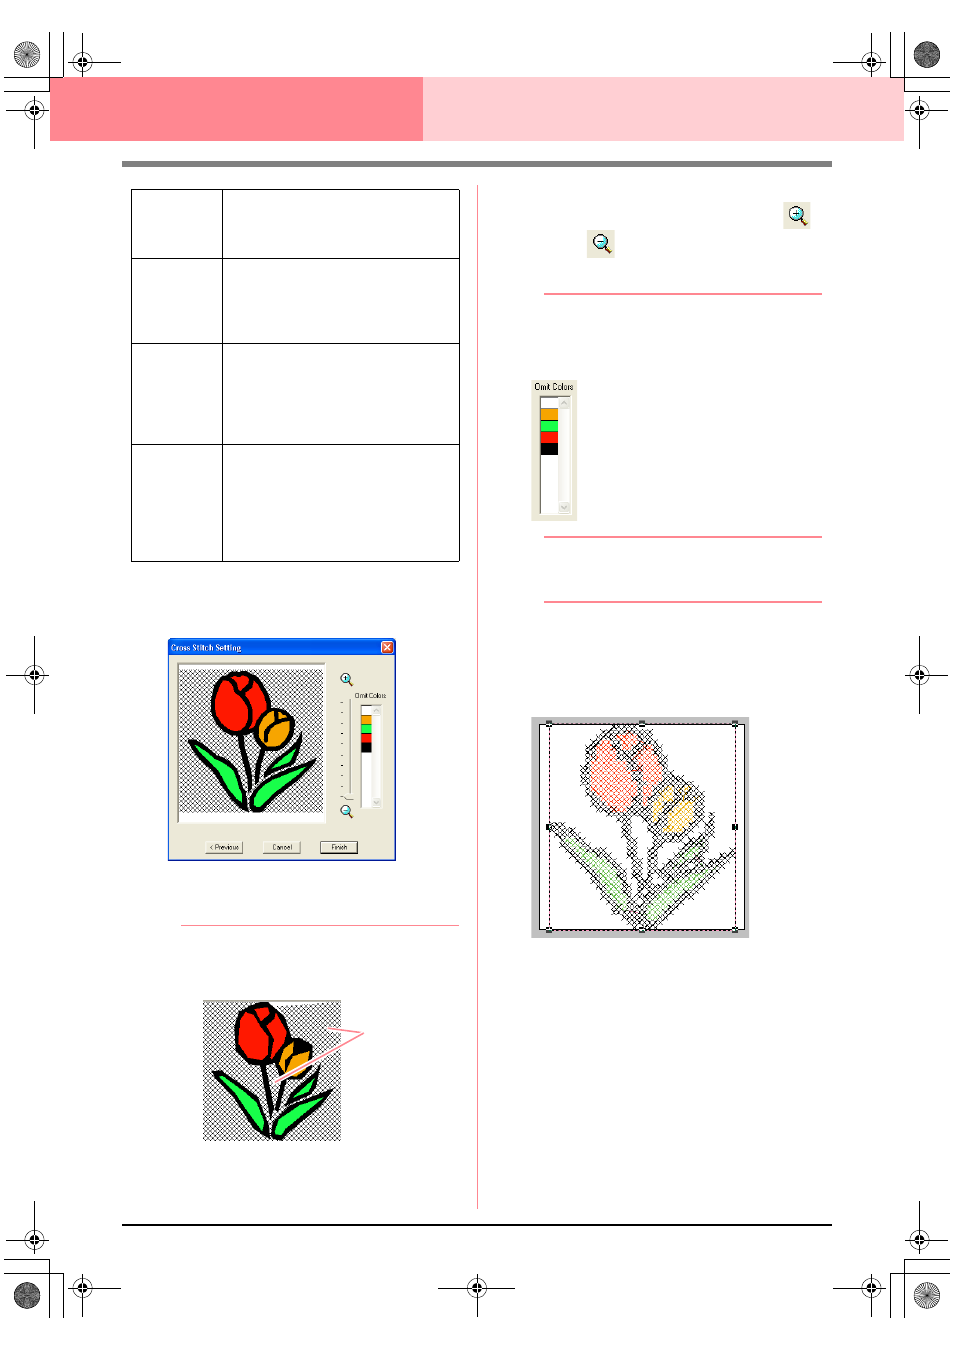
3.
In the image in the dialog box, click the areas
to select whether or not they are to be sewn.
b
Memo:
• Areas not set to be sewn are shown filled
with a crosshatch pattern.
• To adjust the zoom ratio that the image is
displayed in, move the slider between
and
.
• To return to the previous dialog box, click
Previous.
4.
If necessary, in the Omit Colors list, click the
colors to select whether or not they will be
sewn.
b
Memo:
Colors that are crossed out are set to not be
sewn.
5.
After selecting the desired settings, click
Finish.
→ The cross stitch pattern is created and
displayed in the Design Page.
■
If Design Center is selected
→ Design Center starts up, and a Design
Page is displayed with the image import-
ed into it. For details, refer to “Design
Center” on page 69.
Cross size
Sets the horizontal and vertical size of
the pattern.
Range: 1.5 to 5 mm (0.04 to 0.39 inch)
Default: 2.5 mm (0.08 inch)
Stitch times
Sets the number of times that the
pattern will be sewn. Sews twice per
time.
Range: Single, Double, Triple
Default: Single
Thread Chart
Selects the thread chart for selecting
the thread color.
The most appropriate thread color from
the selected thread chart is selected.
A user thread chart can also be
selected.
Max.
Number of
Colors
Sets the number of colors used in the
created pattern.
The embroidery pattern is created using
no more than the number of colors
specified.
Range: 2 to 50
Default: 8
These areas
will not be sewn.
!!
scr146.bmp!!
PeDesignV6Eng.book Page 126 Thursday, July 8, 2004 11:59 AM