Deleting points, Layout & editing – Brother PE-DESIGN Ver.6 User Manual
Page 145
Advanced Opreation
Layout & Editing
137
Layout & Editing
Editing Embroidery Patterns
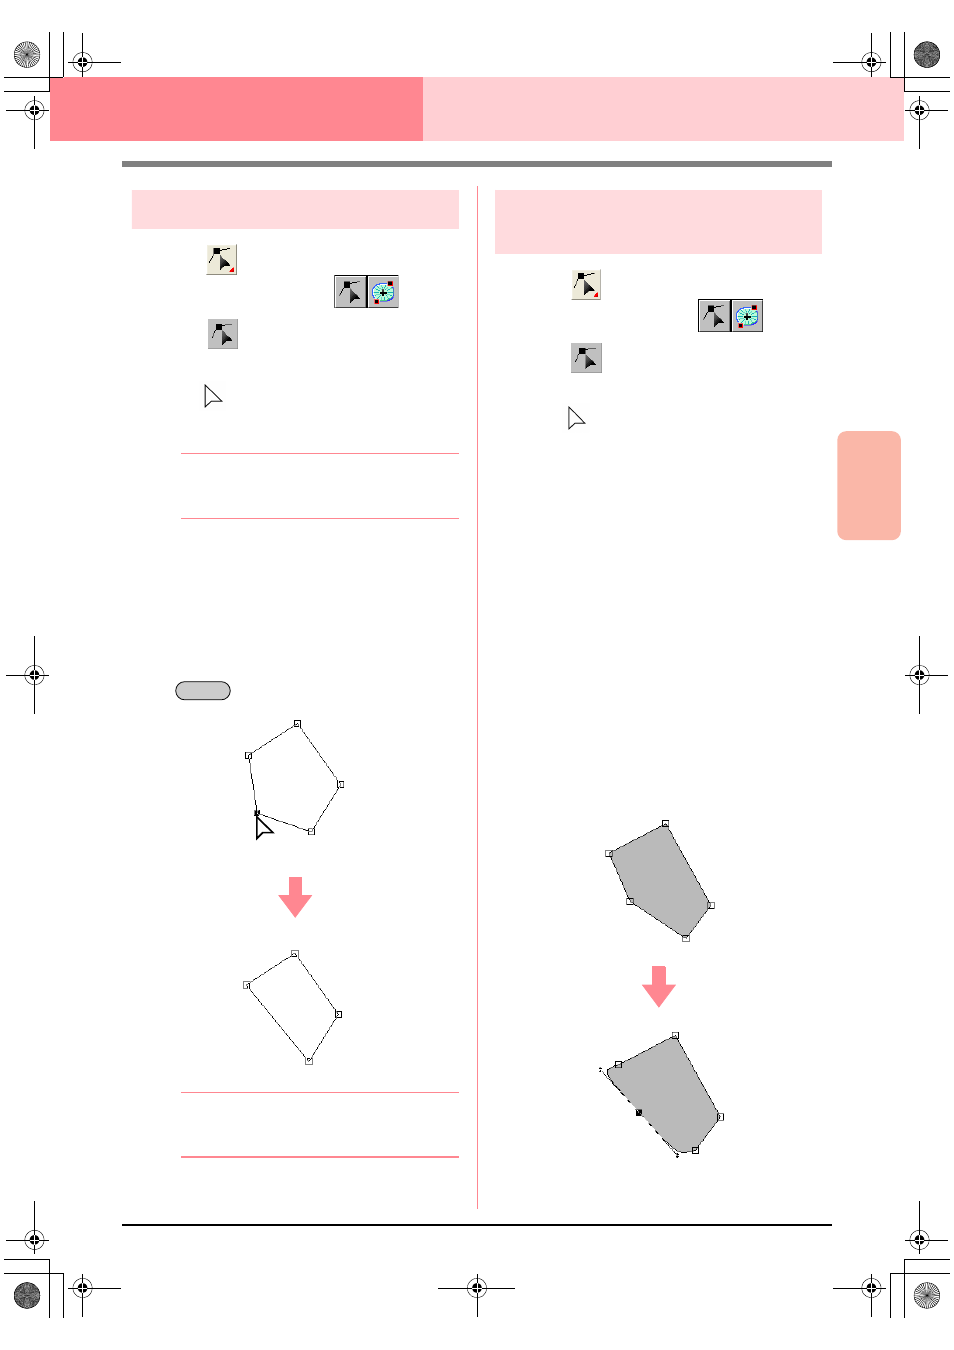
Deleting points
1.
Click
on the Tool Box.
→ Two buttons appear:
.
2.
Click .
→ The shape of the pointer changes to
.
3.
Click the pattern that you want to edit.
b
Memo:
The pattern can be a broken line, a curve, a
manual punching pattern, or stitch data.
→ The points in the pattern appear as small
empty squares.
4.
Click the point that you want to delete.
→ The selected point appears as a small
black square.
5.
Click Edit, then Delete, or press the
key to remove the point.
b
Memo:
If a point of a manual punching block pattern
was selected, the pair of points are deleted.
Transforming straight lines into
curves or curves into straight lines
1.
Click
on the Tool Box.
→ Two buttons appear:
.
2.
Click .
→ The shape of the pointer changes to
.
3.
Click the pattern that you want to edit.
→ The points in the pattern appear as small
empty squares.
4.
Click the point that you want to transform.
→ The selected point appears as a small
black square.
5.
To transform a straight line to a curve, click
Edit, then Change To Curve, or right-click the
point, and then click To Curve on the menu
that appeared.
To transform a curve to a straight line, click
Edit, then Change To Straight, or right-click
the point, and then click To Straight on the
menu that appeared.
→ A point on curve is transformed to a cor-
ner, and a corner point is transformed to a
point on a curve.
Delete
PeDesignV6Eng.book Page 137 Thursday, July 8, 2004 11:59 AM