Layout & editing, If cross stitch is selected – Brother PE-DESIGN Ver.6 User Manual
Page 133
Advanced Opreation
Layout & Editing
125
Layout & Editing
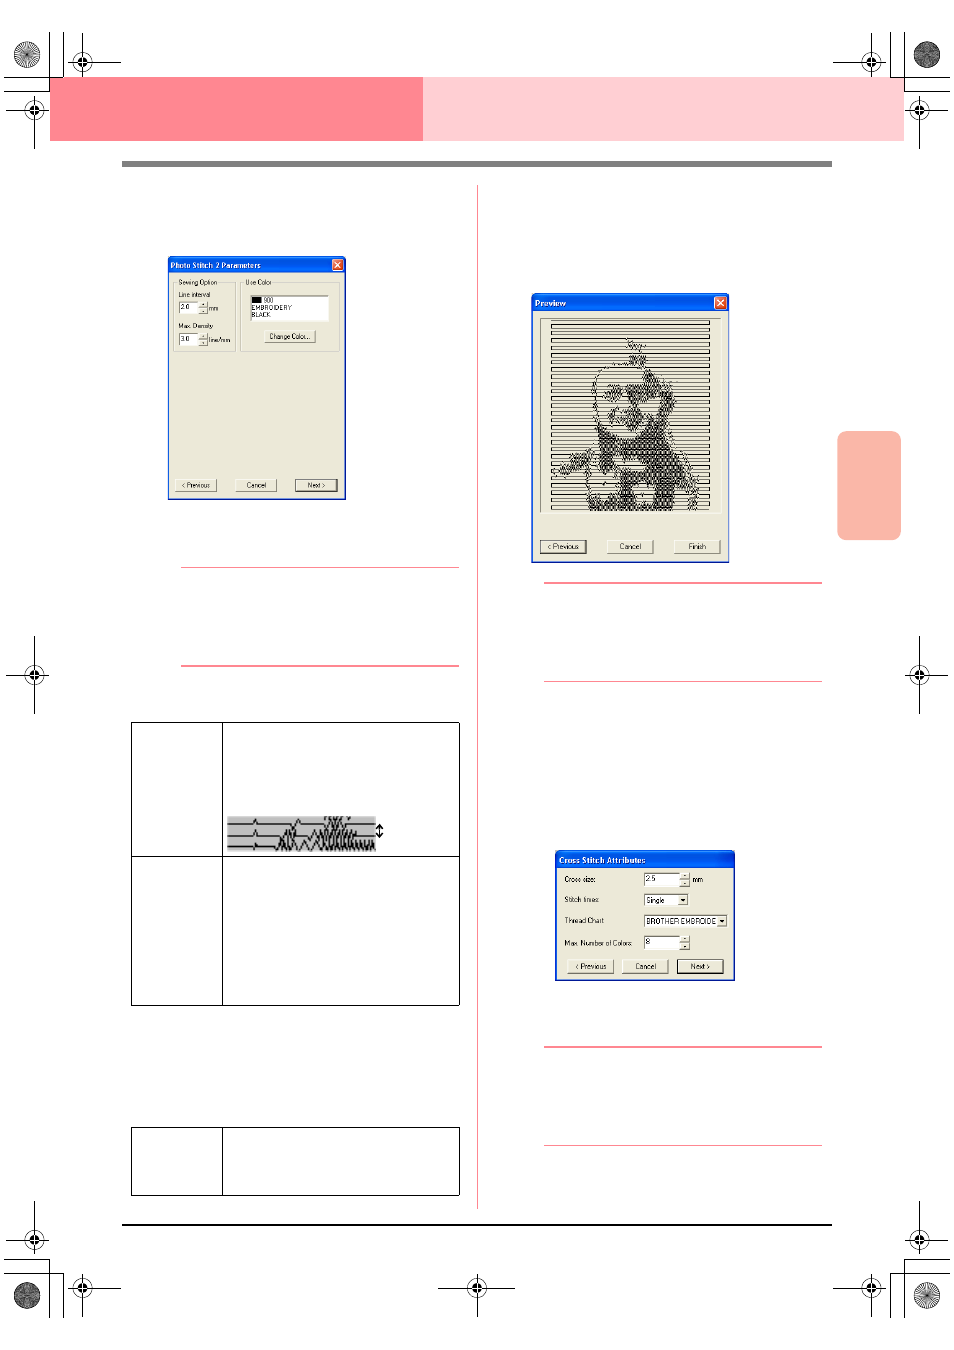
Inputting Images and Embroidery Patterns
5.
In the Gray Balance dialog box, click Next.
→ The Photo Stitch 2 Parameters dialog
box appears.
6.
Specify the settings for creating the
embroidery pattern.
b
Memo:
• To return to the previous dialog box, click
Previous.
• To quit the operation and close the dialog
box, click Cancel.
Sewing Option
Use Color
Specifies the color of thread used to create the
embroidery pattern.
The default setting is the darkest color in the
current thread chart.
7.
In the Photo Stitch 2 Parameters dialog box,
click Next.
→ A Preview dialog box similar to the one
shown below appears, allowing the creat-
ed embroidery pattern to be previewed.
b
Memo:
• To return to the previous dialog box, click
Previous.
• To quit the operation and close the dialog
box, click Cancel.
8.
Click Finish.
→ An embroidery pattern is created and dis-
played in the Design Page.
■
If Cross Stitch is selected
→ The Cross Stitch Attributes dialog box
appears.
1.
Specify the settings for creating the
embroidery pattern.
b
Memo:
• To return to the previous dialog box, click
Previous.
• To quit the operation and close the dialog
box, click Cancel.
Line Interval
Specifies the interval between parallel
lines used to create the embroidery
pattern.
Range: 1.2 to 5 mm (0.05 to 0.2 inch)
Default: 2 mm (0.08 inch)
Max. Density
Specifies the maximum density for
areas of the created embroidery pattern
sewn with the zigzag stitch. The
embroidery pattern will be created with
a density smaller than that set here.
Range: 2.5 to 5 lines per mm (64 to 127
lines per inch)
Default: 3 lines per mm (76 lines per
inch)
Change
Color
Click this button to open the Thread
Color dialog box, which lets you select
the thread color used in the embroidery
pattern.
Line interval
PeDesignV6Eng.book Page 125 Thursday, July 8, 2004 11:59 AM