2 install the new psu, Figure 4-9: psu bottom panel screws – Maple Systems PC419C User Manual
Page 71
Page 59
1010-1023, Rev 00
Step 5:
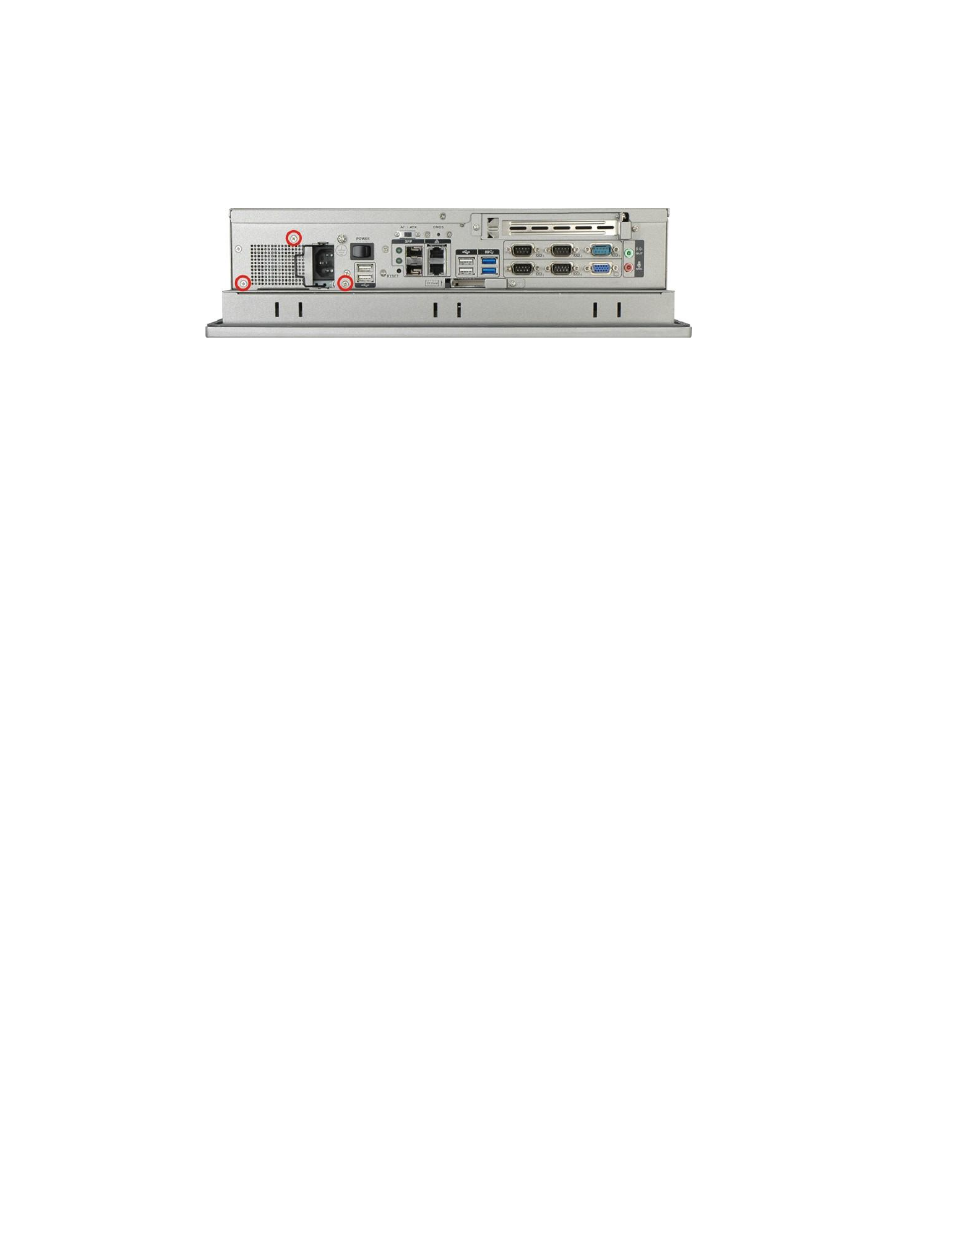
Remove the retention screws that connect the PSU bracket to the chassis
(
Figure 4-9: PSU Bottom Panel Screws
Step 6:
Remove the retention screws that connect the PSU to the PSU bracket.
Step 0:
4.6.2 Install the New PSU
Installation is done in the reverse order to removal. To install a new PSU module, please
follow the steps below:
Step 1:
Attach the PSU bracket to the PSU module with the previously removed
retention screws.
Step 2:
Insert the PSU module and bracket assembly into the chassis and attach the
PSU bracket to the chassis with the previously removed retention screws.
Step 3:
Secure the PSU module to the chassis by reinserting the previously removed
retention screws through the bottom panel.
Step 4:
Bundle the cables of the new PSU module and secure them with a plastic tie
similar to the old PSU module.
Step 5:
Reconnect all previously disconnected power connectors to the motherboard
and disk drives.
Step 6:
Reattach the elevated platform.
Step 7:
Replace the back cover.
Step 0: