Acroprint timeQplus (software version 4.x and above) User Manual
Page 59
timeQplus Administrator Functions
06-0414-000 Rev. B
55
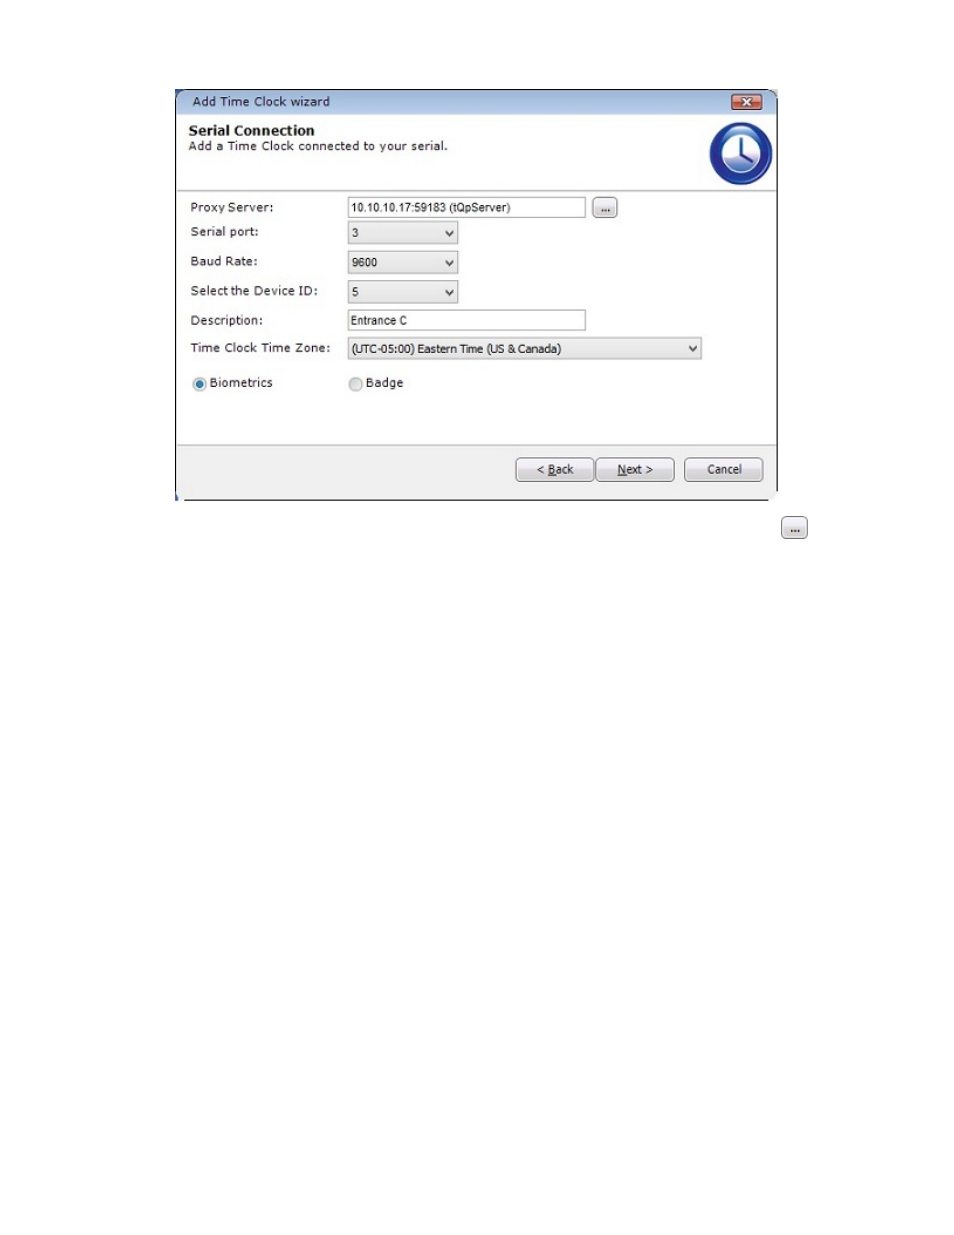
• The Proxy Server field defaults to the tQp Server machine. Click the search button
and
select the proxy server designation for the computer to which this time clock is physically
connected.
• Select the correct values for Serial port, Baud Rate, Device ID, Time Zone, and Time Clock type.
• Enter a description, which is optional, but recommended. A description such as "Front Lobby" or
"Production Entrance C" can be useful if you have a number of connected Time Clocks.
• Click
the
Next button to continue.
• The "Test Connection" window will appear and indicate if the Time Clock was successfully
connected to timeQplus. If so, click the Next button. If not, click the Back button to review the
setup information on the previous window and try again or click Cancel to exit the wizard and
diagnose the problem.
• When a successful connection is made, the next window will ask if you want to Clear
Transactions (aka punches) on this Time Clock. To clear transactions, check the "Clear device
transactions…" box and click the Next button.
• The "Clear Users" window will ask if you want to delete all existing users on this Time Clock. To
delete all users, click the Clear users button; otherwise, click the Next button to continue
• On the last screen, although not required, performing a manual poll is recommended as noted.
Click the Finish button to exit the wizard. This Time Clock should now be listed on the “Comm
Port (RS232)” tab.