Acroprint timeQplus (software version 4.x and above) User Manual
Page 13
timeQplus Administrator Functions
06-0414-000 Rev. B
9
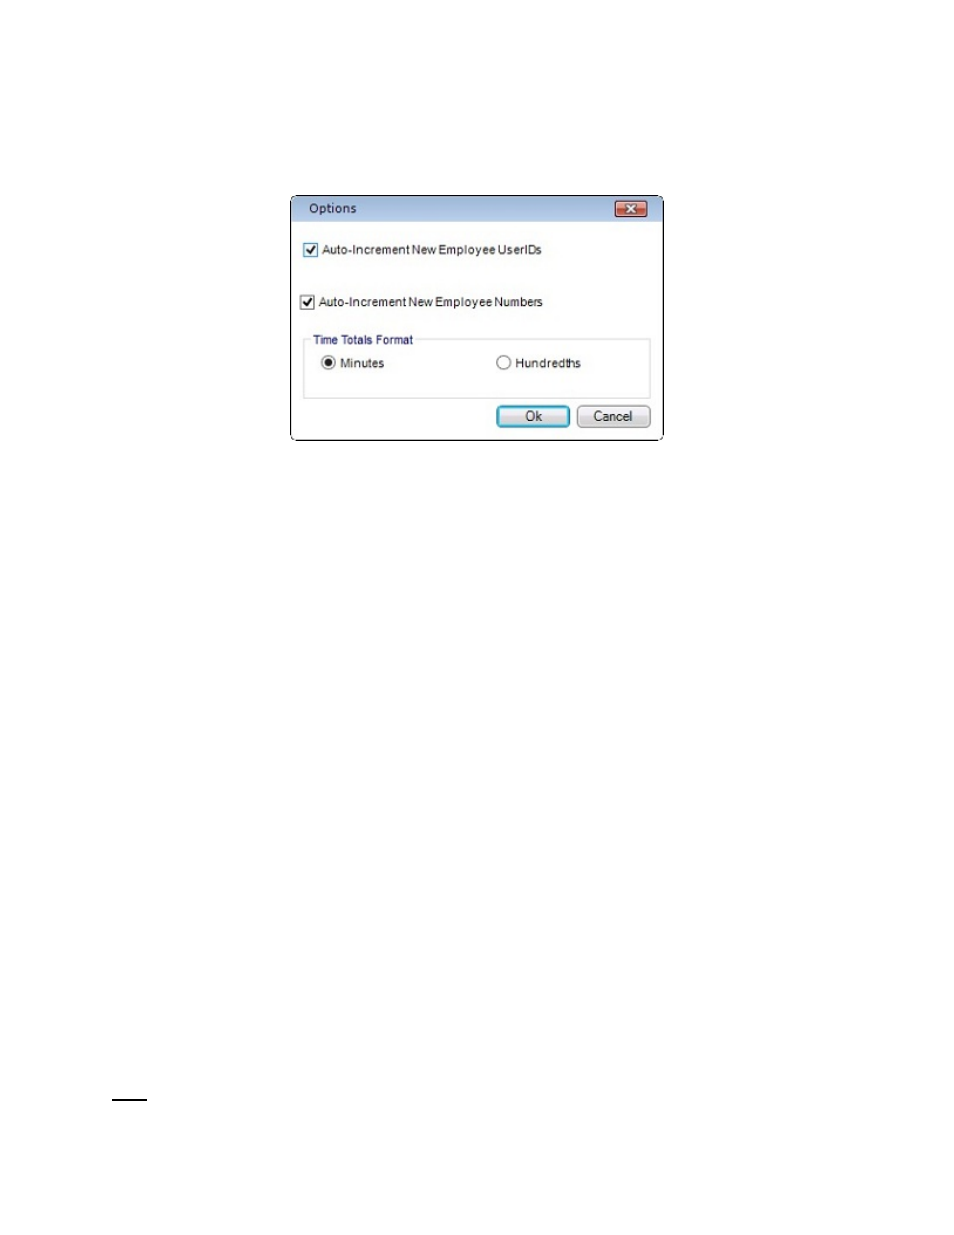
Employee Options
The Employee Options feature allows an administrator to determine the format of time totals viewed by
employees using the Virtual Clock. Time can be displayed in either minutes or hundredths. Employee
Options also allows employee UserIDs and Numbers to be auto incremented when adding new
employees to timeQplus.
To Change Employee Options:
• Click
File on the top menu bar and choose Employee Options.
• Select your preference for Time Totals Format. You may choose to display time totals in minutes
or hundredths.
• To have the software automatically increment new employee UserIDs, check the Auto Increment
New Employee UserIDs box.
• To have the software automatically increment new employee Numbers, check the Auto Increment
New Employee Numbers box.
• Click
Ok when done. To exit without saving changes, click Cancel.
Employee Finger/Face/Hand Enrollment
Collecting, enrolling, and assigning an employee’s Finger, Face, or Hand on a Time Clock is a three
step process.
1. Collect the employee’s Finger/Face/Hand template on the Time Clock.
• For detailed instructions, refer to the TQ600 User Manual for finger templates, the
TQ600F User Manual for face templates, and the Hand Punch User Manual for hand
templates. These documents can be found under Documentation on the top menu bar.
• You will need to know the User ID assigned to the employee in timeQplus. You may find
it helpful to print an Employee Profiles report to ensure you record the templates with
the correct USER ID.
2. Associate the template with the employee record in the software.
• On
the
Employees screen, select the row containing the employee’s name.
• Click the appropriate Enroll or Remove button and follow the on-screen instructions.
3. Assign the employee to additional Time Clocks.
• On
the
Time Clock screen, select the Time Clock the employee will be using to punch.
If using a hand punch, click the Hand Punch tab and select the appropriate time clock.
• Select the employee’s name in the Unassigned Employees list and click the right-
pointing arrow button to move that employee’s name to the Assigned Employees list.
Click the Save button to save the assignment.
Note: Employees can be assigned to and are able to punch at multiple Time Clocks.