Warning – Wavetronix Click 500 (programmable controller) (CLK-500) - User Guide User Manual
Page 71

70
CHAPTER 8 • CLICK 511
the primary communication.
The RS-232 DB-9 port on the front of the module is used when interacting with a computer
for upgrades or to reprogram the unit.
Warning
With older versions of the Click 500 series module, it is necessary to remove pin 4
from the serial cable to prevent the device from going into Program mode. If it enters
Program mode, all of the faceplate LEDs will turn off, and power will need to be cycled
on the device.
The other two communication ports can be accessed via the screw terminal blocks on the
top of the device. However, in many Click 511 applications, these ports are unused. The first
block has -485, +485 and two ground screw terminals for wiring RS-485 communication.
The RS-485 communication lines of this block are physically connected to the RJ-11 jack on
the front of the module. The second block has a -232, +232 and two ground screw terminals
for wiring RS-232 communication.
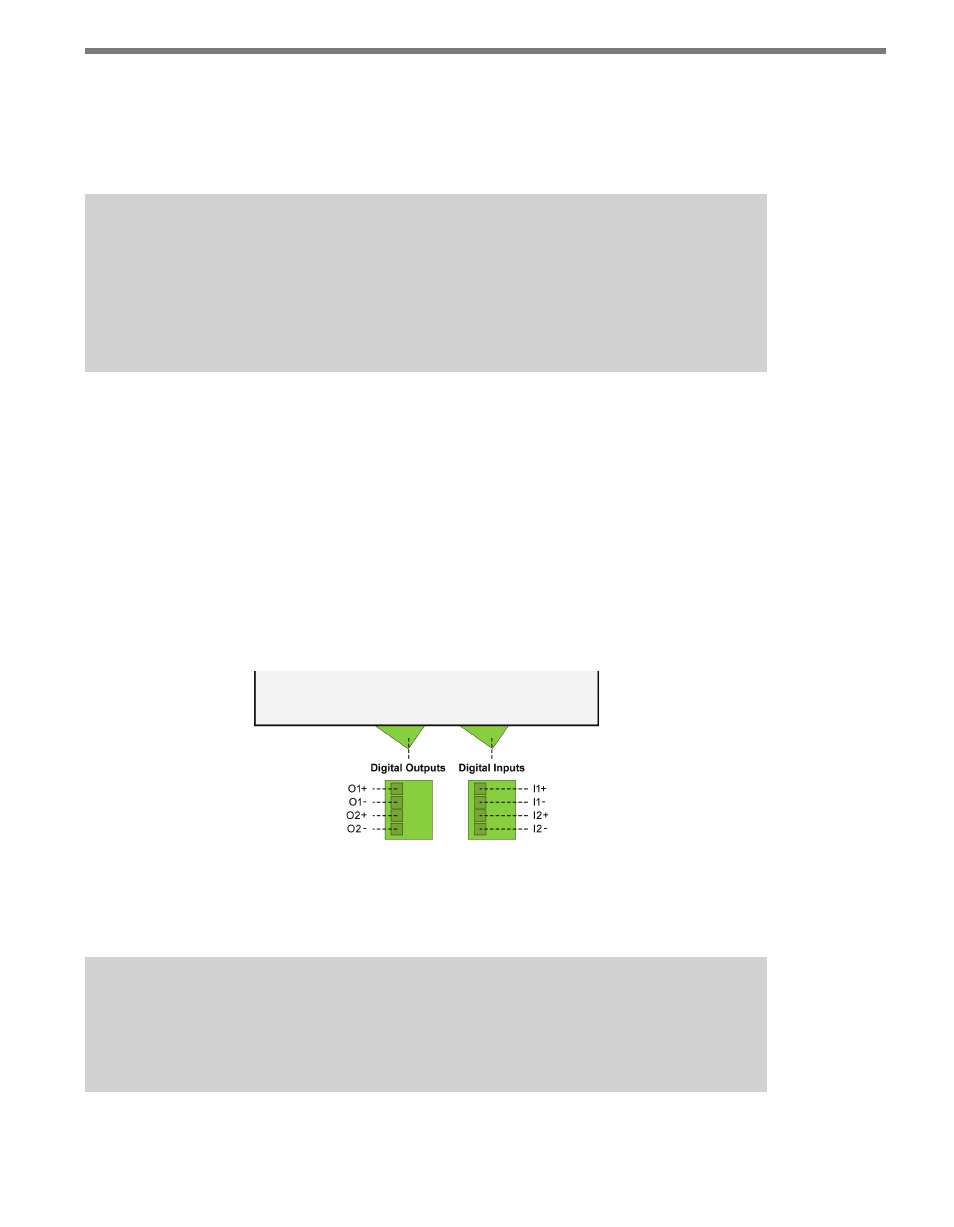
The standard Click 511 application uses the two digital input ports located on the bottom
of the module (see Figure 8.4). The digital inputs are near the front of the module and the
digital outputs are near the back. When connected, I1+ is on the far left side of the device
and I2- is on the far right side.
Figure 8.4 – Click 511 Digital Inputs and Outputs
The Click 511, as a Click 500 series module, has two DIP switches on the left side of the
module. The DIP switches are used to program or reprogram the unit.
Note
For standard Click 511 applications SW1:2 and SW2:2 should be on (the other switches
should be off).
