Place database fields on a label – QuickLabel Designer Pro User Manual
Page 148
- 148 -
3. Click on the Next button.
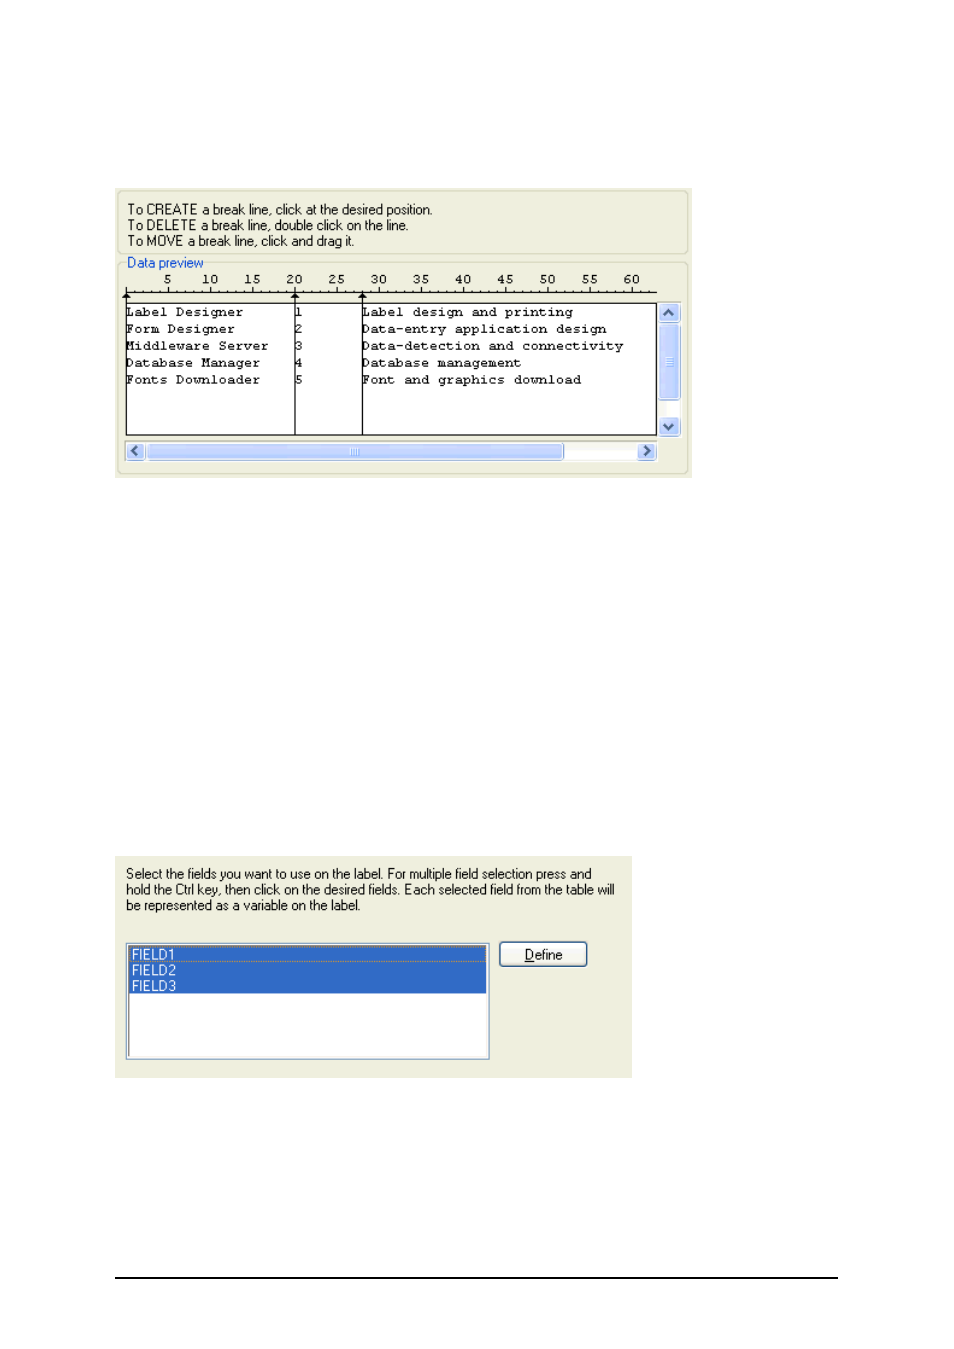
4. Define the widths of the individual columns by placing a break line before the second col-
umn and before the third column.
Defining the fields in the text database
5. Click on the Next button.
6. Accept the default field names and click on the Next button.
7. Review the text database structure. The field names and their maximum lengths are dis-
played. Click on the Finish button to close Text File Wizard.
The link to the database has been created and database fields are available on the label.
The labeling software brings you back to the Database Wizard.
Place Database Fields on a Label
The next step in the Database Wizard opens the dialog box with the list of available fields from the
database.
1. By default all fields from the database will be used on the label. Click on the Next but-
ton.
Using all fields in the text database
2. Specify what records and how many you want to print:
Select the options I want to select which record to print and I will enter label quan-
tity for each selected record. Before printing labels, the table with the records will open