QuickLabel Designer Pro User Manual
Page 108
- 108 -
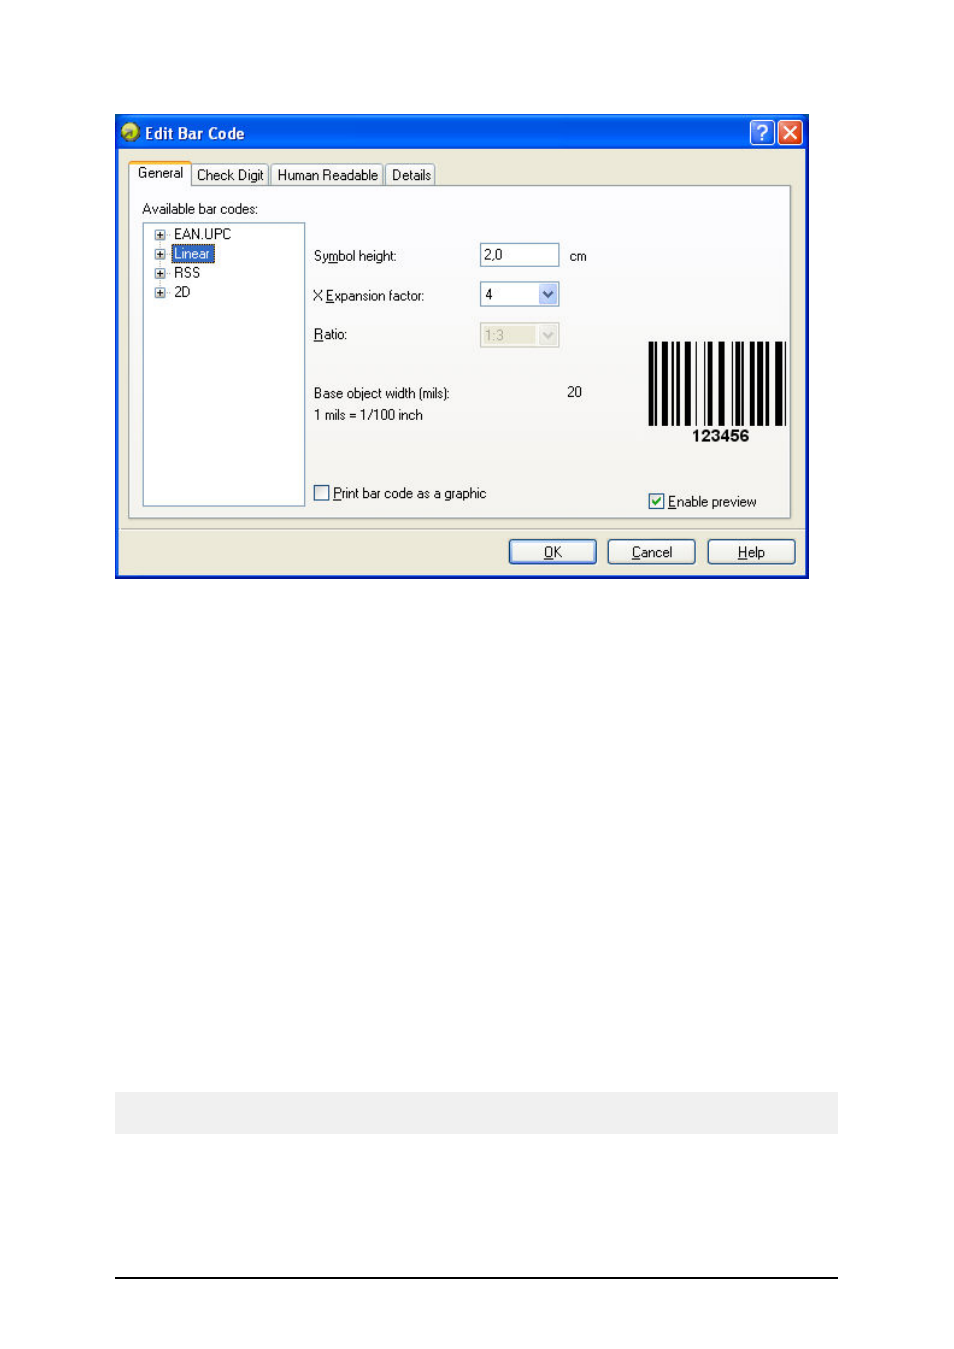
Edit bar code dialog box – General tab
Type of bar code: The required bar code symbology is selected from the tree list of available bar
codes.
Symbol height: The height dimension of a bar code can be specified either by entering a value here
or by resizing the bar code symbol directly on the label.
Narrow bar width: The width of the narrowest bar in the bar code. This is the base bar width. The
widths for all wider bars are calculated by the formula: 'narrow bar width' * 'ratio'. The result of the
formula must be a whole number (it represents number of pixels).
Ratio: This is the ratio between narrowest and widest bar in the bar code. The ratio is locked for
majority of bar codes and you cannot change it. However, for some bar codes you can change it and
adjust the bar code size to your needs.
Space correction: Enable this option to insert additional white pixels for each white space in the bar-
code. The option is useful for InkJet printers where the ink can spill out and you need an extra space
between bars for the reader to decode the bar code properly.
Base object width: Shows the width of a narrowest bar in the bar code.
Print bar code as graphics: Select this option to convert the bar code object into the image and sent
to the printer as image. If not selected, the bar code will print as printer internal object. Printing bar
codes as internal printer objects will speed up label printing, because less data must be transferred to
the printer.
Note: To disable the option Print bar code as graphics, you must use the printer drivers that ship with
the software, NiceDrivers.
Enable preview: Enable this option to see the preview of the selected bar code type. The preview
will show on the right side of the dialog box.