Cub Cadet ISeries User Manual
Page 52
DRIVE SYSTEM-IVT
46
5.
Insert the main shaft into the hole for the left hex
bushing by sliding it through the slot.
See Figure 5B.57
NOTE: Do not install the hex bushing at this
point. It will cause the main shaft to bind while
working on the right side of the tractor.
6.
Swing the rear of the drive pedal shaft support
bracket into place.
7.
Install the rear screw on each side of the drive
pedal shaft support bracket. See Figure 5B.58
8.
Slide the drive pedal bracket onto the main
shaft.
NOTE: Do not install the roll pins at this point.
9.
Install the reverse pedal support.
10.
Install the hair pin clip, washer and hex bushing
on the right side of the main drive pedal shaft.
See Figure 5B.59
11.
Secure the drive pedal bracket to the main shaft
by driving the two roll pins.
12.
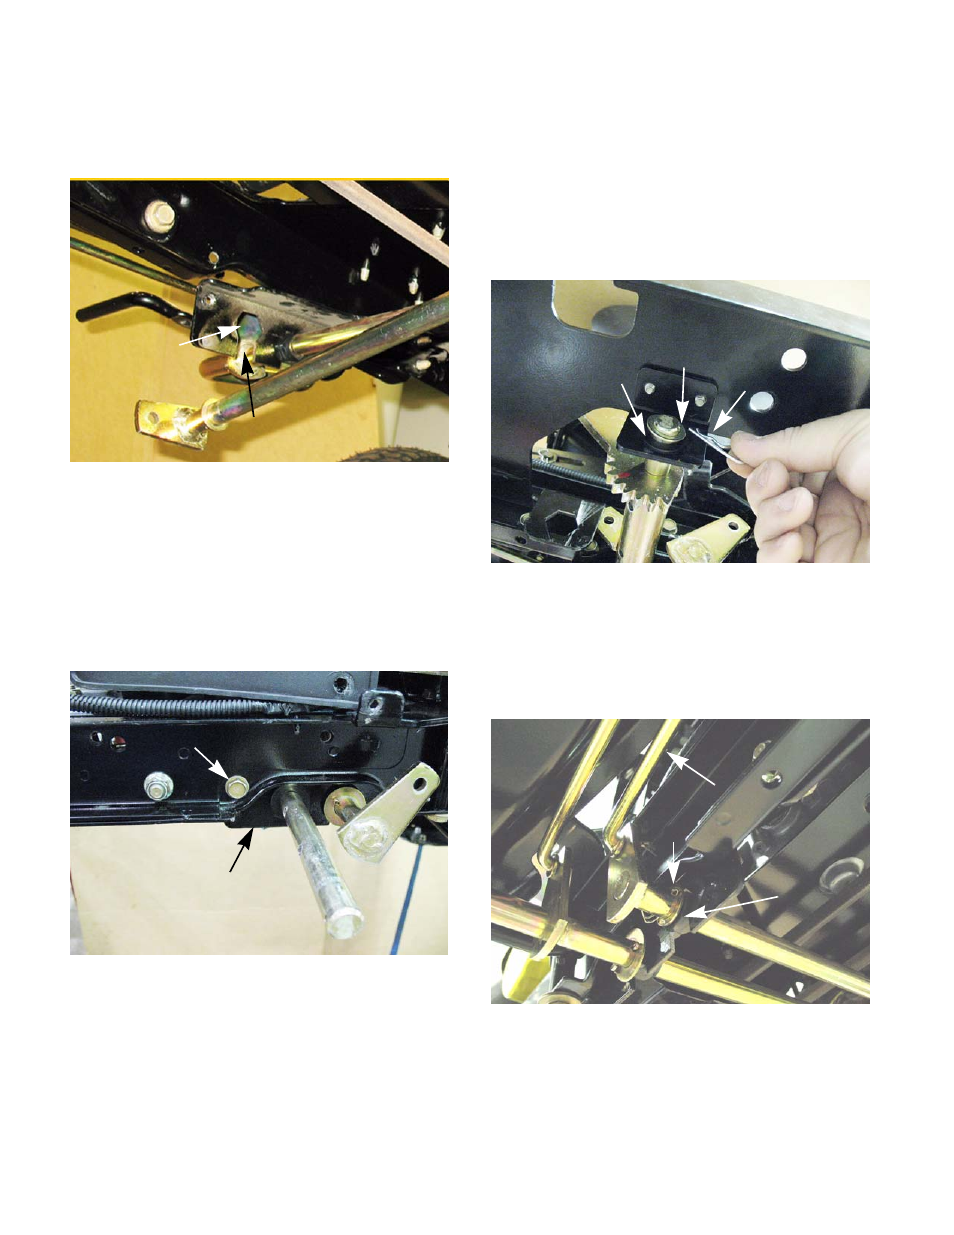
Install the split hex bushing on the left side of the
main shaft. See Figure 5B.60
13.
Install a new cotter pin. See Figure 5B.60
14.
Install both brake release rods from the main
drive pedal shaft using new cotter pins.
See Figure 5B.60
Figure 5B.57
Hole for
hex bushing
Slot
Figure 5B.58
Rear screw
Drive pedal shaft support
bracket
Figure 5B.59
Washer
Hair pin clip
Hex bushing
Figure 5B.60
Split hex bushing
Cotter pin
Left brake release rod