Tie rod – Cub Cadet ISeries User Manual
Page 111
STEERING-IVT
105
4.
Loosen the jam nuts.
5.
Remove the spherical rod ends.
NOTE: Count the number of turns to remove the
spherical rod ends.
6.
Install new spherical rod ends.
NOTE: Install the spherical rod ends the same
number of turn as it took to remove them from
the old drag link.
NOTE: Leave the jam nuts loose.
7.
Install the drag link on the tractor.
8.
Perform a wheel alignment by following the pro-
cedures described in the wheel alignment sec-
tion of this chapter.
9.
Test drive the tractor in a safe area before
returning it to service.
Tie rod
To remove/replace the tie rod:
1.
Remove the steering gear covers.
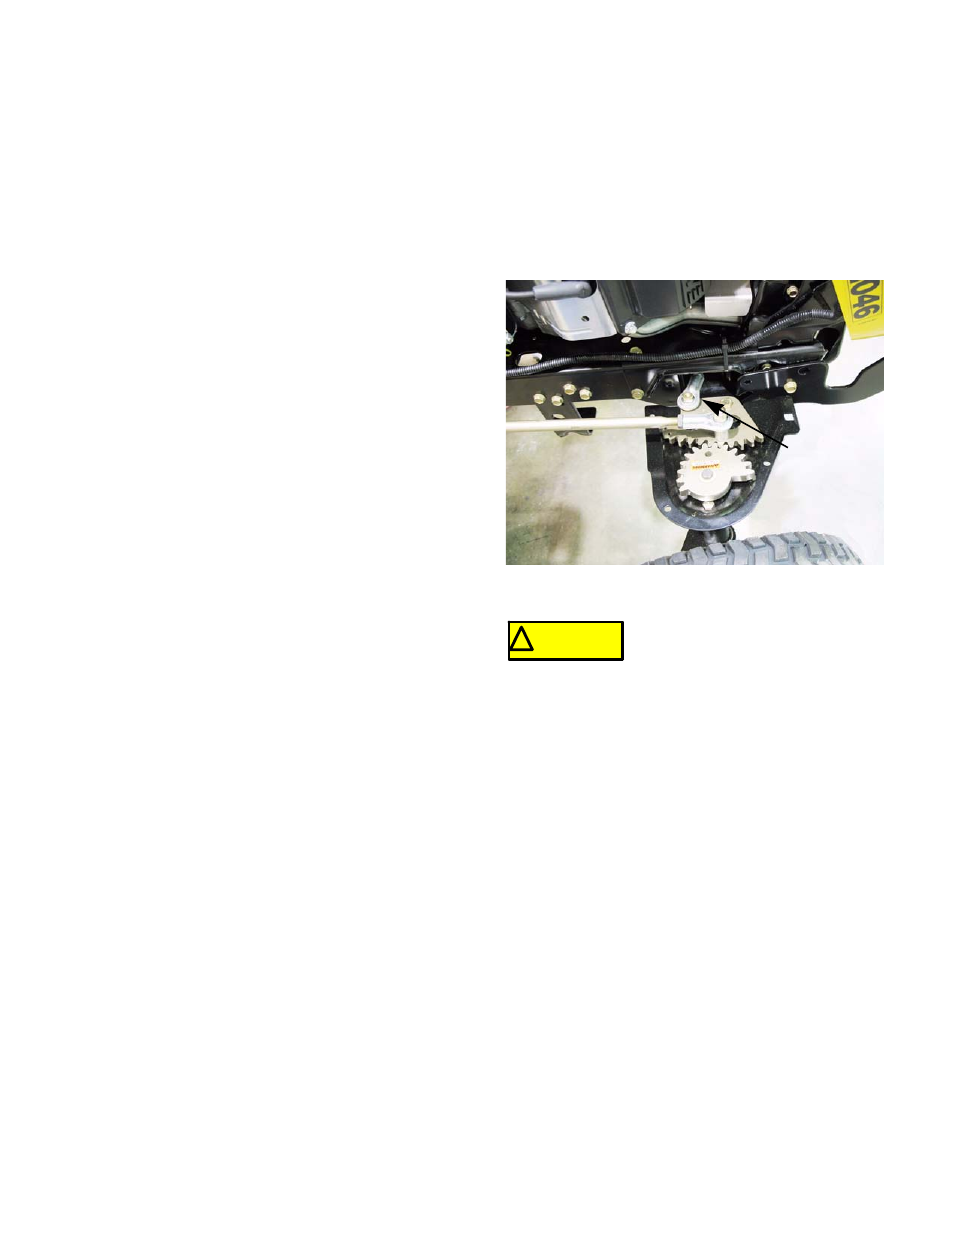
2.
Remove and discard the nut holding the tie rod
spherical rod ends to the inboard steering gear
using two 9/16” wrenches (one of them should
be a slim-line wrench). See Figure 6B.84.
3.
Repeat on the other side of the tractor.
4.
Slide the tie rod out of the tractor.
5.
Loosen the jam nuts.
6.
Remove the spherical rod ends.
NOTE: Count the number of turns to remove the
spherical rod ends.
7.
Install new spherical rod ends.
NOTE: Install the spherical rod ends the same
number of turn as it took to remove them from
the old tie rod.
8.
Install the tie rod on the tractor using new lock
nuts.
9.
Perform a wheel alignment by following the pro-
cedures described in the wheel alignment sec-
tion of this chapter.
10.
Test drive the tractor in a safe area before
returning it to service.
Figure 6B.84
tie rod
end
spherical rod
! CAUTION
! CAUTION
The nuts used on the drag links and
the tie rod are single use only. Do
not try to reuse them by applying a
thread locking compound. Use new nuts every time.