6 backup setting – AVer XR8032_RACK User Manual
Page 63
57
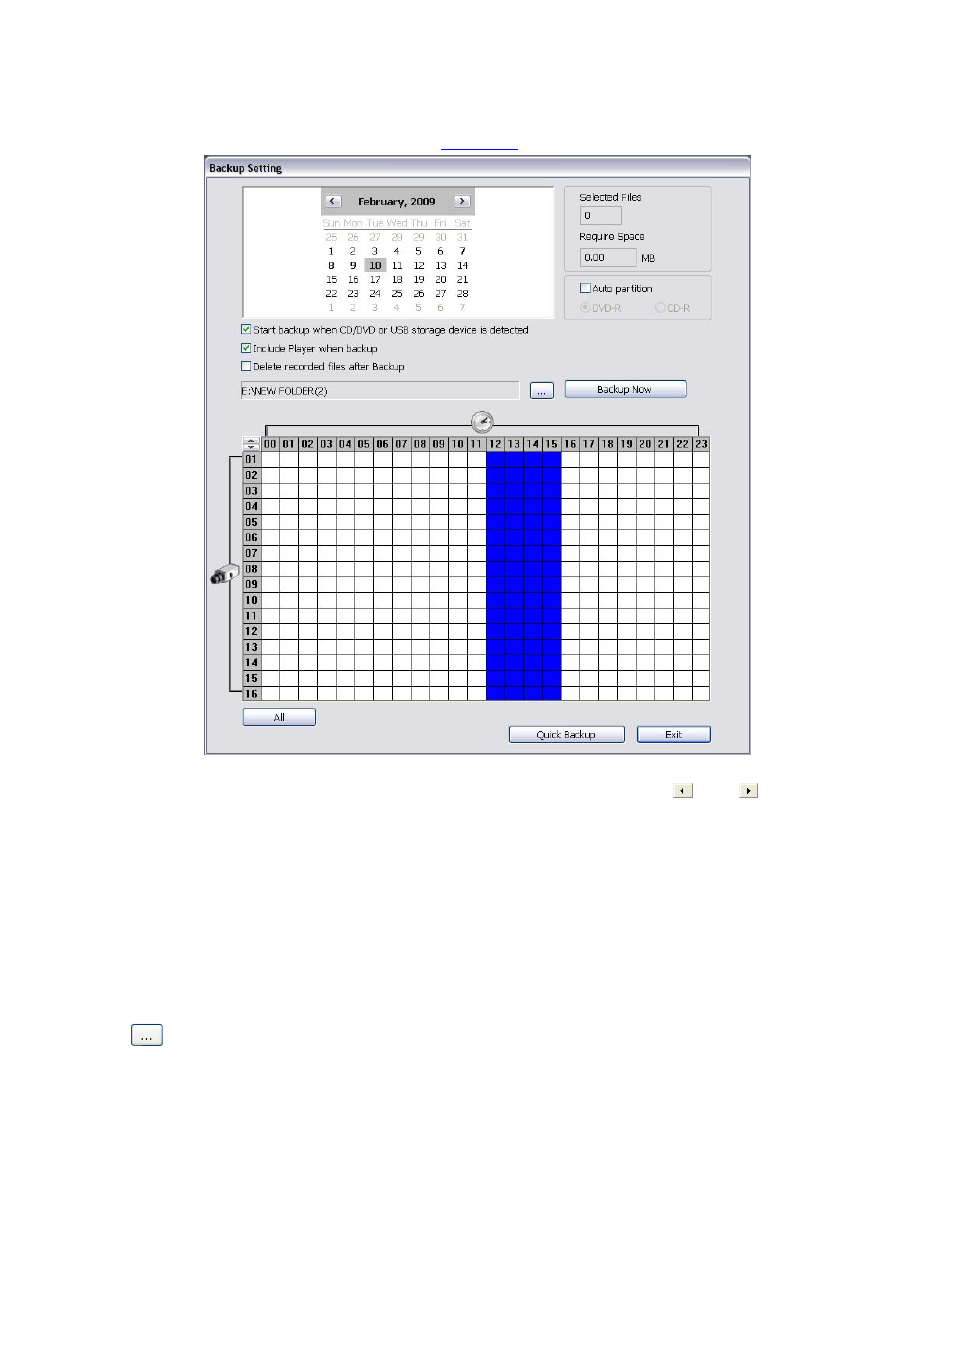
3.6 Backup
Setting
In the Backup Setting dialog box, the number from 00 to 23 represent the time in 24-hour clock. The numbers
from 01 to 16 represent the camera number. When you back up the file, you may find QLogViewer and Player
application included in the backup folder (see also
Chapter 4
).
To Backup file:
1. Select the date of the recorded file in the calendar you want to backup. Use
and buttons to shift the
calendar to the left or right.
2. In the table below, click on the blue block to select the recorded file. The blue block turns red when it is
selected. The block that appears in white doesn’t have data. If you want to set the specific time, right-click
on the selected block. Then, set the time to start and end.
3. Check the information beside the calendar.
–
Selected Files: Show the number of files selected.
–
Require Space: Show the total size of the selected file.
4. Enable
Auto partition and select to divide the file size into DVD-R or CD-R. DVR automatically backup
and divide the file sizes to facilitate burning into DVD or CD disc.
5. If you do NOT want to keep the recorded file in the storage folder, enable Delete files after Backup check
box.
6. Click to set the path on where to store the backup file.
7. Click
Backup Now to start archiving the selected file.
8.
In the Processing… dialog box, to stop archiving press Abort. When done, in the Backup Path list, shows
the archived item. To burn the file in CD, you need to have NERO 6 or above installed in your PC then
select the item in the list and click Burn. Click Exit to end this procedure and burn it later.