3 remote ibackup – AVer XR8032_RACK User Manual
Page 139
133
9.3 Remote
iBackup
Remote iBackup is purely for backing up the *.dvr file from the DVR sever. You can select between Auto Backup
and Manual Backup. Auto Backup continuously archives one hour of the recorded data at a time, starting from
the specified date. As for Manual Backup, it only archives the recorded data of selected date.
i
To back up the data, you must have at least 2G hard disk space.
To back up the recoded data from the DVR server:
1. Make sure you are connected to the internet.
2. Click Start >> Program >> DVR >> Web Tool >> Remote iBackup
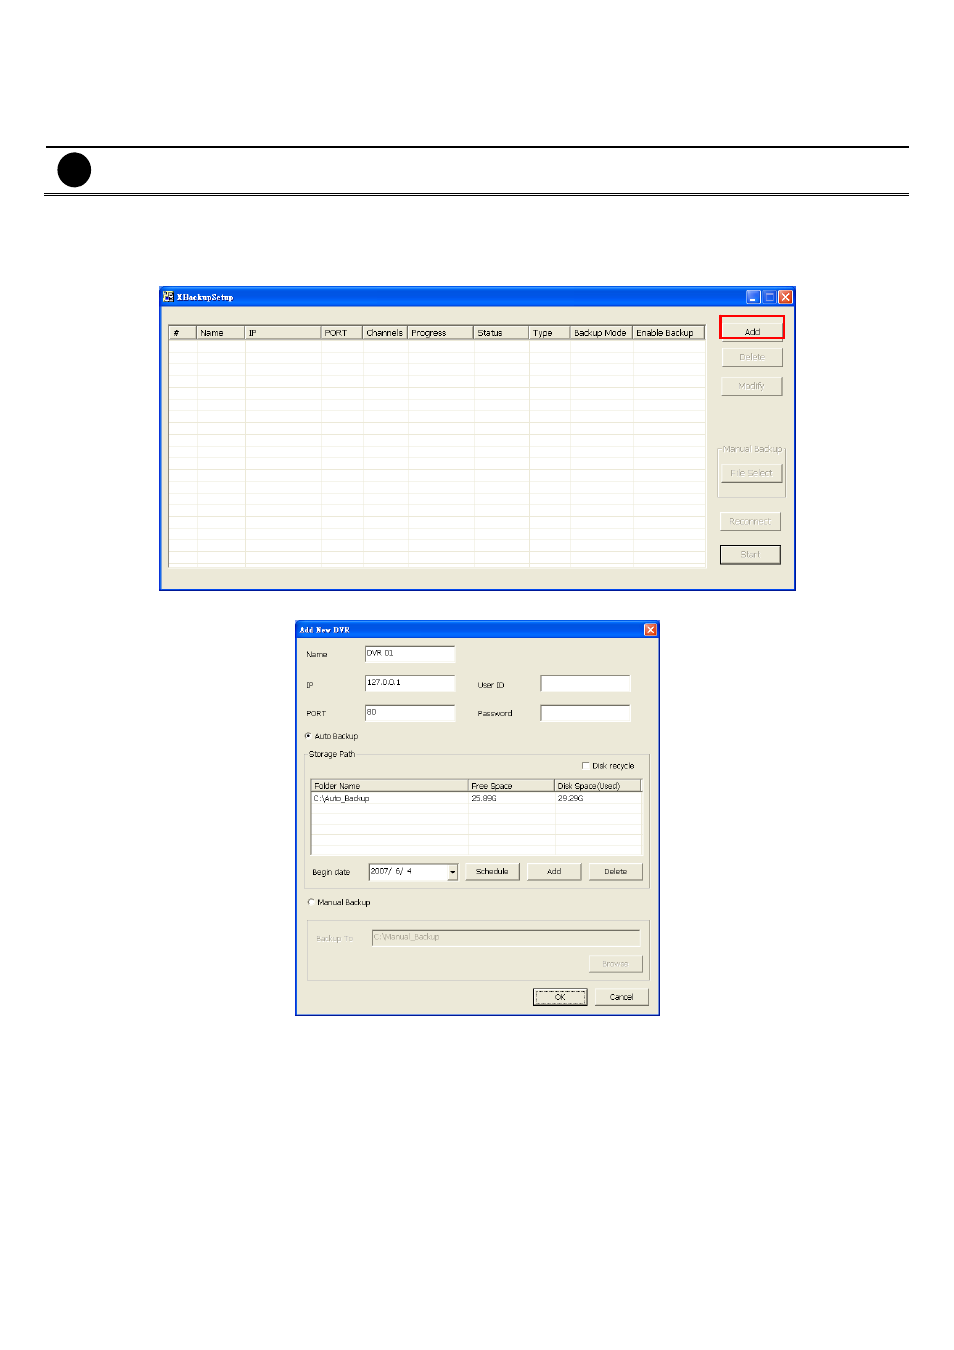
3. To add the DVR server, click Add
4. In the Add New DVR windows, enter the Name, IP, user ID, and password.
5. Select the Backup mode:
Auto Backup mode:
the backup will automatically execute when the setup is completed
- In Begin Date drop down calendar, select the date from where to start
- Click
Add
to set the storage path.
- Click
Delete
to remove the selected storage path.
- Click
Schedule
to select/unselect the time you want to backup. The red block turns white when it is
unselected.
- Enable/disable
Disk Recycle
check box, to automatically overwrite the oldest file when there is not
enough free space to backup the file.
Manual Backup mode:
the backup progress will start when user press the backup button
- Click
File Select
to choose the date, time and camera you want to back up.
- Click
Browse
to set the storage path.
6.
Click OK to complete the adding DVR server. The added DVR server will display in Remote Backup main